The Golden Rule…of Conservation

By Tessa Young and Jen Mikes

Conservators love gold! Not only can it be worked with ease through a variety of processes to make beautiful artwork and jewelry, but it also never tarnishes or corrodes…not in 50 years or 5000 years – NEVER! When Queen Puabi’s headdress (ca. 2450 BCE) was excavated in the 1920s by Sir Leonard Woolley, her golden adornments were gleaming just as brightly as ever. You can learn more about Queen Puabi and her amazing treatment history here, and in the new Middle East Galleries.

Left: In situ image of the headdress of Queen Puabi, excavated by Leonard Woolley in the 1920s. Right: Puabi’s headdress on display in the new Middle East Galleries.

In the past few weeks, the Conservation Lab has been shimmering with gold. Williams Project Conservator Alexis North is preparing for the upcoming Mexico and Central America Gallery, treating gold pendants and ornaments. As a material, gold has virtually no inherent vices: it will not deform or crack with changes in relative humidity or temperature, nor will it discolor with age or UV exposure… it’s as stable a material as a conservator could ask for!  According to the American Institute for Conservation’s Wiki gold entry, “Under normal conditions, [ ] gold is incredibly stable and is more often susceptible to damage from mechanical pressures (scratching, distortion, etc.) rather than corrosion and other chemical processes.” Since conservators spend considerable amounts of time preventing and treating corrosion of less stable metals, the chance to work with largely inert gold objects is very exciting.

https://www.penn.museum/collections/object/253831

Gold frog ornament, SA2902, with a mend on its back proper right foot. https://www.penn.museum/collections/object/253831

Despite it’s notorious stability, each gold object was carefully documented and assessed for condition issues, as with everything that comes through the conservation labs. For most gold objects, the only treatment necessary is a brief campaign of degreasing with ethanol on cotton swabs. For others with thin and pliable areas, such as the back right foot of the golden frog ornament pictured above, external forces exerted on the material may cause stress cracks, potentially culminating in a break. Where cracks are seen, mends with toned Japanese tissue may be applied, creating inconspicuous band-aid-like fixes. After these quick treatments, the objects can often be returned to storage by the end of the day.

However, not all that glitters is entirely gold. Because gold is such a soft and expensive material, many “gold” objects are composed primarily of a harder and less expensive metal with just a thin layer of gold at their surface. There are several processes used to achieve this look. A number of the gold objects in the upcoming Mexico and Central America Gallery, including the golden frog ornament above, were manufactured using the technique of depletion gilding. Additional methods of gilding may be used to adorn metal or wood surfaces such as water gilding, oil gilding, acrylic gilding, or mercury gilding.

Another method for achieving the look of gold while reducing the cost or fragility, is by creating alloys (mixtures) of gold and other metals; a common example is white gold, which is composed of gold and nickel, palladium, platinum, and manganese. The inclusion of other metals in a gold alloy alters the properties of the gold, and may increase the hardness of the final material. However, the presence of non-gold metals in an alloy will predispose the material to tarnishing and discoloration.

To learn more about gold in Central America, check out this piece from the Metropolitan Museum of Art.

Beaded Necklaces: Restringing to Secure the Past

By Tessa Young

Who doesn’t love a beaded necklace?  They’re sold commonly today, but did you know that they were popular in the Ancient Middle East? There are a number of fabulous pieces of beaded jewelry on display in the new Middle East Galleries, and several beaded items from our collection will be featured in the Museum’s Jewelry of Ur lecture and workshop scheduled for June 14th!

https://www.futurity.org/wp/wp-content/uploads/2014/06/beads_dirt_770.jpg

Excavation of a Bronze Age necklace from a burial in the UK (Credit: Suffolk County Council Archaeological Service Contracting Team and Persimmon Homes Ltd [Anglia]) (https://www.futurity.org/shells-necklace-bronze-age-718992/)

When beaded artifacts are unearthed during excavation, typically the floss, or string, which held the beads has disintegrated in the burial environment. To ensure that the beadwork does not lose its original design, archaeologists will document their findings both photographically and through written records, and sometimes, they will string the beads onto a new piece of floss. This floss was usually good enough to get the pieces back to the museum, but it is not up to our modern conservation standards!

B15918 before treatment, with a broken strand and hasty repair tying off the ends

Here at the Penn Museum, when beadwork is destined for loans, display, or requires handling for programming, the Conservation Department wants to be sure that these objects are secure. For the upcoming Jewelry of Ur program, fellow conservation technician Alyssa Rina and I were tasked with restringing several pieces of beaded jewelry, including B15918, pictured above. The floss on this piece was previously broken and then tied off in a quick repair. The plan for this conservation treatment was to restring the beads in a loop with a more durable floss.

Depending on the piece, we restring using two different weights of braided nylon floss, which has the strength necessary to hold the beads securely while also being capable of holding knots. Monofilament (fishing line) is another popular choice, but we have found that knots can come undone rather easily with this material.

Restringing beads in a padded box using a needle in the artifact lab

Penn Museum Conservators have developed several tactics to keep the beads in place during the restringing process. First, we always keep the beads contained within a padded box, preventing the beads from rolling away and getting lost. Second, as seen in the photograph, we typically use a small clamp to secure the floss to the edge of the box. This keeps everything from shifting and rolling around. Finally, we thread the floss onto a small needle to aid in the efficiency of stringing the beads. These beads had large and regular enough holes to use a standard sewing needle, but thin, flexible beading needles are also an option.

Conservators also want to be sure that the stringing will remain in place. The first bead on the string is tied into place with two half-hitches (more-or-less a fancy double knot), and then the rest of the beads are strung into place with the help of a thin, flexible needle. If the beadwork is supposed to be a loop, at the end of the strand, the floss is threaded back through the first bead, and again tied off with two half-hitches. If the beadwork is supposed to be linear, the terminal bead is tied off with two half-hitches, making sure that the beads are tight but comfortable on the strand. Once this is done, the beads are stable enough to be handled or put on display without any fear!

B15918 after re-stringing

A Columnar Matter Part III: The Conservation and Installation of a 3rd Millennium BCE Mosaic Column from Al ‘Ubaid

By Marci Jefcoat Burton

As a last installment of the mosaic column from Tell al-Ubaid in Iraq, we are pleased to announce the treatment and remounting of the 4,200(+) year-old shell, pink limestone, and black shale tesserae is complete (Figure 1)! After a number of years in collection storage, the recently conserved column is now in the Middle East Gallery, and ready for visitors when the exhibit opens this Saturday, April 21, 2018. The treatment process was a dynamic collaborative project, involving a team of seven conservators to clean, repair and re-mount hundreds of triangular and diamond shaped tesserae over the span of 18 months.

Figure 1: The previous column support (left), with all tesserae deconstructed from each section. Only mounting materials, such as plaster ground and reconstructions, remain on the supports. (Right) The newly mounted tesserae on Ethafoam column supports.

The tesserae were originally mounted at the archaeological site in 1919 – 1924 on four hollow cylindrical sections made of wire mesh and burlap. The tesserae were imbedded in a thick layer of plaster, and the resulting weight on a somewhat flexible base eventually became a structural problem. In addition, each column section had a large area of plaster reconstruction to continue the mosaic design around the column. For a memory refresher of the previous condition and treatment protocol, visit our blog posts, column blog 1 and column blog 2.

After months of cleaning every tessera and adhering many fragments back together, the tesserae were mounted onto a new support made from solid Ethafoam, a chemically stable and dense foam (Figure 2). Each new column section support was reconstructed to the same measurements as the wire mesh and burlap supports. The previous use of plaster proved too rigid and heavy in the original mounting system, causing many cracks to develop in the plaster and tesserae to loosen over time. For these reasons, plaster was not used again, and the tesserae were mounted to the Ethafoam supports with an acrylic paste (Paraloid® B-72 (ethyl methacrylate (70%) and methyl acrylate (30%) copolymer) in acetone bulked with glass microspheres) toned black with dry pigments. This is lighter in weight compared to plaster, and compatible with the shell and stone materials. The black acrylic paste was made to resemble bitumen, a pine resin material used by the Mesopotamians to originally mount the tesserae to the c. 3rd Millennium BCE column.

Figure 2: Mounting process of column section #2. The cleaned and repaired tesserae are mounted to the Ethafoam cylindrical supports with Paraloid® B-72 (ethyl methacrylate (70%) and methyl acrylate (30%) copolymer) in acetone bulked with glass microspheres and toned black with dry pigments to mimic bitumen. Spatulas were used to spread the acrylic resin on the support and tesserae were imbedded into the mixture.

All four column sections stack and connect with an internal wooden dowel system. To accommodate the large areas that were once plaster restorations, our Photo Studio printed high resolution, archival images of the tesserae, which were custom scaled and fit to each column section (Figure 3). The digital photo fills integrate a complete mosaic design to give the appearance of a fully mosaicked column (Figure 4). This is a great example of how recent technological advancements help conservators with approaches to treatment and display options.

Figure 3: (From left), Conservation Interns Tessa Young, Alyssa Rina and Jennifer Mikes installing digital photo fills to the top and bottom mosaic column sections.

Figure 4: (a): Column section #2, after remounting tesserae. The locations with previous plaster reconstructions are padded with Volara (closed-cell polyethylene foam). (b): Column section #2 after pinning archival photo fill into place over the Volara.

The mosaic column, and over 1,500 objects await your visit in the Middle East Galleries (Figure 5)! To our visitors in the Artifact Lab who witnessed our many, many hours of treating these column sections, we thank you for your brilliant questions, comments and curiosity about the tesserae and our conservation process during our Open Window Sessions. You will find the assembled column has transformed into an impressive and complete piece, and we hope you enjoy it as much as we do!

Figure 5: Bob Thurlow (Special Projects Manager) and Marci Jefcoat Burton (Conservation Curriculum Intern) installing the four mosaic column sections in the Middle Eastern Gallery.

Ancient faces in the Middle East Galleries

Our new Middle East Galleries open next week and they will feature over 1200 artifacts from our collection, including many iconic objects like the Ram in the Thicket, the Bull-headed lyre, and Queen Puabi’s headdress. Oh, and for those of you who are always asking about our cuneiform tablets, do we have a treat in store for you – there are dozens and dozens in the galleries. The majority of the objects in the exhibition were excavated by Penn archaeologists, many nearly a century ago.

ALL of these objects came through our Conservation Labs to prepare them for the galleries and many needed significant treatment in order to ensure their stability for long-term display. Our Middle East Galleries (MEG) team has worked diligently and tirelessly on this project – you can read more about some aspects of this work on the Penn Museum blog here.

The triumphant column team poses next to the 4 recently conserved mosaic column drums from Tell al-‘Ubaid, Iraq. This project took months to complete.

In just over a week, visitors to the Museum will have the opportunity to get up close and personal with these newly-conserved objects. Everyone will be drawn to the highlight pieces mentioned above and here, but the other pieces are worth lingering over too. It’s usually impossible to see them as closely as we do during the conservation treatment process, so I thought I’d give you the opportunity to see 2 small but beautiful objects closer than you can in the galleries.

B8997 (left) and B9026 (right)

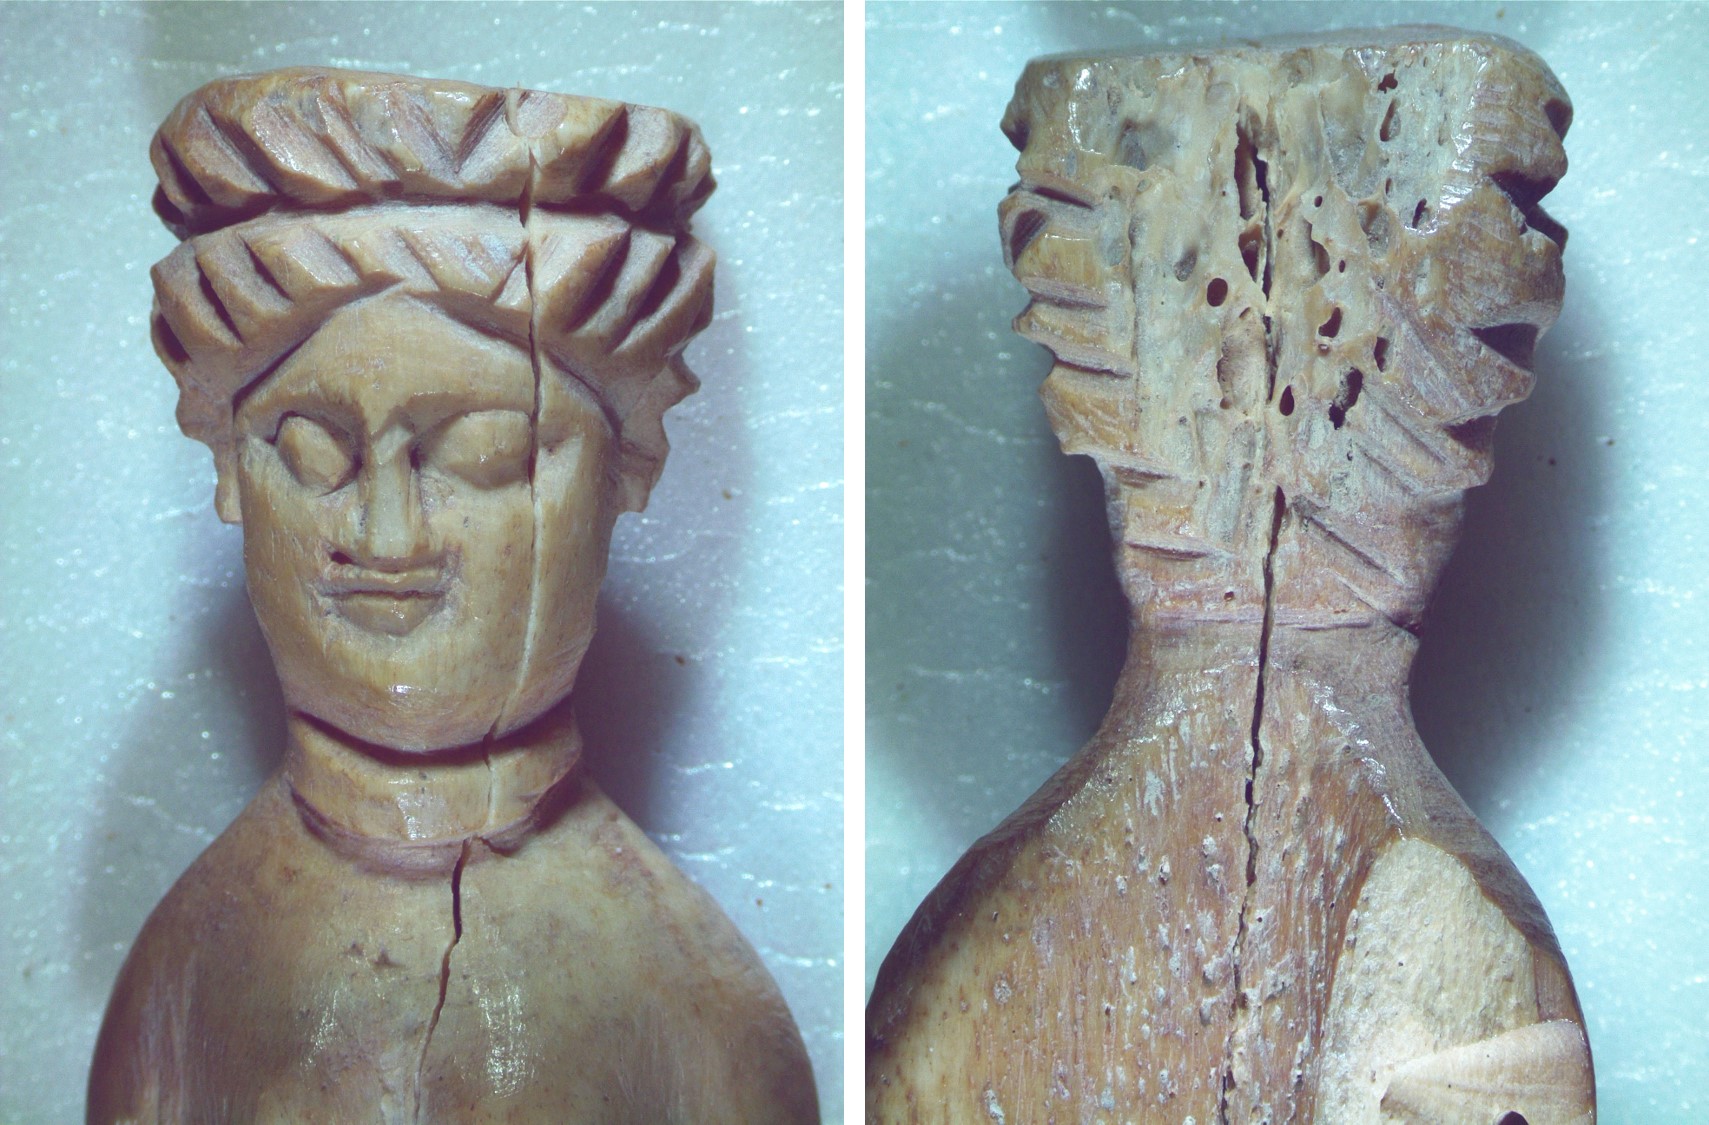
These 2 female figures, both excavated from Nippur, Iraq, will be on display in the same case in the Middle East Galleries. They’re small, just several inches long. The figure on the left was likely a doll which would have had articulated arms; you can see the holes where they were once attached. Fortunately, both artifacts required very little treatment. B8997, the figure on the left, does have a large, but stable crack that did not require any treatment. Examination under the binocular microscope revealed small amounts of burial dirt on both figures which had escaped previous cleaning campaigns, so both were carefully surface cleaned to remove this soil.

Detail of B9026 before (left) and after (right) cleaning, 7.5X magnification

As I worked on these figures, I captured some images with the camera attachment on our Leica microscope. Both objects are made of bone and are delicately carved. The reverse side of the doll’s head has an unworked area that nicely shows the cancellous (or spongy) bone features.

B8997 detail of front (left) and reverse (right), 7.5X magnification

Their time in the lab was brief – they only stayed for a day or 2. But in the midst of the hustle and bustle of preparing for these galleries, it’s nice to take a moment to appreciate the details.

The Middle East Galleries open to the public on Saturday, April 21. Our department has a few loose ends to wrap up with that project (and a few loose ends on the blog – stay tuned for a last blogpost on the mosaic column treatment) but we’re already turning to our next big tasks – the renovation of our Mexico & Central America Galleries, Africa Galleries, and Egyptian Galleries.

Transformation Tidbits on a Tuesday

By: Anna O’Neill, Jonathan Stevens, and Céline Wachsmuth

It’s Tuesday! And time for another transformation post. As the Kaipure team is wrapping up our work, we have been reflecting upon how different everything has become from when we first started the project in June 2017, almost a year ago. We have seen many transformations, both big and small. Here are some snapshots of transformations we’ve seen throughout the project:

First thing’s first, we have our simple, but satisfying, surface cleaning transformation. Jonathan shares one of his blocks in the middle of cleaning:

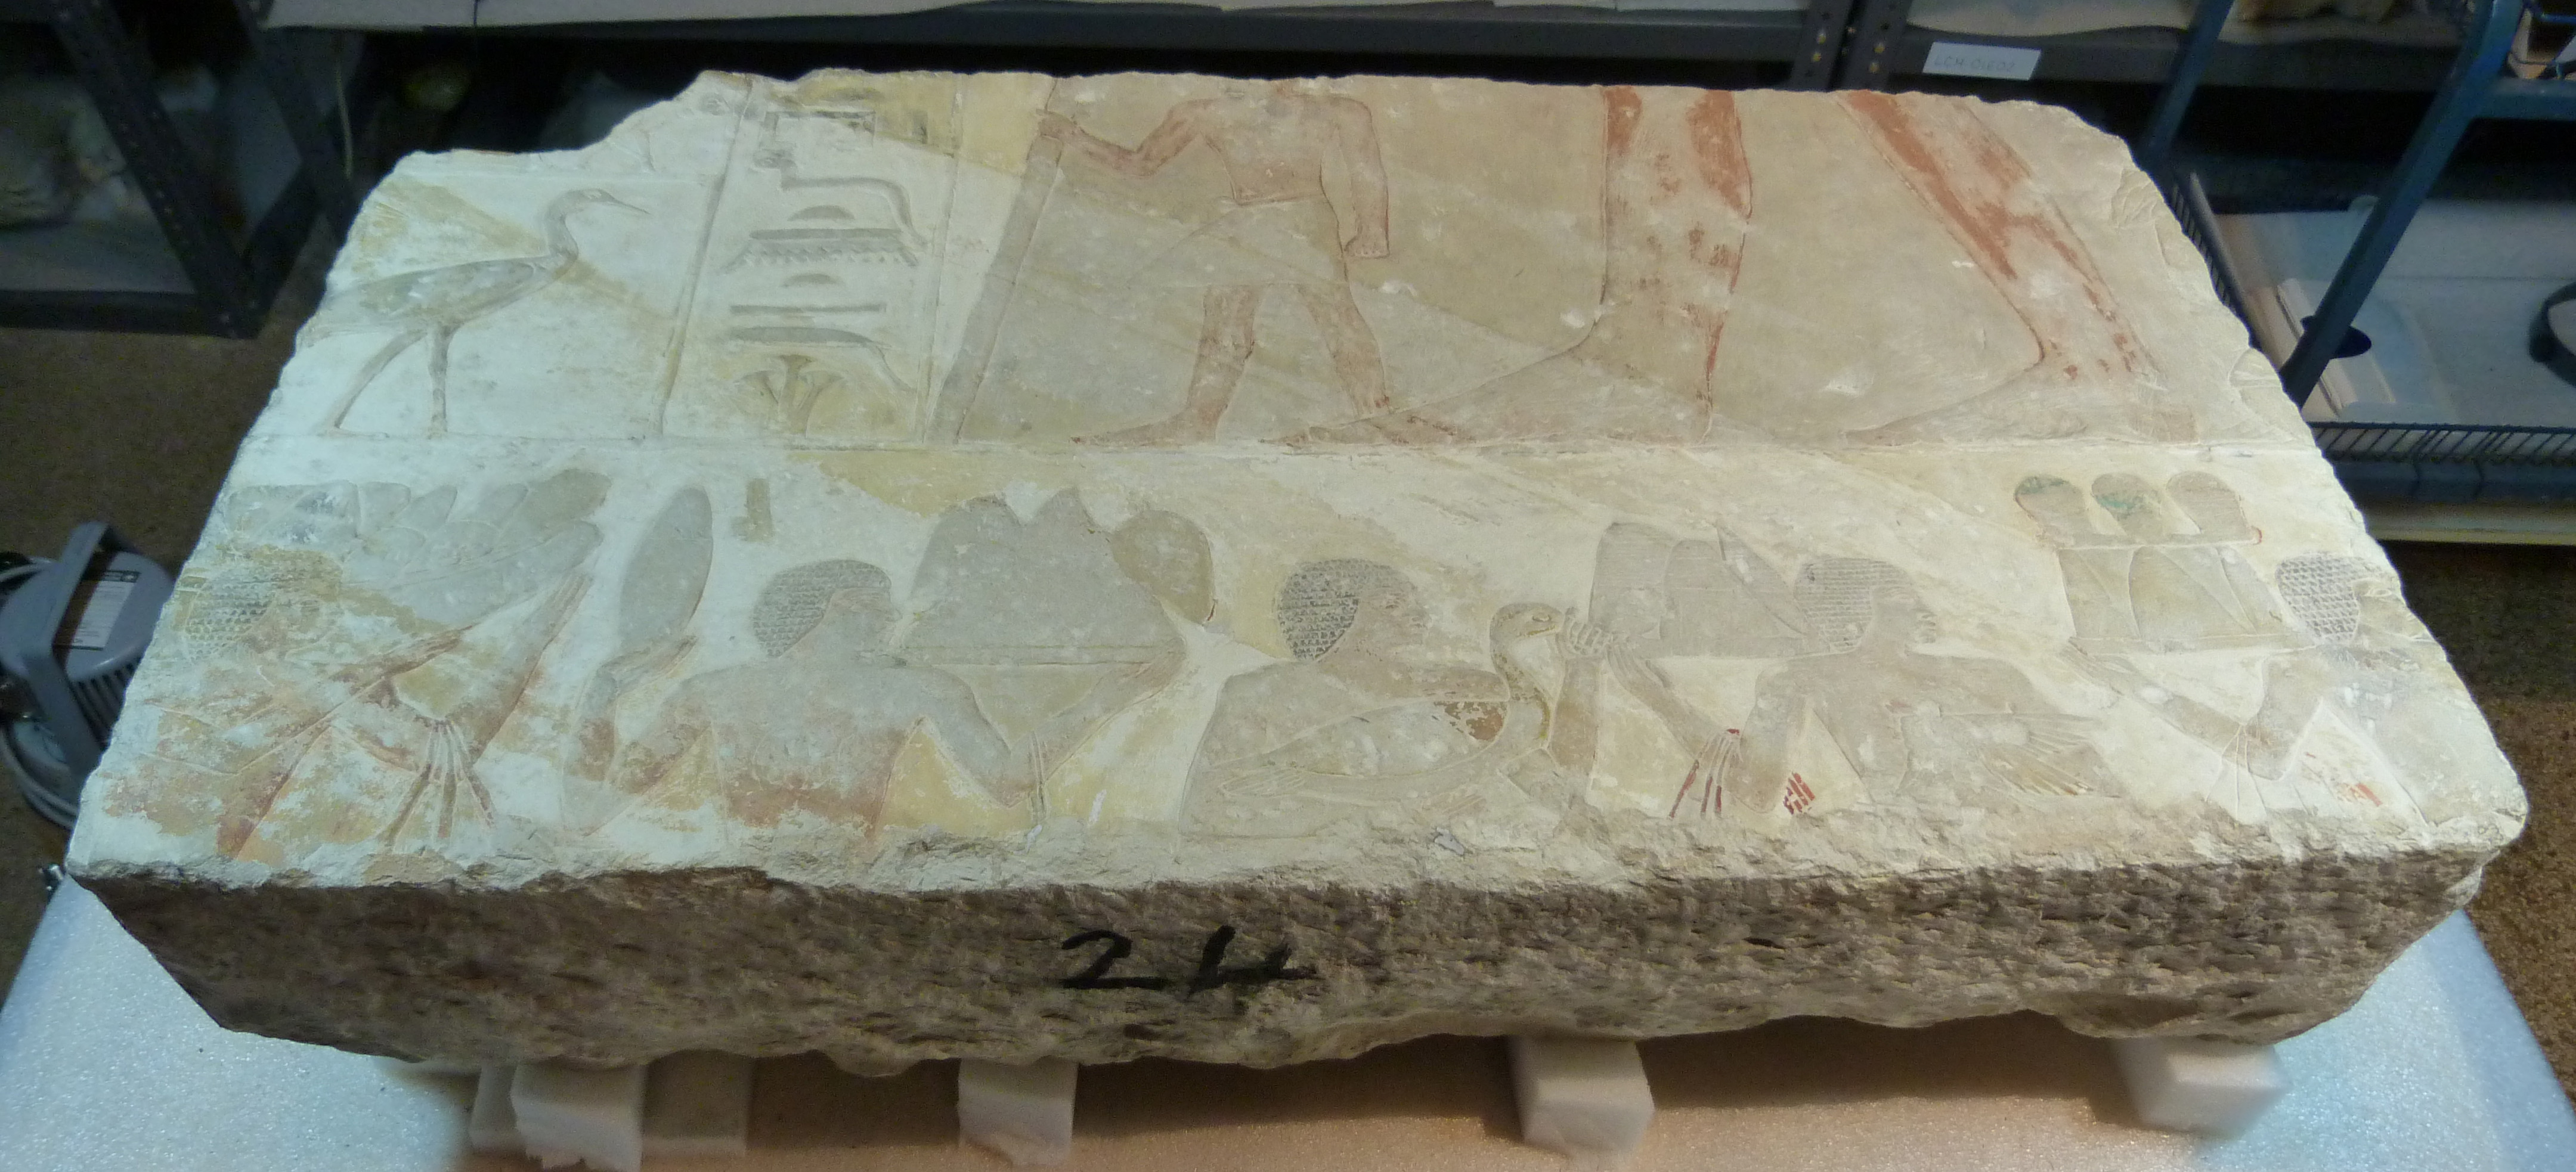
Photo by Jonathan Stevens Cleaning in progress. Most of the background of this limestone block has been dry-cleaned using white rubber erasers, vulcanized latex sponges and cosmetic sponges. The brighter areas are clean and any area that looks gray has not been cleaned yet.

Cleaning is fun, especially when the results are so nice and neat!

Anna had the chance to rejoin two block fragments, something that we haven’t been able to do much of because of the size and weight of most of the blocks, even though some are broken and we know how they fit together.

Photos by Anna O’Neill For this piece, both the main block and missing fragment were cleaned and the break edges consolidated with 2% w/v Paraloid B-72. Then the fragment was adhered with 40% w/v Paraloid B-72 and held in place with straps overnight until the join had set. The cracks were filled with a white Paraloid B-72/glass microballoon mixture, which provides support to areas of loss and helps to protect the fragile edges along the break. The fill was then painted with Golden acrylic paints to integrate it with the rest of the piece.

One of the last blocks Céline had the chance to work on also had one of the most fragile surfaces of any of the blocks. It was a lengthy, but incredible treatment. Both images below show the process of stabilizing the block’s surface. After cleaning, loose and lifting fragments were secured by injecting a 30% solution of Paraloid B-72 in acetone beneath the flakes. The unprotected edges of the flakes were supported and protected with a mixture of Paraloid B-72 and glass microballoons, applied by injection with a syringe, and then in-painted with acrylics to match the surface.

Photos by Céline Wachsmuth Detail of before, during, and post treatment of a section of the block. There was significant lifting and destabilization over much of the block’s surface.

Photos by Céline Wachsmuth Detail of before, during, and post treatment of a section of the block. This section was floating on the surface, meaning it was no longer attached.

Stay tuned for a final post about the finishing touches on the Kaipure Tomb Chapel project.

The Kaipure Conservation Project is funded through a generous grant from the American Research Center in Egypt (ARCE) Antiquities Endowment Fund (AEF) which was established though a grant from the United States Agency for International Development (USAID).

Many new faces in the lab…

by Williams Project Conservator Alexis North

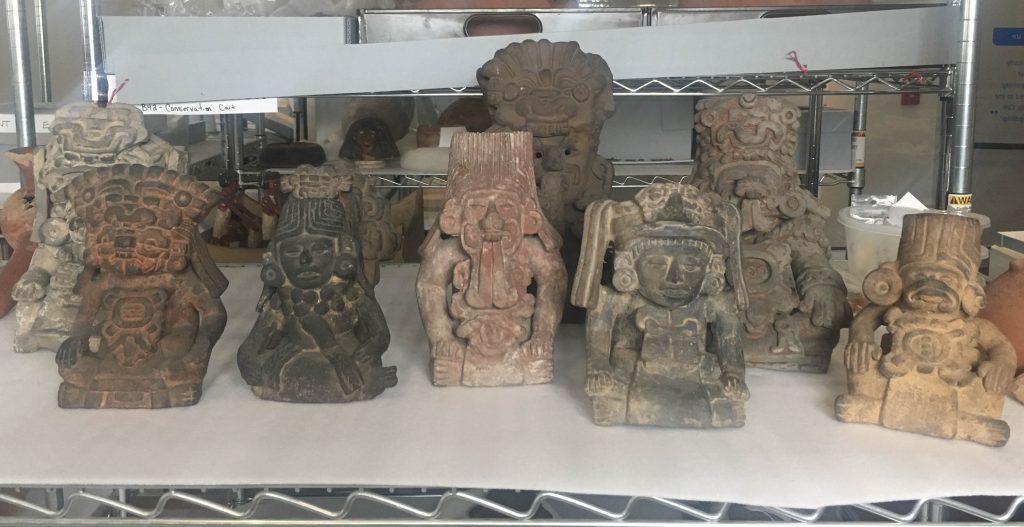
Yesterday, I was able to make several new friends, when the American section brought these objects up to the lab, in preparation for the reinstallation of our Mexico and Central America gallery:

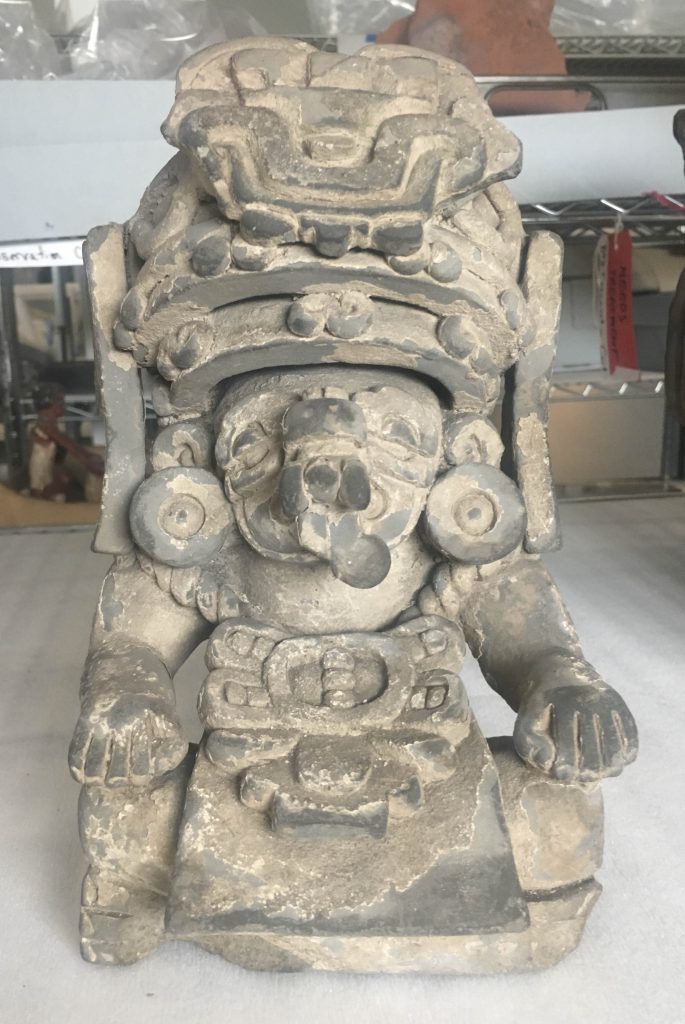
 These are a group of Zapotec ceramic effigy vessels from Mexico. These types of vessels are usually found in tombs, and their meaning depends on where and how they were buried. They are often found in groups, and with other associated burial materials.

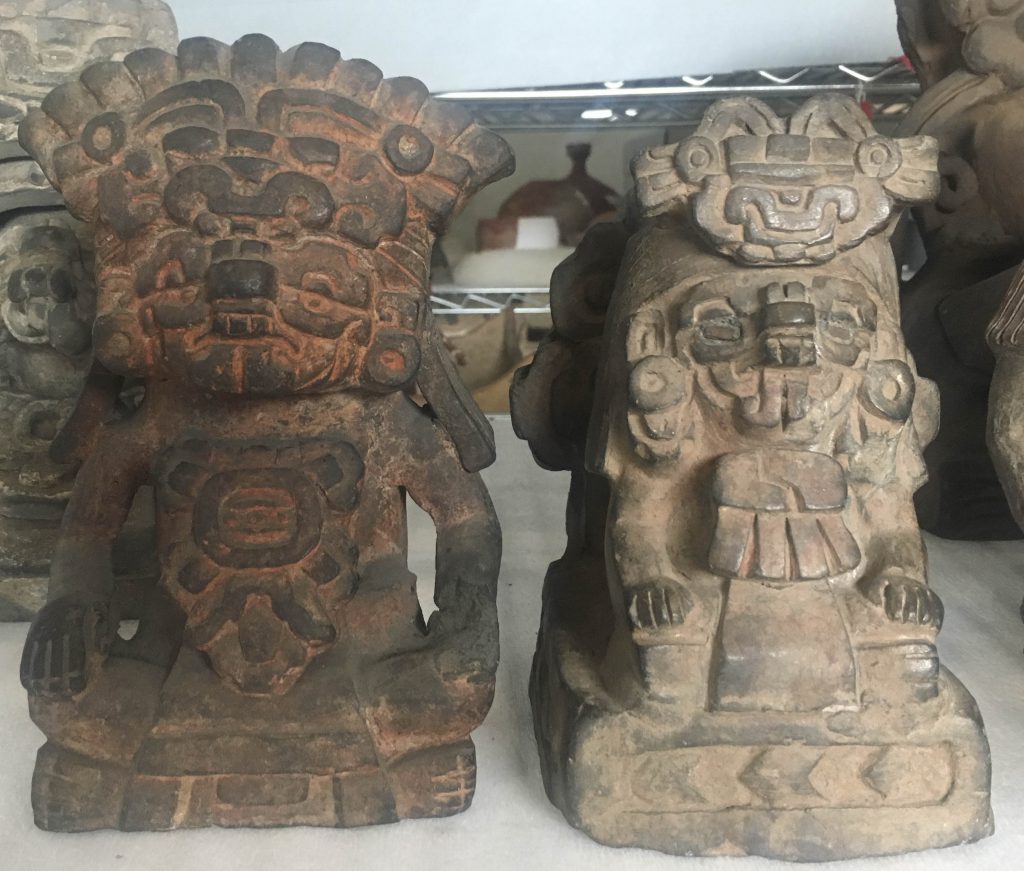
Each of these effigy vessels is elaborately and uniquely decorated. Some have human faces, some are wearing masks, and some even have animal features.

These two vessels (NA6361; 29-41-707) depict humans wearing masks.

Most of these vessels are in good condition, intact or with only small losses. At least two, however, will need a little more conservation to get them ready to display. This vessel was originally covered with a white stucco coating:

Vessel 29-41-702, depicting a masked seated figure.

The stucco is now starting to lift from the surface, and any handling can cause small pieces of the stucco to fall off. It will need to be carefully stabilized before the vessel can go on display.

Detail of the headdress of 29-41-702. The red arrows show areas where the stucco is lifting off the surface of the ceramic.

And this vessel shown below has some loose fragments which will need to be rejoined. Thankfully the amazing duck bill on his face is still intact!

Before treatment photo of 31-26-1.

For (a lot) more information and other examples of these types of vessels, check out the Foundation for the Advancement of Mesoamerican Studies, Inc., and their database on Zapotec effigy vessels.

A typical Tuesday in Kaipure

Anna O’Neill, Assistant Project Conservator

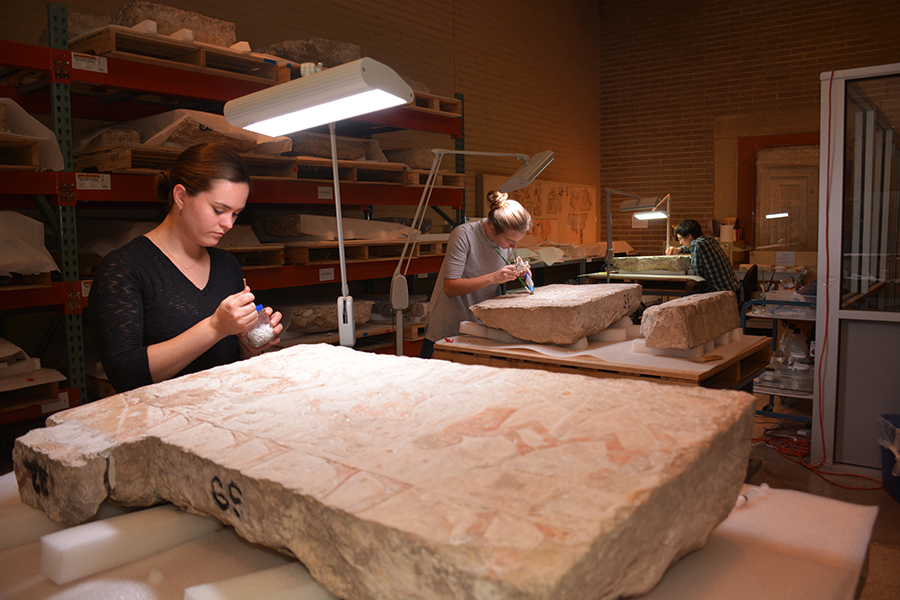
The Kaipure lab space in the Lower Egypt (Sphinx) Gallery lets visitors observe as conservators work on a tomb chapel wall, but we don’t often have the opportunity to explain what’s going on. So, here’s a glimpse into what we might be doing on any given day.

9:00 am: We arrive in the conservation hallway, drop off our bags and grab a quick cup of tea to warm up before our weekly department meeting.

9:15 am: Department meeting! It’s getting a bit crowded in here with so many conservators working on lots of different projects. We give our updates – “Still working on Kaipure” – and listen to everyone report their progress. Since we spend most of our time working in the Lower Egyptian Gallery, it’s fun to hear all about all the various objects being treated.

10:00 am: Céline finished up the block she was working on yesterday, so our first order of business is to put her completed block back on the red shelves along the back wall and pull out a new pallet for her to work on.

Jonathan brings Big Joe into the lab.

10:15 am: We’ve completely rearranged the lab, clearing space in the middle and in front of the shelves so that we can bring in Big Joe, our forklift (no, really – his name is written on the side). Most of the time, people tend to think of conservation as a very delicate task, but we’ve had to become experts in heavy machinery, too.

Carefully maneuvering Big Joe to pick up a pallet with a completed block.

10:30 am: We use Big Joe to move Céline’s completed block to a shelf, measuring to make sure that it fits, and then raise the tines all the way up to the top shelf. It’s the first time we’ve had to reach this high, so we’ve brought in Bob Thurlow, Special Projects Manager and resident forklift expert, to supervise while we bring down a new pallet. Fortunately, everything goes smoothly and we land the pallet on a wheeled table made specifically to hold the heavy weight of the blocks.

Left, Céline pulls a block from the top shelf – it’s eight feet off the ground, but feels much higher! Right, Making sure the pallet is centered on the rolling table.

10:45 am: It’s time to play Jenga with our workspace again as we put Big Joe back in storage and get our tables back in working position.

11:00 am: Céline begins documenting her new block, which means getting to know every inch of the object. She begins photography and condition mapping, while Jonathan and I get back to work on the pieces we already had out.

12:30 pm: Lunch time!

1:30 pm: We’re back in the lab, each working on our blocks. Céline has finished documenting her new block, so she gets started on the first phase of cleaning – dusting with a soft brush and gentle vacuum.

Jonathan is busy with solvent cleaning, painstakingly rolling tiny cotton swabs saturated with acetone or ethanol over the surface to remove soiling, staining, and other substances that may have accumulated over the nearly 100 years the wall was on display.

Everybody busy at work in the Kaipure lab.

I’ve done all the cleaning I can on my block and now I’ve moved on to stabilizing loose and lifted flakes of paint and stone. This is done by a process we call “edging”, using a syringe to apply a mixture of Paraloid B72 bulked with glass microballoons and fumed silica to fragile areas, then gently shaping it with a solvent-soaked swab so they fill any gaps between flakes and the stone surface. These tiny fills serve multiple purposes: they fill empty spaces so they won’t collapse under pressure; they protect the edges so the flakes won’t be popped off if touched; and they provide light adhesion between the flake and the stone. Once inpainted, the B72/microballoon mixture blends right into the stone, but we feel much better knowing that the surface is more stable.

5:00 pm: The guards are making their rounds in the gallery to make sure all the visitors have left for the day. That means it’s time for us to close up the Kaipure lab for the evening and head home.

All photos by Lucia Scanlan

The Kaipure Conservation Project is funded through a generous grant from the American Research Center in Egypt (ARCE) Antiquities Endowment Fund (AEF) which was established though a grant from the United States Agency for International Development (USAID).

A glimpse of upcoming changes

There are a few new objects on display in the Artifact Lab this week, which give visitors a glimpse of upcoming changes in the museum.

Newly-installed case with objects slated for the renewed Mexico & Central American Gallery

These 4 pieces were recently conserved in the Artifact Lab to prepare them for installation in our forthcoming Mexico & Central America Gallery (from left to right: a stone metate from Costa Rica 11819, two burnished ceramic jars from Mexico 31-41-34 & 87-42-1132, and a ceramic tripod vessel from Costa Rica 2013-11-1) .

You can see many other objects that will be going into that gallery, both on display in our current Mexico and Central America Gallery as well as being worked on in the Artifact Lab.

Artifacts currently being treated in the Artifact lab.

Visit our Building Transformation website to learn more about this gallery, which will look something like this:

#Transformation Tuesday: Getting our Ducks in a Row

The transforming treatment of the Al’Ubaid frieze of three birds (B15883) from the new Middle East Galleries in now complete! (To be more correct, they are probably doves not ducks.) More information about the frieze can be found here. Click here for more information on the exciting new galleries, opening this April!

The frieze before treatment

The frieze after treatment

Originally, the three stone birds (initially called ducks but now identified as doves) would have been surrounded by black shale tesserae and the borders would have been copper alloy sheets. The frieze would have originally looked much like the marching bulls frieze. Unfortunately, neither the shale pieces nor the copper alloy borders made it. The birds had been embedded in a plaster background carved to look like the shale tesserae, and the borders were made from modern machined copper alloy sheets.

The old support system had to be removed due to some condition issues and to prepare the frieze for long-term exhibition. Once taken off, the grimy birds could then be laser-cleaned. The blog post about laser-cleaning them can be found here.

Applying the bulked Paraloid B-72 to the Ethafoam© support

Although the only ‘real’ parts were the stone birds, the curator wanted the entire frieze to be reconstructed to help visitors put the birds in context. It will be displayed next to the marching bull frieze.

After cleaning, the birds were adhered onto a piece of dense archival foam. The black tesserae background was created with Paraloid B-72 (ethyl methacrylate and methyl acrylate copolymer) bulked with glass microballoons and toned with dry pigments. Bulked Paraloid B-72 is stable, reversible, and easily manipulated with either solvent or heat. The shallow lines to make it appear there are tesserae were put in with a heated spatula. The copper alloy borders were also created with Ethafoam© coated in bulked Paraloid B-72 tinted in various shades of green to mimic copper corrosion. The fills in the ducks were inpainted with acrylics to integrate them better.

After all that, the ducks look much happier!

The frieze after treatment and ready for display

Continue reading

#Transformation Tuesday: New Year’s Edition

By: Céline Wachsmuth

It’s Tuesday and that means it’s time for another transformation story. This one comes from an object going into the Middle East Galleries (click here for more information on the exciting new galleries, opening this April!).

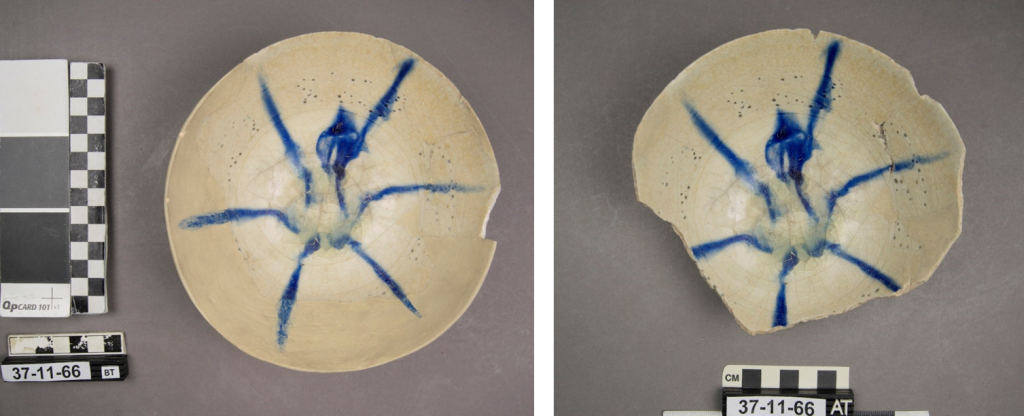
It’s hard to believe the first month of January is almost over! Many people make resolutions for the New Year, hoping to make an improvement, big or small (myself included, I have a Google doc with a list of resolutions). Most resolutions are easier said than done, including the prevalent resolution to shave a few pounds. This bowl had similar thoughts, but made losing some weight look like a piece of cake!

Bowl before treatment (left) and after treatment (right)

This bowl had been repaired in the past, but the joins needed to be taken down because the old adhesive was failing. The bowl was pretty clean when it came into the lab so it wasn’t long before I began solvent testing the adhesive in order to make a vapor chamber. The adhesive was soluble in acetone and most of the sherds separated with gentle prodding after eight days in a vapor chamber. The old fills (made of plaster), however, did not budge. This was probably due to the likelihood that they had been cast in place.

Outlines of Old Fills
Fill outlined in dark blue was dremeled out
Fills outlined in light blue were softened with deionized water and then removed

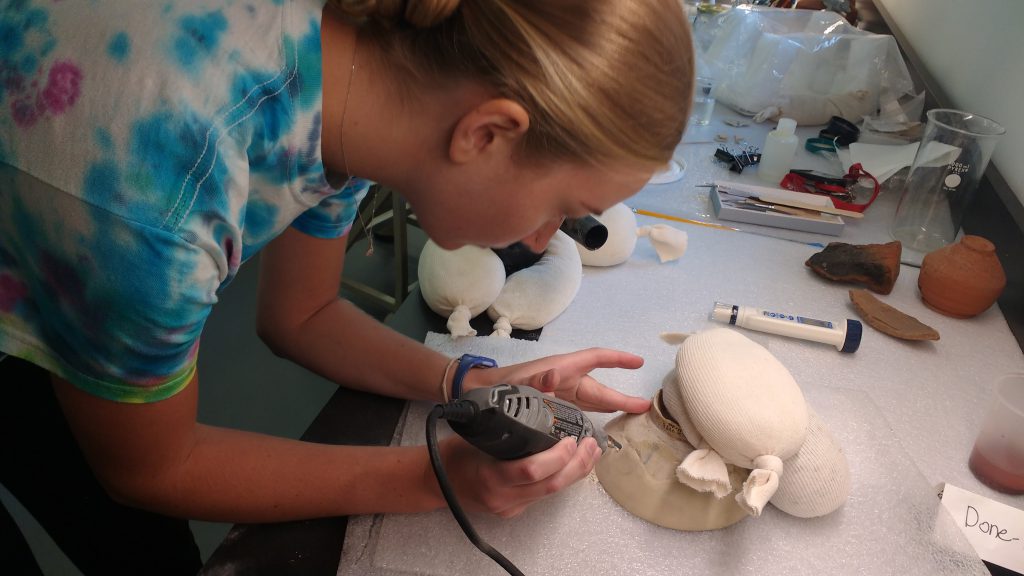
These ounces had to go! When a fill resists detachment by solvent, other, usually mechanical, methods have to be implemented. One mechanical treatment is to use a dremel, just like the one you might use at home for some smaller detailed work, to carve away the fill. This is tricky because the dremel can put the object at risk if used improperly. Once I was all set up and had been shown the proper technique, I slowly moved around the entire area of the fill.

using the dremel to remove the fill

two of the sherds sitting in a bed of glass beads while the adhesive sets

Once the large fill was removed and those ounces had been shed, it was time for some TLC. I cleaned the break edges on each sherd with acetone (for the sherds previously joined with adhesive) or deionized water (for the sherds adjacent to the old fills). All the break edges were then coated with a dilute solution of Paraloid B-72 (ethyl methacrylate methyl acrylate copolymer) and the sherds were put back together with a 50% solution of Paraloid B-72 in 1:1 acetone:ethanol. Two small areas of the bowl had some gaps that needed to be filled; one for added structural stability and one to help complete the shape. This was done using a mixture of 3M microballoons, Paraloid B-72 in 1:1 acetone:ethanol, acetone, and some dry pigment to approximately color match the fill to the bowl. The fills needed some additional color to help blend in more and they were painted with light washes of acrylics.

This bowl made losing a couple ounces look easy even though we all know how much work really has to go in to something transformative! Thankfully, it’s only the beginning of the year and there is plenty of time to make your own transformations. Just like there’s plenty of time for another transformation to happen in the labs before our next Transformation Tuesday post – stay tuned!

PS – If you’re looking for some “ancient workout tips” check out these fun suggestions