What’s all that 3D data for?

By Tessa de Alarcon

We’ve had a few posts (this one by Chelsea Kim and this one by Christy Ching) on creating 3D models using photogrammetry, and I thought I’d give some examples of what we are doing with that data once it’s collected. For some objects we are creating ortho-mosaics and these 2D images are going into reports as after treatment images as well as going into the catalogue model as record photography that also shows up in the online collection database. This wooden coffin 2017-20-1.3 is an example of this type of imaging.

2017-20-1.3 after treatment photos created using ortho mosaics generated from a 3D model created using photogrammetry.

For other objects we are also producing ortho-mosaics, but they are before treatment images. For example with E641 a wall painting that was previously on display.

E641 when it was on display

The wall painting is currently in two sections and each one has been imaged separately. These before treatment images have been used to create condition maps.

Before treatment ortho mosaics of E641 created with photogrammetry

The maps go into our reports and help provide visual documentation to support our written reports. For large objects, these kinds of condition maps are often easier to understand than written descriptions and can provide more precise information on the location of specific condition issues. Here you can see the condition map for E641. The map is not yet complete, I am still working on documenting one of the sections but I have combined the two maps into one image so you can see what that process looks like.

E641 condition map. The map for the section on the left is complete while the mapping on the section on the right is still in progress

The models can also be used to show surface distortion, so here in this screen shot of the 3D model of E641 you can see planar distortions in the wall painting where the fragments are not aligned. There may be a variety of causes leading to this distortion including poor alignment during the previous reconstruction or they may be the result of lifting/separation of the original material from its current modern backing.

Detail of E641. One the left is a mesh without the color added to the 3D mesh-model and on the right is the same area with the color and surface texture added to the model. The image on the left you can easily see the fragments and how they are misaligned in some areas.

I am currently working on learning how to create a 2D false color image where the colors reflect depth, so that we can have these planar distortions documented in 2D as well as being able to see them in the model.

So all together, this data is being used to document both the final condition of objects after treatment, as well as to document them before treatment. The models are also useful tools to assess complex condition issues and are valuable for evaluating next steps. For example, our current plan is to remove the wall painting from it’s current modern backing and put it on a new one. Our hope is to correct some of these planar distortions as a part of that process, and this model as well as one we make after treatment will be useful for evaluating the efficacy of the treatment and provide a base line for assessing its condition in the future.

2D to 3D

By Chelsea Kim

As an intern working with the conservation department, I have received the opportunity to work on many projects and experience things I never thought I would. Recently I have been working on this software called Reality Capture using photogrammetry. Photogrammetry is a process that uses an abundance of photographs to create a 3D model without any distortion from many overlapping images stitched together to form a detailed and geometrically corrected image called an orthomosaic. This process is usually used on larger objects, and this is because it’s too big to be in frame when taking pictures and has a lower quality with distortion which is far from perfect, and Christy Ching explains more in depth about this in her previous blog post.

I want to show how to create a digital three-dimensional model using the software, Reality Capture, and I’ll demonstrate with an example of the after-treatment photos of an Egyptian coffin.

To start off with, having pictures of the object is a must. For this example, they were already taken and edited in Photoshop, to adjust the white balance using adobe bridge ahead of time. Then I begin by opening the software and then under workflow at the top left corner, I select “inputs.”

Screenshot of the software highlighting where to click “Inputs” which is above “1. Add Imagery”

Then I select all the images making sure that they were a .jpeg file and then I click on “Align Images” as highlighted above. After the images are aligned, a transparent box surrounding the coffin appears. I adjust the box by dragging the control points around to make it as small as possible without cutting off any part of the coffin. As you can see in the image below, using E883C, the box is close to the coffin but does not intercept the coffin itself.

Screenshot of the Egyptian coffin E883C after the images were aligned with the transparent box adjusted to tightly around it.

Now for the fun part to see the coffin take shape, I click next to “Calculate Model” to select “Preview Quality” as highlighted below. Then I go to the tools bar to use the lasso option to erase all the unnecessary space around the coffin. Then after being satisfied with selected area, I click on “Filter Selection,” which turns the selected areas from orange to dark blue showing that it worked.

Screenshot of the coffin after selecting “Preview Quality.”

Finally, I go back to the Workflow bar to select “Texture” which is highlighted below and then it shows all the details of the 3D model without any distortion in high detail and quality.

Screenshot of the 3D model after being textured.

Egyptian Sarcophagus or Museum Time Capsule?

by Tessa de Alarcon with images by Alexis North, Molly Gleeson, and Christy Ching

We recently de-installed two stone sarcophagi from Egypt from the upper Egypt gallery at the Museum: E15415 and E16133. These pieces are slated for reinstall in the new Egyptian and Nubia Galleries and will likely need extensive treatment before they go back on display. This is why they have come off display, so that we can assess their condition and evaluate what needs to be done for the new gallery. For both pieces, we need to check the stability of the previous treatments. Both have previous joins and fills that were done before the formation of the conservation department. This means that we have no records for when these treatments were done or the materials that were used to reconstruct the stone and fill the losses.

E15415 at the top and E16133 on the bottom

In the case of E15415, this meant we needed to see the underside. We brought in Harry Gordon, a sculptor and professional rigger, to build a wooden cradle or cribbing and then lift the piece and flip it so we could see the joins and fills from the other side.

E15415 as it was on display in it’s vitrine (top) and images from the process of cribbing and flipping the object so we could examine the bottom (bottom right and bottom left).

When we flipped the object over and took the plinth it had been sitting on off, we found an additional puzzle. The piece has had a plexiglass vitrine over it for quite many years to protect it while on display. However, that has not always been the case, it used to be uncovered in the gallery. It seems that prior to the placement of the vitrine some visitors took advantage of the small gap between the stone and the wooden plinth below it to slide things under the object.

E15415 after we flipped it over and lifted off the plinth that had been underneath it (left) and a detail of the interior as we sorted through the items that we found that had been underneath the sarcophagus

In a way, this has made this object a sort of time capsule. We found a number of things that had been hidden under the sarcophagus including a coupon for Secret deodorant (worth 5 cents), a program for the Graduation Exercises for the University of Pennsylvania Oral Hygiene Class of 1967, a museum map from the when the museum was called The University Museum, a votive candle donation envelope for the church of St. John the Evangelist Sacred Heart Shrine, a scrap of paper with dishes on it, and two black and white photographs. While some of these things are easily identifiable, like the program and the coupon others are more of a mystery.

The paper items that we found underneath the E15415

I personally find the photos the most interesting. They look like shots perhaps from a photo booth. This is based on their size and format and that each has a torn edge (one at the top and the other at the bottom) suggesting that they may have been part of a longer whole or strip of images. Who is the subject in each image? Were the photos discarded because the owner or owners didn’t like them? Were they taken at an event or party at the Museum? Were the photos captured at the same event or in the same photo booth (if they are indeed from a photo booth)? They are similar in size and format, but that doesn’t mean they relate to one another. Were they taken somewhere else and discarded during a visit to the Museum? I have only questions and no answers, but my hope is that by sharing these images maybe someone reading this will know or recognize them and be willing to tell us more.

Photographs found underneath E15415. The image on the left is torn at the bottom while the one on the right has a torn edge at the top.

An update on Kaipure’s funerary chapel

By Jessica Betz Abel and Julia Commander

Greeting everyone – there’s a lot to update on from our Conservation Lab Annex (CLA) but for this post, we’re going to focus on the recent progress of Kaipure’s Funerary Chapel. It has been a while since we posted about Kaipure, in fact the last time we posted was almost exactly three years ago. As a quick reminder, two of the walls (the south and east) from the chapel were most recently on display in the Lower Egyptian Galleries, but they were disassembled and deinstalled in 2015 as a precautionary measure due to nearby construction. This also allowed us to proceed with much needed treatment of the flaking limestone and paint as well as designing a new support system in anticipation the entire chapel being reassembled in the new Ancient Egypt and Nubia Galleries. The complete chapel has not been on display in over 25 years!

Here at CLA we are working on building one of the smaller walls as a proof of concept for our engineering team. The south wall is the smallest section and so that is where we decided to start. But before we could begin, we had to locate all the blocks and bring them down from the rafters. 

Julia Commander using the forklift to retrieve blocks from the south wall of Kaipure.

With all the blocks needed for the south wall, we started by erecting the bottom course of stones. Once those were in place and shored up with temporary wood and foam pegs, we laid the first stretcher course on top.

The first two courses of the Kaipure chapel south wall.

In antiquity stones would have been assembled using a mortar, however, using a mortar in an indoor gallery setting is not necessary or practical. Mortars require quite a bit of water for application and that could potentially mobilize any lingering salts in the limestone which could compromise the structural integrity of the stone. Mortar is also much less reversible than many of our other options, not to mention the mess it would create during installation. Instead, we have been investigating interfaces of various materials that would replace the need for mortar or adhesive at all. For Kaipure, we have narrowed down our options to Silicone Rubber and Sorbothane. Both materials have good viscoelastic properties, reduce point loading, distributing the weight of the stones, and providing a grippy material between each course to lock the stones together.

Comparing the working properties of Sorbothane vs. Silicone Rubber.

In addition to the interfaces, we are currently working with our project engineers to design an armature on which each wall can be assembled. The armature will provide the stability and support that many of the individual stones need. In order to not cause any further damage to the stone, we are opting to use the existing holes which were drilled into the backs and sides of the stones during a previous installation. Though we are still very much in the early stages of design we are excited by the prospect of seeing the entire chapel reunited in a few short years!

Picture (im)perfect

Hello again from CLA (or at least from our home offices)! As we’ve mentioned before, conservators love to look at records relating to the objects we’re treating. It helps us to gain insights into the artifact’s history and gives us context for what we see on the bench in front of us. While we don’t always have exhaustive information about every single piece, it’s always interesting to do a little research when we can. One of our recent blog posts discussed how we’ve used archaeological renderings to understand traces of colors on our objects; this post will take a look at how photographic records can inform us about the current condition of the pieces.

Photograph of the Penn Museum Archives
A view of the Penn Museum Archives.
Each of these boxes is filled with a treasure trove of information.

Before the CLA team dove into the hands-on work last fall, we took a trip to the museum’s extensive archive collection to do some digging into the history of Merenptah’s palace. With the help of Alex Pezzati, Senior Archivist, we were able to read through the records of the excavation, led by Clarence Fisher from 1915-1920. Our research was also guided by the work of Dr. Kevin Cahail, whose own forays into the archives have revealed a lot of missing details about the site. He was able to provide a lot of insights into what we were seeing in the photographs.

One of the things that impressed us most about the excavation images is the sheer scale of the architecture. While we’re very familiar with our columns and doorways by now, it’s quite another thing to see them in situ. The picture below shows columns and pylons (trapezoidal gateways) from Merenptah’s Coronation Chapel. These objects were previously exhibited at half height because the ceilings in the downstairs gallery were too low, but they’re about 25 feet tall. Part of our project for the new galleries is to figure out how to display these columns at their full height so museum visitors can experience them the way the Egyptians would have. In the meantime, it’s a useful reminder to look at images like this to remind ourselves that they stood for several thousand years!

Site image of the Coronation Chapel during excavation
The Coronation Chapel mostly excavated. The columns would have had capitals, but otherwise are at their full height.

Another thing you might notice in that image is all the water on the ground. The site is in the Nile flood plain and experienced several very wet seasons. We could tell from the current condition of the stone that it had been waterlogged. Stone is often thought of as being hard and unchangeable, but this particular Egyptian limestone contains a lot of clay, so it becomes very soft when wet. Fisher’s notes talk about how fragile the stone was, and ultimately how they made the decision to bring the pieces back to Penn before they deteriorated even more. The stone was still damp when it was wrapped in linen and packed into wooden crates – which explains the fabric impressions we see in the surface of some of the pieces.

Workers preparing columns for shipping and stone with textile impressions
(Left) Workers preparing the column pieces for shipping. (Right) An example of the stone surface with impressions of the textile weave.

Images from the site are incredibly useful tools when we’re looking at damage to an object and trying to determine the cause – whether the damage occurred before excavation or due to more recent changes. They’re also helpful when we’re trying to figure out the extent of old repairs. When the pylon pieces were installed in the gallery in the 1920s, they were extensively restored with plaster and paint. We could also tell that some lost stone had been replaced with bricks and cement, but it was difficult to tell where the restoration ended and the stone began. Fortunately, there were a lot of pictures taken of the coronation chapel while it was being excavated.

Coronation Chapel pylon
(Left) The left pylon during excavation. Notice that the row of figures second from bottom is almost completely lost. (Right) The same object with plaster reconstruction. The detail was based on the other pylon, which is much more intact.

Looking at the original photographs of the left pylon, we could tell that it had already suffered significant surface loss to the bottom and middle sections. We could also see that even though it was still standing, the middle part had broken into several pieces. Using that knowledge during the deinstallation process, we were able to rig around the damaged areas and to remove the old restoration material so the pieces could be separated. When the pylons are reinstalled in the renovated galleries, they will be safely displayed on custom steel support structures. We’re working on how to replicate the decoration, but we’ll make it clear what is original and what is new.

During our time in the archives, we discovered one thing that hasn’t changed much – archaeologists love site dogs.

Site animals
Some pictures of very good dig dogs over the years… and one very cute baby fox (bottom left)!

Monumental but gentle

by Anna O’Neill, Julia Commander, and Jessica Betz Abel

Hello from the Penn Museum Conservation Lab Annex (CLA)! Since Lynn’s introduction, we’ve had a little bit of time to settle into our new, off-site facility and get started on some seriously big projects. Our primary task here is working on architectural elements that were part of the palace of the Pharaoh Merenptah, who ruled Egypt from Memphis from 1213–1203 BCE. We have doorways, windows, and other objects from the palace which will be displayed in the new Ancient Egypt & Nubia Galleries to give visitors the experience of being in an ancient Egyptian building. But first, we have to put them together!

The warehouse section of CLA, with pallets of fragments from the Merenptah palace complex.

We have four doorways that will go into the galleries, all of which are very large and in many pieces. They are made of limestone and intricately carved, with traces of inlay and paint. Our first project is Doorway 1, which will be about 12 feet tall once it’s all together. It’s never been displayed before, but it was partially treated in the past. Some fragments are joined together with adhesive and metal pins, and we can tell that some of the decorated surfaces were coated with a consolidant. The fragments are also very dark and dirty from almost 100 years in storage.

Doorway 1 is in thirteen major pieces, which were all on different pallets when they were moved to CLA. With a little bit of effort and a lot of maneuvering with pallet jacks, we grouped the fragments together. It was very satisfying to figure out how all the pieces fit together and form a door!

Doorway 1 coming together on pallets in the lab section of CLA.

Since we’re using Doorway 1 as our pilot project to figure out how we’ll treat the rest of the palace objects, we’ve spent a lot of time testing different conservation approaches. Since the doorway is discolored with dirt and one or more old coatings, we’ve been experimenting with gel cleaning and found two methods that work well for what we need – hot agar and Nanorestore gels® Peggy. We’ve talked about using other kinds of gel before.

Agar is a product of red seaweed and contains a polysaccharide called agarose. When it’s dissolved in water and heated, agarose forms long molecular chains – that means that when it sets, agar becomes a rigid gel that can be peeled up as a sheet without leaving problematic residues behind. The long agarose chains create pockets that hold solvents on the surface of the object, allowing them to work on grime or coatings without soaking in too deeply. You can add different cleaning solutions to agar, but plain deionized water gave us the results we wanted. We dissolved agar in deionized water and heated it in the microwave to form the solution, then poured it directly onto the surface of the stone and allowed it to cool. Applying it as a liquid means that the gel conforms well to the irregularities in the object and lets us get into all the nooks and crannies.

Action shots showing the application of agar to the surface of Doorway 1.

The Peggy 6 gel is made of poly (vinyl acetate) and comes as a thin polymer sheet. It feels a little like the gummy hands you can stick on windows – stretchy and flexible but strong. Like agar, the Peggy gel can be used with different cleaning solutions but we stuck with deionized water. The gel is laid on the surface of the stone to let the water do its work on the grime. Because the Peggy is a stretchy sheet, it can skim right over delicate carvings that might contain pigment. Another advantage of the Peggy gel is that it’s reusable – we just rinse it out in deionized water and use it again.

The Peggy 6 gel in action.

To clean Doorway 1 we used a combination of the agar and Peggy gels. Both gels soften the dirt and coating, and often looks pretty grimy when they’re peeled up. Once the gel is removed, the stone is wiped with cotton and more deionized water to remove even more dirt. We were pretty pleased with the difference between the cleaned and dirty surfaces, and using the gels meant that the process was much more efficient and gentler on the stone than using swabs.

Other parts of the treatment include reversing old repairs (or deciding when to leave them be), assembling fragments, and figuring out how to display the doorway in the gallery. We’ll check back in later with more monumental updates!

But this warehouse is Just Right

By Lynn Grant

Penn Museum’s Conservation Department is charged with reviewing, documenting, and stabilizing every artifact that goes on exhibition in the Museum. Most of the time, the objects tend to be in the ‘smaller than a breadbox’ (if you don’t recognize that category, check out this article) and are dealt with fairly expeditiously, especially once our labs were renovated in 2014. Before that, larger objects were a challenge, which was one factor in turning a gallery space into the Artifact Lab.  Even with the renovated lab, working on large objects (large textiles, eagle feather bonnets, carved elephant tusks) requires negotiating with colleagues – or sometimes just having a group session to free up the space as quickly as possible. 

Four conservators working on one carved elephant tusk to reduce the time it monopolized that working space.

But then there’s the ‘Wayyyyy bigger than a breadbox category”, aka monumental artifacts – too big to bring into lab. Sometimes we’ve dealt with this by bringing the lab to the artifact (Tang Taizong, Buddhist murals, Kaipure, the Sphinx).

Conservator Julie Lawson cleaning the Tang Taizong horse reliefs in the gallery.

For the renovation of our Ancient Egyptian and Nubian galleries, though, the sheer number of monumental artifacts, including parts of a Pharaonic palace was (nearly) overwhelming.

Fortunately, planning began early. When we assessed all the various pieces, we came out with three categories: 1) can fit into lab; 2) too large for lab but not too large to leave building; and 3) too large for lab and too large to leave building. This last category included pieces that were too large and/or heavy for our current freight elevator and loading dock. We ended up closing the Museum’s Lower Egyptian Gallery in the summer of 2018 to permit the objects in Category 3 to be treated in situ.

NYU Conservation Center graduate student Adrienne Gendron working on a column drum from the Palace Complex of Merenptah in our Lower Egyptian gallery.

This was not an ideal situation, not only because it deprived visitors of access to those objects longer than we hoped; but also because the space is not very suitable and would be adjacent to or part of a construction site for the next 5 years. However, you can’t argue with physics. Well, you can, you just won’t win.

For artifacts in Category 2, we needed to find a space where we could store them and do the necessary conservation and reconstruction for the new installation. This was not an easy search and the University’s Facilities and Real Estate Services (FRES) were instrumental in helping us with the hunt. We needed a facility that was large enough to store the objects; had ceilings high enough to accommodate the re-erection of the large architectural elements; was secure or could be made so; could be adapted as a conservation work space; and was within an easy commute from the Museum. The hunt was long and hard: either the ceiling wasn’t high enough or the distance from the Museum too far or the neighborhood was too iffy, or there weren’t big enough loading docks to load/unload our monumental babies.

We finally located a space we agreed could be made to work – about 50 minutes from the Museum but it was big enough, had the ceiling height, had three loading docks – one of which was big enough to bring the truck inside (you really don’t want to be unloading Egyptian limestone in the rain), and it had areas that could be adapted as lab/office spaces.

Home sweet warehouse.
This shot shows our storage area as we first saw it (left) and as it was when we took possession (right).

We started moving artifacts out to the Conservation Lab Annex (CLA) last year and began serious conservation work in September.  I’ll let our CLA team introduce you to their space and their work in upcoming blog posts.

Making some noise

We have been notably quiet on this blog lately, but that doesn’t mean that we haven’t been making a lot of noise elsewhere!

Project Conservator Anna O'Neill Alexander uses a PaleoTool to remove old restoration plaster that surrounds an ancient Egyptian limestone fragment. 
The limestone fragment is part of a column from the palace complex of Merenptah, 
which dates to 1224-1204 BCE.
Project Conservator Anna O’Neill Alexander uses a PaleoTool to remove old restoration plaster that surrounds an ancient Egyptian limestone fragment.
The limestone fragment is part of a column from the palace complex of Merenptah,
which dates to 1224-1204 BCE. See the (noisy) video footage of her at work here.

We also have some BIG imminent deadlines, which have kept us very busy, and some of our monumental projects are so BIG that they can’t even be worked on within the Museum building. More on that soon.

All of that aside, we continue to work on projects in the Artifact Lab, that are not as big, necessarily, but are just as important. Most of the artifacts we are working on are to prepare for the future installation of our new Ancient Egypt and Nubia Galleries.

Project Conservator Teresa Jimenez-Millas is currently working on the coffin 
and mummy of Petiese in the Artifact Lab. Here she is using an adhesive 
solution to stabilize the painted surface of Petiese's coffin lid.
Project Conservator Teresa Jimenez-Millas is currently working on the coffin
and mummy of Petiese in the Artifact Lab. Here she is using an adhesive
solution to stabilize the painted surface of Petiese’s coffin lid.
Petiese was an Egyptian priest who lived during the Late Period (664 – 332 BCE).

To hear more about all these projects in REAL TIME, check out our 1-hour #AskAConservator Q&A session next Monday, November 4th, on the Penn Museum’s twitter account, or visit us when the Museum is open, where EVERY day is Ask a Conservator Day!

Treatment of a parchment scroll from Ethiopia: an objects conservator changes dimensions

by Teresa Jimenez-Millas

During the past month I have had the great opportunity of working on a parchment treatment under the supervision of Sarah Reidell, the Margy E. Meyerson Head of Conservation, Tessa Gadomski, Conservation Librarian, and the rest of the fantastic team in the Steven Miller Conservation Lab at the Penn Libraries’ Kislak Center for Special Collections, Rare Books and Manuscripts.

The parchment is an Ethiopian prayer scroll (29-94-123) in our Museum’s collection that we are treating for the opening of the Africa Galleries this November 2019.

In The Walters Art Museum online catalogue, there are similar scrolls to this one. The Walters describes them as, “Ethiopian prayer scrolls were made to be the length of the person who commissioned them, thereby protecting the owner from head to toe.”

This scroll is made of three sections of parchment sewn together using parchment strips/thongs (0.5 cm) from the same kind of animal. Parchment is a sheet material that is made from the skin of domesticated animals such as calves, sheep, and goats, cleaned of their hair and flesh and then dried under tension on a frame. It is a mechanical process and the skin is not chemically tanned. Further analytical methods such as scanning electron microscopy (SEM) or Peptide Mass Fingerprinting (PMF) would give us more information as to the kind of protein and other features that would help us to identify the type of skin.

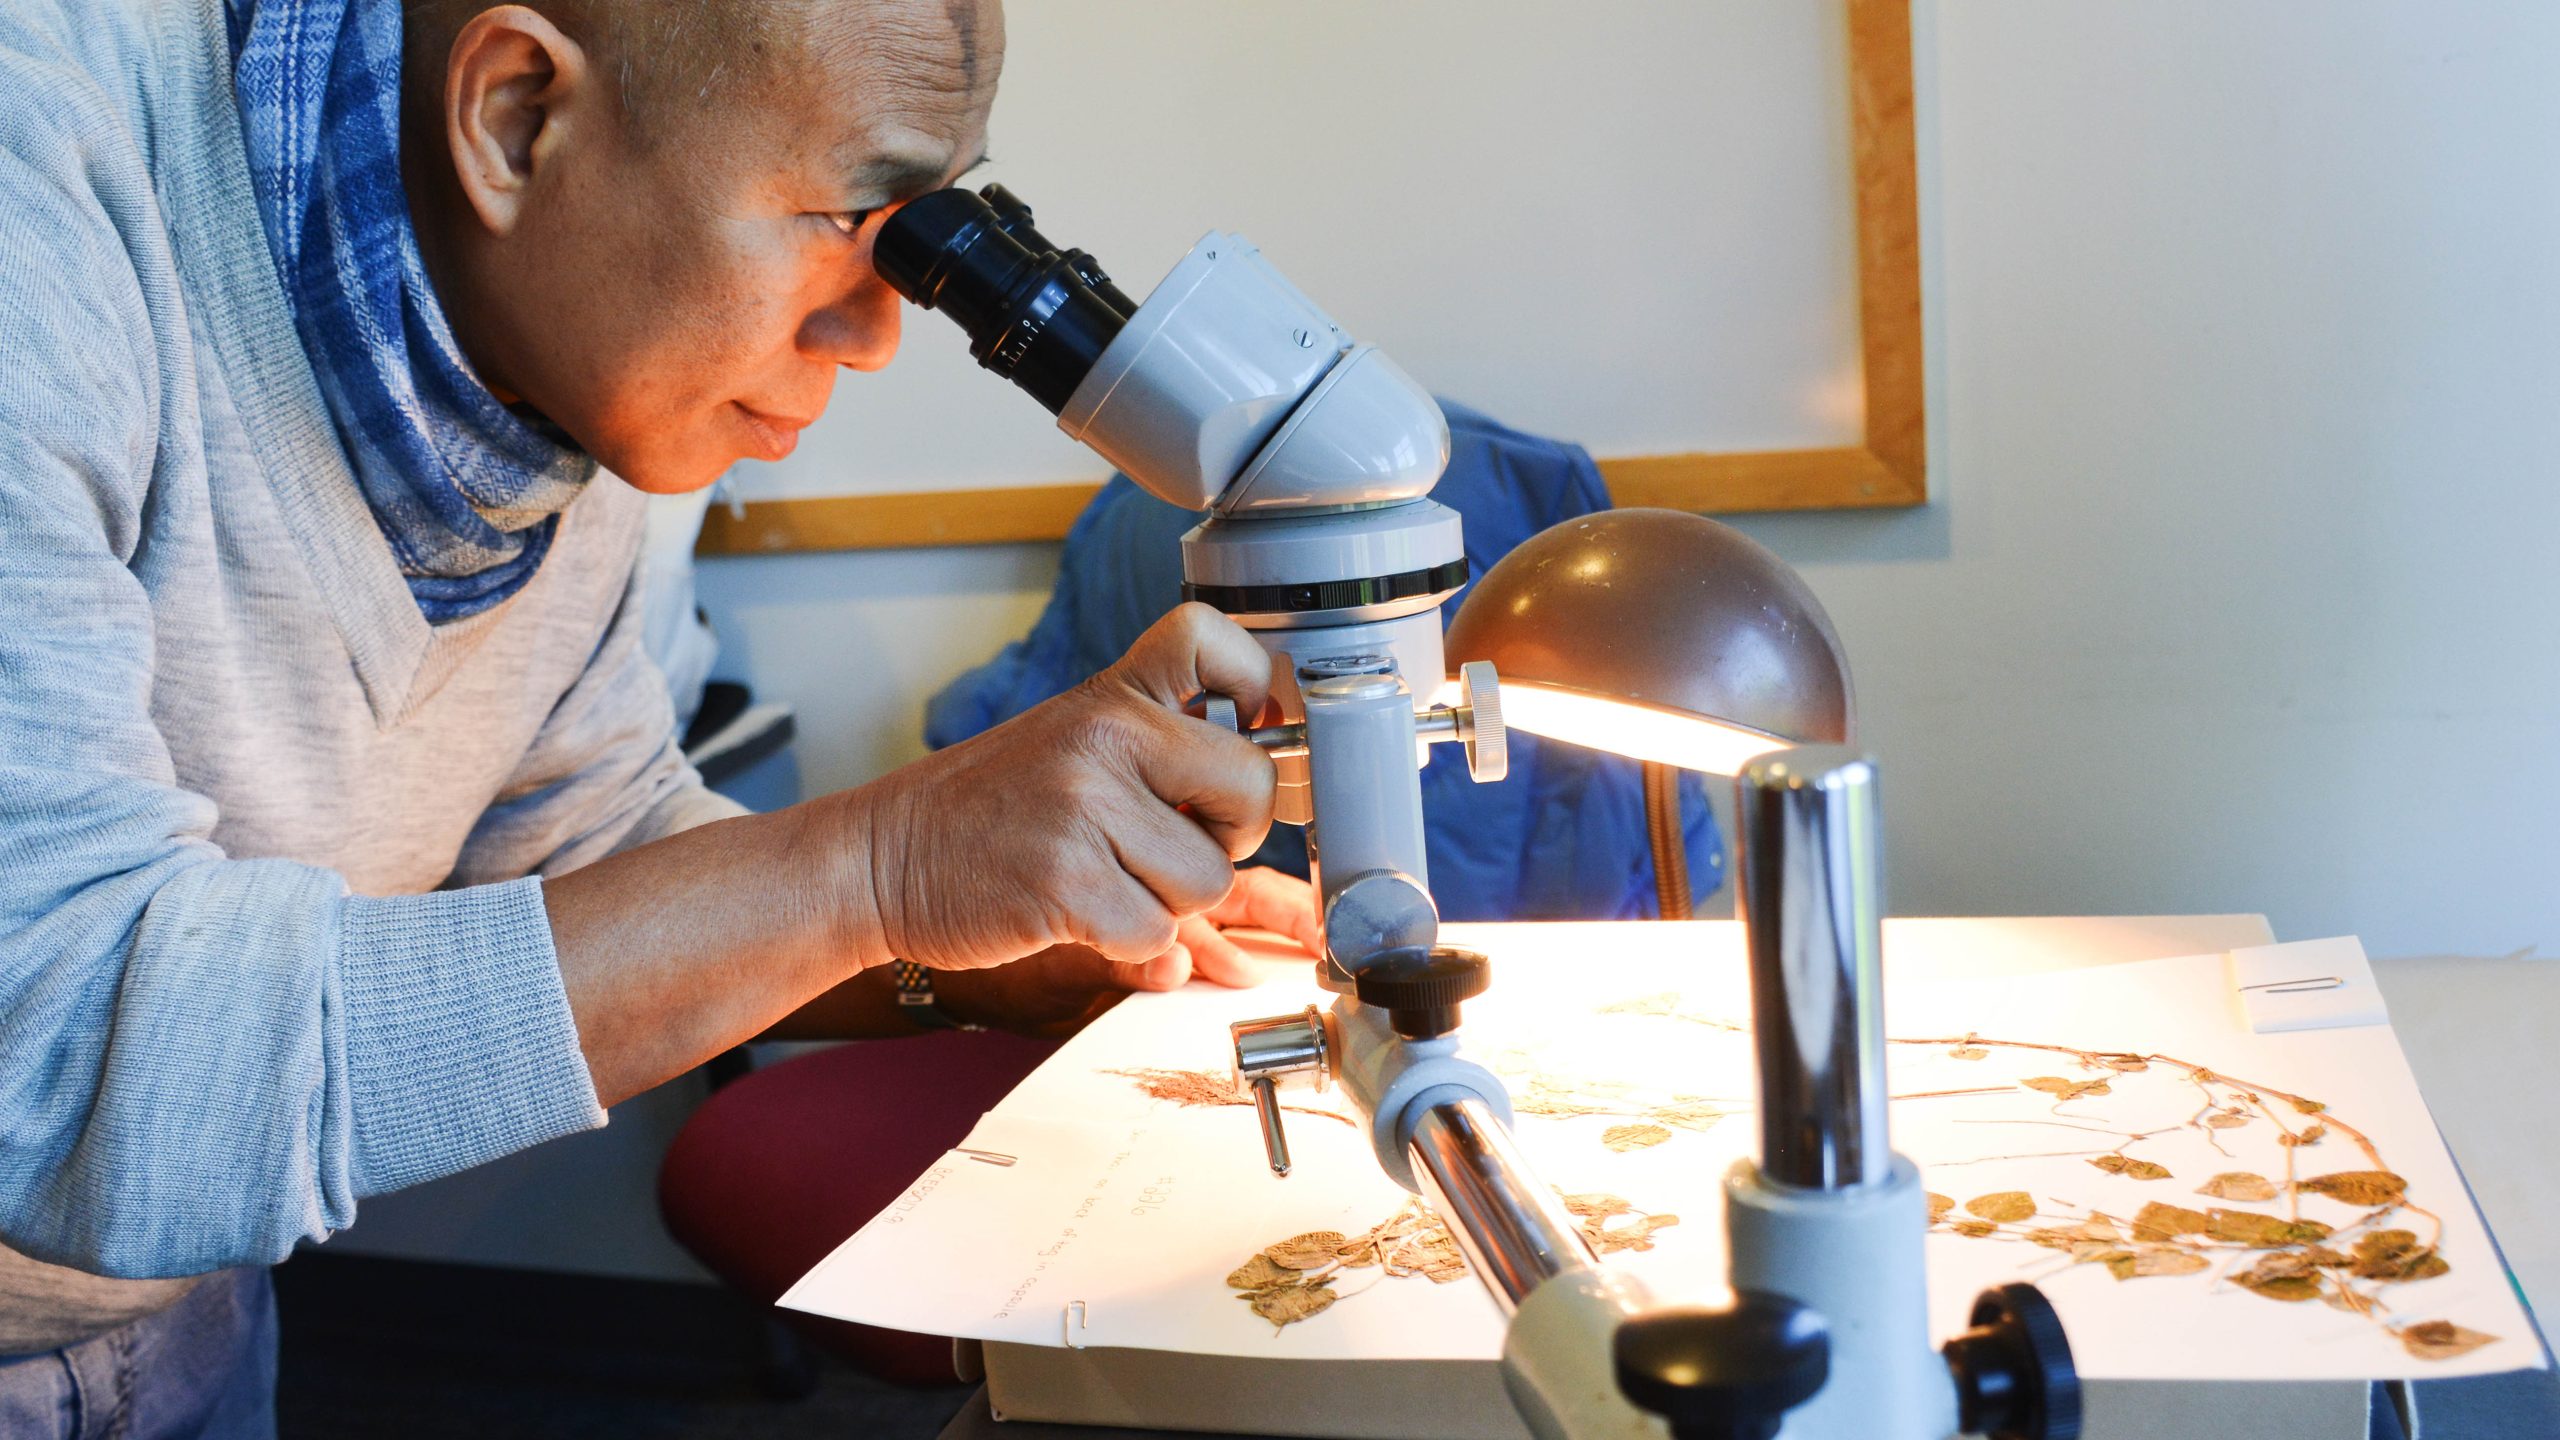
The first step on this new and exciting project was a close examination of the object under a stereo binocular microscopic (Leica IC80HD). In my examinations, I noticed some interesting features that I would not have been able to understand without Sarah’s expertise, and I’d like to share some of these cool details here.

At first glance, the third section of the scroll has a 9 cm stitched repair that one might think was made after the parchment was manufactured. But as I learned, the process of manufacturing parchment involves drying the material under tension, which leads to marked changes in fiber orientation, and inevitably involves some degree of breakage of certain fibers in the dermal network.

The stitched repair is circled in red

Observation under magnification with Microscope LEICA IC80D we can see that the sewing holes are very round but are not punched. The holes appear to have been pierced when the skin was wet, and the parchment dried around the stitching creating ridged folds that are now keeping the split closed.

The thread is still present in about 25% of the repair. The edges of the thread are not cut but are frayed. At some areas we can still see some remains of black ink that also indicate that the scribe probably wrote over the repair. All these observations indicate that this repair was made during the manufacturing process of the parchment, while still wet.

I will write more about the treatment of this object in a future post!

An Answer to the tough question: What is your favorite thing?

By Tessa de Alarcon

A question we often get asked in the Artifact Lab is, “what is your favorite thing that you have worked on?” Usually I find this question hard to answer because we work on so many different and fascinating objects, but at the moment, it’s a no-brainer. The trumpets from the Democratic Republic of Congo that are slated to go into the new Africa Galleries are by far some of the coolest objects I have ever worked on. As an example, here is AF5211:

After treatment photo of AF5211

This trumpet is carved from elephant ivory (identifiable by the clearly visible Schreger lines).

Detail of AF5211 showing Schreger lines: a feature used to identify elephant ivory

There is some type of reptile skin wrapped around one end and stitched together on the side, and animal fur that literally makes this object look like a rock star.

detail of AF5211 showing the reptile skin and fur

All these details make this object beautiful, but what makes it special is what is hiding beneath the skin. In a few spots where the reptile skin has shifted you can glimpse repairs.

Detail of AF5211 showing plant fiber repairs

The repairs are even more visible from the interior of the object. It seems that at some point, probably when this object was in use, the ivory split. It was then repaired by drilling holes into the ivory and stitching it together. There is also some type of resinous mixture that was put into the join.

Overall view of the interior of AF5211 showing repairs

Detail of the interior of AF5211 showing the repairs

The reptile skin may have been added to both hide the repair and support it so that the object could continue to be used. It is these glimpses of the life of the object that make it so special. It tells not just the story of its craftsmanship but also the people who used it and cared for it.

To see this object in person, visit the new Africa Galleries when they open in November of this year!