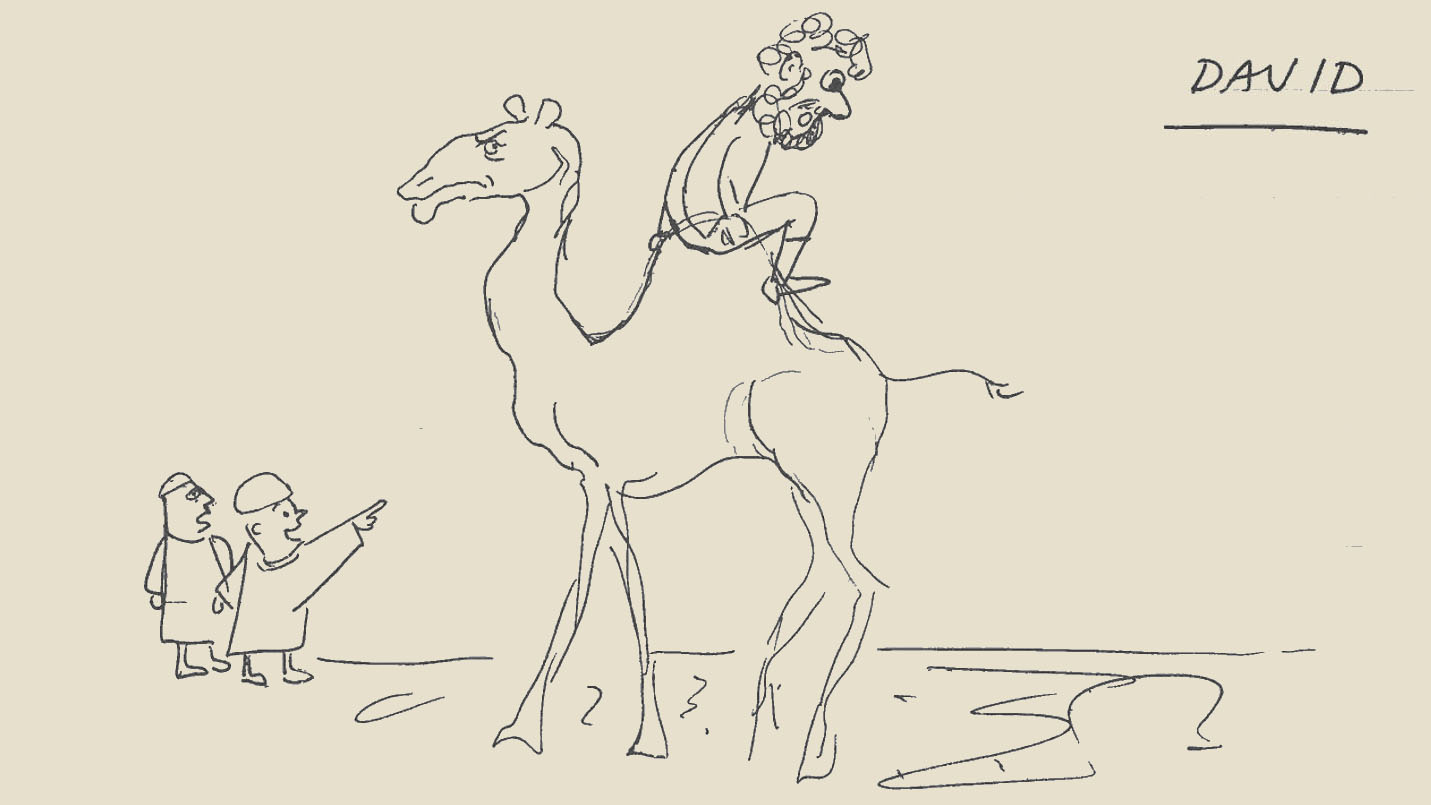
Horus gets a facelift

By Anna O’Neill, Alice and Herbert Sachs Egyptian Collections Conservator

When I last wrote about transforming a stela, I wrote about removing an old coating on a small stela fragment. Well, stelae come in all shapes and sizes, and I just finished treating another one!

We just opened Ancient Egypt: From Discovery to Display, which highlights some of the Penn Museum’s Egyptian artifacts while our larger galleries are being renovated. This was the perfect time for some of the pieces that have always been on display to come into the conservation lab for a little bit of TLC (tender loving conservation).

This stela is a black quartzite monument for the pharaoh Qa’a, the last king of the First Dynasty in Egypt, around 2910 BCE. It is about five feet tall and shows a falcon representing the god Horus standing atop a serekh (a boxy decoration representing a palace) containing the hieroglyphs for Qa’a’s name.

The Penn Museum Qa’a stela (E6878) before treatment with old restored areas outlined in red (left) and the Cairo example (right). A letter from Penn Egyptologist Sara Yorke Stevenson to the archaeologist William Flinders Petrie in 1901 declares that the restoration “gives an idea of life”.

As you can see in the image above, the stela was heavily restored with cement in the early 1900s to make it look whole. Unfortunately, the restoration had given Horus a somewhat comical expression. With a big beak and tiny eye, he looked perpetually disappointed and definitely not stylistically appropriate for his time. Fortunately, our statue has a mirror twin in the Cairo Museum, which it would have been paired with on site in Abydos. Because the one in Cairo is mostly intact, we can use it as an example of what ours would have looked like. The head and beak are much smaller and simpler, giving Horus the look of a bird of prey. With the curators, we decided to give Horus a facelift based on the Cairo Museum example.

First, we did some digital mock-ups of how the head would look before I painted the outline directly onto the restored area. Using a Dremel rotary tool with a grinding stone attachment, I shaped Horus’s head and beak to more appropriate proportions, which was a very dusty but very satisfying process. Since we didn’t have any good examples of what the eye might have looked like (the Cairo Museum face is damaged), I filled this area using Paraloid B-72 and glass microballoons. I also sanded down the squared-off edges of the restored border so they sloped down into the background, again like the Cairo Museum stela, and smoothed some of the rougher areas of restoration.

Horus’s reconstructed head before treatment (left), with rough digital sketch (center), and during reshaping with the Dremel (right). Please note that I only reshaped what I knew was the restoration material! Conservators never make changes to original parts of objects.

Once the curators were happy with the shape of Horus’s head, it was time to move on to painting. The previous paint that covered the cement was a color that didn’t quite match any of the tones in the stone – fine for display in a dim gallery, but the stela’s new home would be more brightly lit. Finding the right color was challenging because the top fragment, which was found a few years after the bottom pieces, is a slightly darker color than the rest of the stela. I decided on a mid-tone that worked with the base color of the surrounding original stone, and then used a sponge to layer lots of highlights and darker shades to blend in with the actual artifact. I also used paint to create the optical illusion of “finishing” the bottom left corner of the serekh so that it appears complete from a distance.

The Qa’a stela after reshaping and repainting the old restoration.

You can now see the Qa’a stela and lots of other amazing Egyptian artifacts in Ancient Egypt: From Discovery to Display. The Artifact Lab has also reopened, and we look forward to being able to talk to everyone about the work we’re doing to prepare for all the exciting changes at the Penn Museum.

Transformation Tuesday, Stela Edition

Sometimes the simplest treatments make the most visible impact! This Eleventh Dynasty (2081-1938 BCE) painted limestone stela from Deir el-Bahari in Egypt had a thick and yellowed coating dating from before it was installed in our Lower Egyptian around 1958. It came off easily by swabbing with acetone, followed by a simple cleaning with a xanthan gum/benzyl alcohol gel to remove any remaining dirt. Plaster from where the edges been set into the gallery wall was carefully chipped away with a chisel. Suddenly, the ibis looked much younger than its 4,000 years!

Many thanks to Tom Stanley, the museum’s Social Media guru, for making this transformational GIF:

We should note that, in conservation, cleaning is considered an “irreversible” treatment – that is, there’s no putting back what you’ve cleaned away. So we’re always careful to make sure that anything we remove is something that shouldn’t be there. This is especially important when the cleaning process is as dramatic as the one above, since you can’t change your mind once you’ve started! From the way the coating was applied over the break edges, it was clear that it had been put on after the stela was excavated. That meant that the coating could be removed and the ibis will be much nicer to look at when it’s reinstalled in the renovated Egyptian Galleries.

58-10-1 before, during and after treatment.

Transformation Tidbits on a Tuesday

By: Anna O’Neill, Jonathan Stevens, and Céline Wachsmuth

It’s Tuesday! And time for another transformation post. As the Kaipure team is wrapping up our work, we have been reflecting upon how different everything has become from when we first started the project in June 2017, almost a year ago. We have seen many transformations, both big and small. Here are some snapshots of transformations we’ve seen throughout the project:

First thing’s first, we have our simple, but satisfying, surface cleaning transformation. Jonathan shares one of his blocks in the middle of cleaning:

Photo by Jonathan Stevens Cleaning in progress. Most of the background of this limestone block has been dry-cleaned using white rubber erasers, vulcanized latex sponges and cosmetic sponges. The brighter areas are clean and any area that looks gray has not been cleaned yet.

Cleaning is fun, especially when the results are so nice and neat!

Anna had the chance to rejoin two block fragments, something that we haven’t been able to do much of because of the size and weight of most of the blocks, even though some are broken and we know how they fit together.

Photos by Anna O’Neill For this piece, both the main block and missing fragment were cleaned and the break edges consolidated with 2% w/v Paraloid B-72. Then the fragment was adhered with 40% w/v Paraloid B-72 and held in place with straps overnight until the join had set. The cracks were filled with a white Paraloid B-72/glass microballoon mixture, which provides support to areas of loss and helps to protect the fragile edges along the break. The fill was then painted with Golden acrylic paints to integrate it with the rest of the piece.

One of the last blocks Céline had the chance to work on also had one of the most fragile surfaces of any of the blocks. It was a lengthy, but incredible treatment. Both images below show the process of stabilizing the block’s surface. After cleaning, loose and lifting fragments were secured by injecting a 30% solution of Paraloid B-72 in acetone beneath the flakes. The unprotected edges of the flakes were supported and protected with a mixture of Paraloid B-72 and glass microballoons, applied by injection with a syringe, and then in-painted with acrylics to match the surface.

Photos by Céline Wachsmuth Detail of before, during, and post treatment of a section of the block. There was significant lifting and destabilization over much of the block’s surface.

Photos by Céline Wachsmuth Detail of before, during, and post treatment of a section of the block. This section was floating on the surface, meaning it was no longer attached.

Stay tuned for a final post about the finishing touches on the Kaipure Tomb Chapel project.

The Kaipure Conservation Project is funded through a generous grant from the American Research Center in Egypt (ARCE) Antiquities Endowment Fund (AEF) which was established though a grant from the United States Agency for International Development (USAID).

A typical Tuesday in Kaipure

Anna O’Neill, Assistant Project Conservator

The Kaipure lab space in the Lower Egypt (Sphinx) Gallery lets visitors observe as conservators work on a tomb chapel wall, but we don’t often have the opportunity to explain what’s going on. So, here’s a glimpse into what we might be doing on any given day.

9:00 am: We arrive in the conservation hallway, drop off our bags and grab a quick cup of tea to warm up before our weekly department meeting.

9:15 am: Department meeting! It’s getting a bit crowded in here with so many conservators working on lots of different projects. We give our updates – “Still working on Kaipure” – and listen to everyone report their progress. Since we spend most of our time working in the Lower Egyptian Gallery, it’s fun to hear all about all the various objects being treated.

10:00 am: Céline finished up the block she was working on yesterday, so our first order of business is to put her completed block back on the red shelves along the back wall and pull out a new pallet for her to work on.

Jonathan brings Big Joe into the lab.

10:15 am: We’ve completely rearranged the lab, clearing space in the middle and in front of the shelves so that we can bring in Big Joe, our forklift (no, really – his name is written on the side). Most of the time, people tend to think of conservation as a very delicate task, but we’ve had to become experts in heavy machinery, too.

Carefully maneuvering Big Joe to pick up a pallet with a completed block.

10:30 am: We use Big Joe to move Céline’s completed block to a shelf, measuring to make sure that it fits, and then raise the tines all the way up to the top shelf. It’s the first time we’ve had to reach this high, so we’ve brought in Bob Thurlow, Special Projects Manager and resident forklift expert, to supervise while we bring down a new pallet. Fortunately, everything goes smoothly and we land the pallet on a wheeled table made specifically to hold the heavy weight of the blocks.

Left, Céline pulls a block from the top shelf – it’s eight feet off the ground, but feels much higher! Right, Making sure the pallet is centered on the rolling table.

10:45 am: It’s time to play Jenga with our workspace again as we put Big Joe back in storage and get our tables back in working position.

11:00 am: Céline begins documenting her new block, which means getting to know every inch of the object. She begins photography and condition mapping, while Jonathan and I get back to work on the pieces we already had out.

12:30 pm: Lunch time!

1:30 pm: We’re back in the lab, each working on our blocks. Céline has finished documenting her new block, so she gets started on the first phase of cleaning – dusting with a soft brush and gentle vacuum.

Jonathan is busy with solvent cleaning, painstakingly rolling tiny cotton swabs saturated with acetone or ethanol over the surface to remove soiling, staining, and other substances that may have accumulated over the nearly 100 years the wall was on display.

Everybody busy at work in the Kaipure lab.

I’ve done all the cleaning I can on my block and now I’ve moved on to stabilizing loose and lifted flakes of paint and stone. This is done by a process we call “edging”, using a syringe to apply a mixture of Paraloid B72 bulked with glass microballoons and fumed silica to fragile areas, then gently shaping it with a solvent-soaked swab so they fill any gaps between flakes and the stone surface. These tiny fills serve multiple purposes: they fill empty spaces so they won’t collapse under pressure; they protect the edges so the flakes won’t be popped off if touched; and they provide light adhesion between the flake and the stone. Once inpainted, the B72/microballoon mixture blends right into the stone, but we feel much better knowing that the surface is more stable.

5:00 pm: The guards are making their rounds in the gallery to make sure all the visitors have left for the day. That means it’s time for us to close up the Kaipure lab for the evening and head home.

All photos by Lucia Scanlan

The Kaipure Conservation Project is funded through a generous grant from the American Research Center in Egypt (ARCE) Antiquities Endowment Fund (AEF) which was established though a grant from the United States Agency for International Development (USAID).

#Transformation Tuesday: Getting our Ducks in a Row

The transforming treatment of the Al’Ubaid frieze of three birds (B15883) from the new Middle East Galleries in now complete! (To be more correct, they are probably doves not ducks.) More information about the frieze can be found here. Click here for more information on the exciting new galleries, opening this April!

The frieze before treatment

The frieze after treatment

Originally, the three stone birds (initially called ducks but now identified as doves) would have been surrounded by black shale tesserae and the borders would have been copper alloy sheets. The frieze would have originally looked much like the marching bulls frieze. Unfortunately, neither the shale pieces nor the copper alloy borders made it. The birds had been embedded in a plaster background carved to look like the shale tesserae, and the borders were made from modern machined copper alloy sheets.

The old support system had to be removed due to some condition issues and to prepare the frieze for long-term exhibition. Once taken off, the grimy birds could then be laser-cleaned. The blog post about laser-cleaning them can be found here.

Applying the bulked Paraloid B-72 to the Ethafoam© support

Although the only ‘real’ parts were the stone birds, the curator wanted the entire frieze to be reconstructed to help visitors put the birds in context. It will be displayed next to the marching bull frieze.

After cleaning, the birds were adhered onto a piece of dense archival foam. The black tesserae background was created with Paraloid B-72 (ethyl methacrylate and methyl acrylate copolymer) bulked with glass microballoons and toned with dry pigments. Bulked Paraloid B-72 is stable, reversible, and easily manipulated with either solvent or heat. The shallow lines to make it appear there are tesserae were put in with a heated spatula. The copper alloy borders were also created with Ethafoam© coated in bulked Paraloid B-72 tinted in various shades of green to mimic copper corrosion. The fills in the ducks were inpainted with acrylics to integrate them better.

After all that, the ducks look much happier!

The frieze after treatment and ready for display

Continue reading

#Transformation Tuesday: New Year’s Edition

By: Céline Wachsmuth

It’s Tuesday and that means it’s time for another transformation story. This one comes from an object going into the Middle East Galleries (click here for more information on the exciting new galleries, opening this April!).

It’s hard to believe the first month of January is almost over! Many people make resolutions for the New Year, hoping to make an improvement, big or small (myself included, I have a Google doc with a list of resolutions). Most resolutions are easier said than done, including the prevalent resolution to shave a few pounds. This bowl had similar thoughts, but made losing some weight look like a piece of cake!

Bowl before treatment (left) and after treatment (right)

This bowl had been repaired in the past, but the joins needed to be taken down because the old adhesive was failing. The bowl was pretty clean when it came into the lab so it wasn’t long before I began solvent testing the adhesive in order to make a vapor chamber. The adhesive was soluble in acetone and most of the sherds separated with gentle prodding after eight days in a vapor chamber. The old fills (made of plaster), however, did not budge. This was probably due to the likelihood that they had been cast in place.

Outlines of Old Fills
Fill outlined in dark blue was dremeled out
Fills outlined in light blue were softened with deionized water and then removed

These ounces had to go! When a fill resists detachment by solvent, other, usually mechanical, methods have to be implemented. One mechanical treatment is to use a dremel, just like the one you might use at home for some smaller detailed work, to carve away the fill. This is tricky because the dremel can put the object at risk if used improperly. Once I was all set up and had been shown the proper technique, I slowly moved around the entire area of the fill.

using the dremel to remove the fill

two of the sherds sitting in a bed of glass beads while the adhesive sets

Once the large fill was removed and those ounces had been shed, it was time for some TLC. I cleaned the break edges on each sherd with acetone (for the sherds previously joined with adhesive) or deionized water (for the sherds adjacent to the old fills). All the break edges were then coated with a dilute solution of Paraloid B-72 (ethyl methacrylate methyl acrylate copolymer) and the sherds were put back together with a 50% solution of Paraloid B-72 in 1:1 acetone:ethanol. Two small areas of the bowl had some gaps that needed to be filled; one for added structural stability and one to help complete the shape. This was done using a mixture of 3M microballoons, Paraloid B-72 in 1:1 acetone:ethanol, acetone, and some dry pigment to approximately color match the fill to the bowl. The fills needed some additional color to help blend in more and they were painted with light washes of acrylics.

This bowl made losing a couple ounces look easy even though we all know how much work really has to go in to something transformative! Thankfully, it’s only the beginning of the year and there is plenty of time to make your own transformations. Just like there’s plenty of time for another transformation to happen in the labs before our next Transformation Tuesday post – stay tuned!

PS – If you’re looking for some “ancient workout tips” check out these fun suggestions

#Transformation Tuesday ft. The Big Guy

By: Céline Wachsmuth

It’s #TransformationTuesday! And that means I get to show off a wonderful transformation that happened right in the Lower Egyptian gallery here at the Museum.

Before Treatment Shot of the Big Guy

After Treatment Shot of the Big Guy

Tah-dah! Looks great, doesn’t it? The Big Guy looks so much better. (I affectionately nick-named this block “Big Guy” because it’s the heaviest block on this side of the wall (it weighs approximately 720 pounds). If you’re in need of some context for this project, check out this Kaipure Catch Up)

Though there isn’t much visible difference between these two photos, in terms of the stability of the block’s surface, much has changed. All in all, this treatment took me about two months to complete and it was quite the journey.

I began my treatment by condition mapping the block in Photoshop and then surface cleaning with gentle vacuuming. Once the dirt immediately on the surface had been removed, I used a variety of sponges and erasers to clean the more stubborn grime. In just these first two steps I realized how fragile much of the surface was. Small flakes would break off easily and not always predictably. Swabbing with a cotton swab was no different and in some cases was more problematic. I proceeded slowly and carefully. Once the Big Guy had been safely cleaned, you could really see his brightly painted surface. The colors were more visible, but so were the fragile and lifting areas. I next faced the biggest challenge of this treatment: how to efficiently and effectively stabilize and consolidate the surface.

Photoshop Condition Mapping of the Big Guy

I began stabilizing all the lifted areas by injecting a dilute adhesive under the surface using an insulin syringe. This worked for some areas but caused some of the surrounding surface to darken. If it came in contact with the surface, the needle also had the potential to disturb it and cause a piece to break off. I then tried to apply the adhesive by brush; I saturated the brush with adhesive and gently tapped the exposed stone next to the prepared surface, wicking the adhesive underneath. This worked but had many of the same issues as the syringe. Both application methods would have taken a substantial amount of time, as almost all of the surface was in need of some consolidation. I began to explore other options for effectively consolidating the surface. In speaking with conservators in the department, we decided to try applying the adhesive via spray canister.

Preval Spray System

Before spraying the entire block, we tested it to see how even the spray application would be and if it would cause any darkening or staining. I was very happy with the tests but thoroughly discussed all the potential shortcomings of this application method with Kaipure project supervisor Molly Gleeson. Spraying the adhesive wouldn’t penetrate below the prepared layer and would only provide superficial consolidation. For those areas that were significantly lifted, I went around with a higher percentage of adhesive and used the brush method of application mentioned above. Once I was satisfied those areas had been stabilized, I sprayed a layer of adhesive on the surface, let it dry completely, and then applied a second layer in areas that were still more concerning. The Big Guy was much more stable and happier but you can’t see any evidence of this because the adhesive is clear!

(I bet if you ask him though, he’d tell you he felt much prettier!)

This figure grabbed a bunch of food to celebrate the Big Guy’s transformation! In actuality, this figure is bringing food for the REAL Big Guy, Kaipure

The Big Guy was almost complete but I had one more task to finish before he would be ready to be handled. Many areas of loss had unprotected edges at risk of being lifted off the surface. Take this area for example, there are quite a few spots with unprotected edges ready to break off with added pressure. 

Detail of unprotected edges

To solve this problem, I edged (put up a protective and supportive layer of material around the exposed edge) those spots with Modostuc. Notice the white spots now on his body?

Can you see the white areas?
Detail of area of edging on figure

I went around to the many places on the Big Guy with unprotected edges and did the same thing. Once I was satisfied all edges had been protected, I painted over all of them with watercolors, a process called “inpainting”. And, if I did my job well, you can’t see it!

Can you find the areas of edging?
Detail of inpainting

The Big Guy is now stable and ready to be moved off-site until the next phase of treatment: re-installing him in the Museum with his many brothers and sisters! This is all part of a larger picture of transformation (for more information on the museum Building Transformation Campaign, click here). It’s a transformation inside a transformation! Inception, anyone?

Two weeks ago, conservator Alexis North posted about one of her recent treatments where the before and after treatment photos are indeed worlds apart and more what you might expect from a Transformation Tuesday post (see her post here). However, don’t judge a book by its cover or an object by its treatment photos! Though you can’t always see the changes, rest assured that once an object passes through conservation it has been changed for the better. Stay tuned for more of our exciting (and perhaps surprising!) Transformation Tuesday series posts!

The Kaipure Conservation Project is funded through a generous grant from the American Research Center in Egypt (ARCE) Antiquities Endowment Fund (AEF) which was established though a grant from the United States Agency for International Development (USAID).

Transformation Tuesday

Inspired by our Building Transformation campaign, we are starting a series on this blog called Transformation Tuesday. At least one Tuesday a month, we will write a post featuring conservation projects underway that are contributing to the Penn Museum’s Building Transformation, along with interesting tidbits that we are learning about the collection and the Museum building as we work.

For instance, we are in the process of fully documenting the architectural elements of the palace of Merenptah currently on display in the Lower Egyptian Gallery, in preparation for the future reinstallation of this material on the 3rd floor of the museum. This includes documentation and research on a variety of levels, and just last week, the palace elements were laser scanned** in order to document them as accurately as possible before they are moved.

Black and white targets placed around the Lower Egyptian Gallery as part of the laser scanning process (left) and the scanning of a column in progress (right)

To supplement the laser scanning, we are creating condition maps of each of the architectural elements. These are big pieces, so it requires us getting up on a lift so that we can examine all surfaces of the columns, gateways, and doorways.

Last week, we began by examining and documenting one of the palace doorways. We always thought that this doorway had been up since 1926 like the rest of the palace, but in the photographs from the opening of the Lower Egyptian Gallery in 1926, this doorway isn’t there!

Lower Egyptian Gallery in 1926 (left) and in 2017 (right). Note that the doorway on the far right in the 2017 image (indicated by the red arrow) is not in the 1926 photo.

We know that the Lower Egyptian Gallery opened on May 19, 1926. So when was that doorway installed? Well, when we got up on the lift to examine it from above, we could see that there were some very minor differences in the way that it was installed, but we also saw a scrap of newspaper stuck between the plaster restoration on one side and the wall.

A piece of newspaper wedged between the wall board and plaster restoration and the wall behind the doorway.

And this piece of newspaper has a date on it! It is a scrap from the Philadelphia Bulletin dated to Thursday July 22, 1926. So it seems that they intended on installing the doorway for the opening, but may have run out of time, and installed it just a couple months later. This isn’t a huge revelation, but it is an example of some of the fun investigating that we do as part of our work to reconstruct the history of our galleries and the objects that are installed in them.

Stay tuned for more Transformation Tuesday blogposts!

**The laser scanning of the palace of Merenptah was funded through a generous grant from the American Research Center in Egypt (ARCE) Antiquities Endowment Fund (AEF) which was established though a grant from the United States Agency for International Development (USAID).