Horus gets a facelift

By Anna O’Neill, Alice and Herbert Sachs Egyptian Collections Conservator

When I last wrote about transforming a stela, I wrote about removing an old coating on a small stela fragment. Well, stelae come in all shapes and sizes, and I just finished treating another one!

We just opened Ancient Egypt: From Discovery to Display, which highlights some of the Penn Museum’s Egyptian artifacts while our larger galleries are being renovated. This was the perfect time for some of the pieces that have always been on display to come into the conservation lab for a little bit of TLC (tender loving conservation).

This stela is a black quartzite monument for the pharaoh Qa’a, the last king of the First Dynasty in Egypt, around 2910 BCE. It is about five feet tall and shows a falcon representing the god Horus standing atop a serekh (a boxy decoration representing a palace) containing the hieroglyphs for Qa’a’s name.

The Penn Museum Qa’a stela (E6878) before treatment with old restored areas outlined in red (left) and the Cairo example (right). A letter from Penn Egyptologist Sara Yorke Stevenson to the archaeologist William Flinders Petrie in 1901 declares that the restoration “gives an idea of life”.

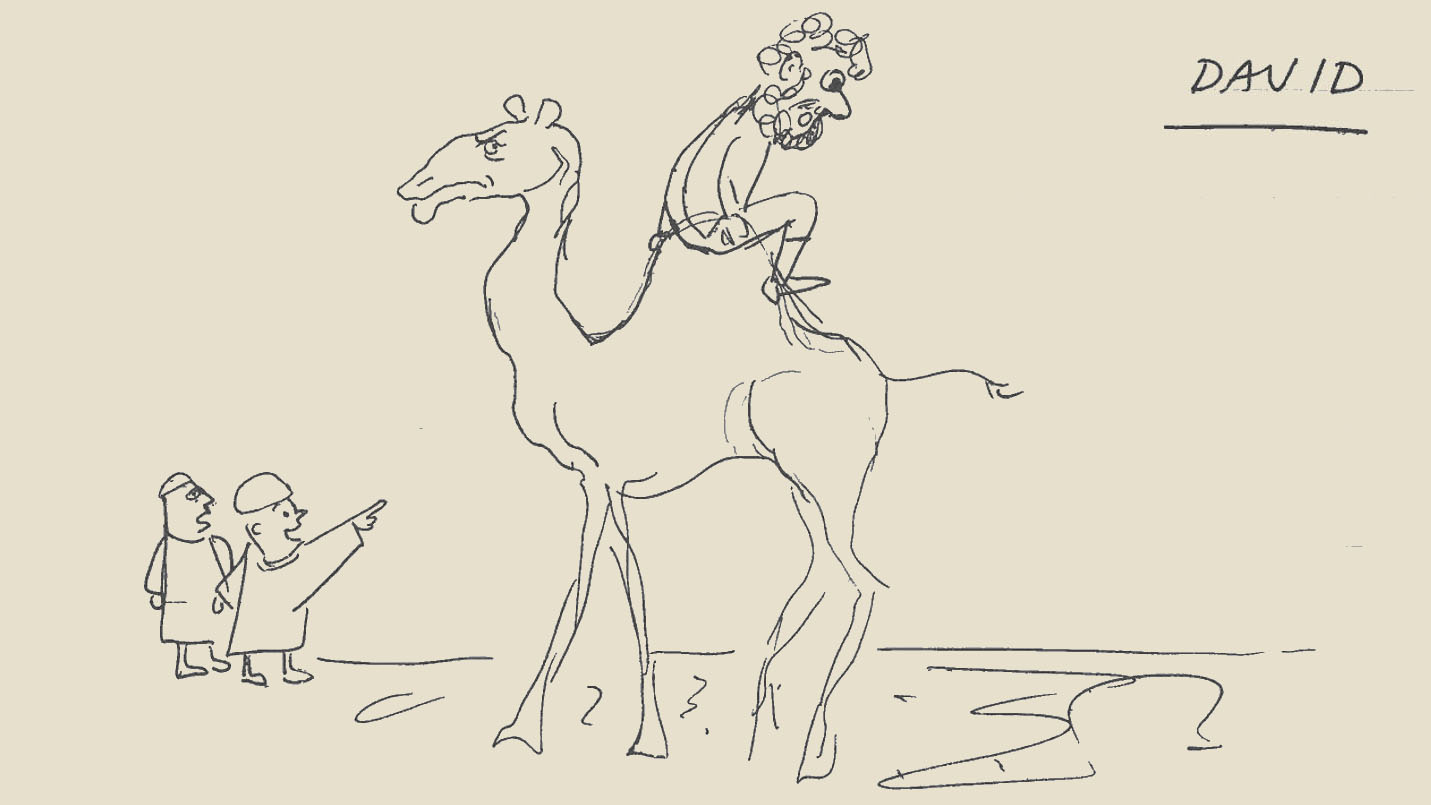
As you can see in the image above, the stela was heavily restored with cement in the early 1900s to make it look whole. Unfortunately, the restoration had given Horus a somewhat comical expression. With a big beak and tiny eye, he looked perpetually disappointed and definitely not stylistically appropriate for his time. Fortunately, our statue has a mirror twin in the Cairo Museum, which it would have been paired with on site in Abydos. Because the one in Cairo is mostly intact, we can use it as an example of what ours would have looked like. The head and beak are much smaller and simpler, giving Horus the look of a bird of prey. With the curators, we decided to give Horus a facelift based on the Cairo Museum example.

First, we did some digital mock-ups of how the head would look before I painted the outline directly onto the restored area. Using a Dremel rotary tool with a grinding stone attachment, I shaped Horus’s head and beak to more appropriate proportions, which was a very dusty but very satisfying process. Since we didn’t have any good examples of what the eye might have looked like (the Cairo Museum face is damaged), I filled this area using Paraloid B-72 and glass microballoons. I also sanded down the squared-off edges of the restored border so they sloped down into the background, again like the Cairo Museum stela, and smoothed some of the rougher areas of restoration.

Horus’s reconstructed head before treatment (left), with rough digital sketch (center), and during reshaping with the Dremel (right). Please note that I only reshaped what I knew was the restoration material! Conservators never make changes to original parts of objects.

Once the curators were happy with the shape of Horus’s head, it was time to move on to painting. The previous paint that covered the cement was a color that didn’t quite match any of the tones in the stone – fine for display in a dim gallery, but the stela’s new home would be more brightly lit. Finding the right color was challenging because the top fragment, which was found a few years after the bottom pieces, is a slightly darker color than the rest of the stela. I decided on a mid-tone that worked with the base color of the surrounding original stone, and then used a sponge to layer lots of highlights and darker shades to blend in with the actual artifact. I also used paint to create the optical illusion of “finishing” the bottom left corner of the serekh so that it appears complete from a distance.

The Qa’a stela after reshaping and repainting the old restoration.

You can now see the Qa’a stela and lots of other amazing Egyptian artifacts in Ancient Egypt: From Discovery to Display. The Artifact Lab has also reopened, and we look forward to being able to talk to everyone about the work we’re doing to prepare for all the exciting changes at the Penn Museum.

Egypt-bound

Yes, that’s right, I’m going to Egypt and I’m leaving tonight.

My bag is mostly packed; in there somewhere are a bunch of conservation supplies.

My bag is mostly packed; in there somewhere are a bunch of conservation supplies.

I have the great fortune to be joining the Penn excavations in South Abydos for a couple weeks to carry out conservation work on some of the recent finds. The team is led by Dr. Josef Wegner, Egyptian Section Associate Curator at the Penn Museum. This will be my first visit to Egypt, but not my first time working on an excavation (nor will it be my first time working in a desert in the winter!). I’m really excited for this opportunity and I’m looking forward to seeing in person the sites and finds that I’ve heard so much about over the last 3 years since beginning my job In the Artifact Lab. I’m not sure what kind of updates I’ll be able to provide from the field, but I’ll certainly be posting about my experience once I return in mid-January. Since I’m not there yet, I don’t have any photos to share, but if you want to see some images of the site and read about a graduate student’s recent experience there, check out this blog post on the museum blog for a taste of what I’ll be doing/seeing.

Wax on, wax off

In my last post, I briefly described the Egyptian storage move project currently underway. And I also promised to feature some of the objects that are in the lab as a part of this project. As conservators, we get excited by lots of things, so I really can’t post images of every single object that comes into the lab, but we will try to post as much as we can here, on Twitter, and on the museum’s Facebook page.

Earlier this week, Alexis brought a drawer of beadwork up to the lab, and this is one of the pieces she found in that drawer:

A piece of beaded fringe that recently came to the Artifact Lab for conservation/re-housing.

A piece of beaded fringe that recently came to the Artifact Lab for conservation/re-housing.

Huh. Not the prettiest object I’ve ever seen. But just wait…

Partially cleaned beadwork

Partially cleaned beadwork

Under that dark material (which is wax) the beadwork is beautiful! We actually see a lot of beadwork in our collection that has been coated with wax, which has now discolored to a dark brown, completely obscuring the colors of the beads. Coating beads with wax was a method used by archaeologists to remove beadwork from mummies during excavation, in order to maintain the correct arrangement of the beads, since the original linen threads were usually mostly deteriorated. In the case of this beadwork, shown above, it was not only waxed, but affixed to a piece of cardboard. Alexis is currently cleaning the wax off the beads and she will eventually re-house this piece for safe transport to the off-site storage location.

Another cool detail – she found this, written on the back of the cardboard:

HapimenbeadsIt says: “E16220B. Bead fringe of Hapi-men, Pl. LXXIX Abydos. From mummy buried with his dog.” This small piece of beadwork belongs to our mummy Hapi-Men, who is currently on exhibit with his dog! Hapi-Men and Hapi-puppy were excavated by Sir Flinders Petrie from Abydos in 1902. You can read more about Hapi-Men and some of our research about him here and here.


Hello, goodbye

We have had a very special object in the Artifact Lab for a few weeks – this Predynastic ritual vessel in the shape of a woman:

E12281_at01_compressed

E12281, after treatment

This vessel was excavated at Abydos, and we estimate that it is at least 5000 years old.
Here is a view of the vessel from the top:

E12281_at06_compressedI have worked almost exclusively on organic materials in the Artifact Lab, so getting to work on this ceramic was a nice diversion. Conservation treatment, which involved some light surface cleaning and minor mending, was requested because this object will be featured in an upcoming publication. It will leave the lab today, but I didn’t want it to leave without posting an image of it on the blog! Once the publication comes out, I’ll be sure to include a link to it.

In the meantime, to learn more, follow this link to check out a video discussion of a similar vessel, in the collection at the Brooklyn Museum:

Brooklyn Museum female figure


Wood ID

I’m currently treating 7 fragments of a painted wooden coffin from Abydos. Lately, many of our visitors have been asking what kind of wood was used to make this coffin. This has actually been a question that we have been asking ourselves, and we are trying to see if we can come up with an answer.

In ancient Egypt, large timbers for coffin-making were scarce, so the wood was either imported from places like the Mediterranean, the Near East, or from other parts of Africa, or the Egyptians would cobble together smaller pieces of wood from local sources. Based on previous studies, we have a finite list of types of wood that are known to have been used, but from there we need to move to looking at the object itself.

These images show the exposed wood on the side (left) and back (right) of one of the coffin fragments. Can you guess what type of wood this might be?

These images show the exposed wood on the side (left) and back (right) of one of the coffin boards. Can you guess what type of wood this might be?

As conservators, we are educated not only in object treatment, but in the analysis of objects, and the examination of tiny fragments of objects, like plant and textile fibers, wood, and pigments. But many of us don’t do wood ID all that often, so it can take awhile to get set up, to re-orient ourselves to what we’re seeing in the samples, etc. AND it requires a sample, which we don’t often have access to. Fortunately, for me, I have some already detached samples from these boards and access to someone who does this type of work more frequently, archaeobotanist Dr. Naomi Miller, so I turned to her to help me with this work.

Dr. Miller looked at the samples I had and selected one that looked promising, due to the exposed cross-section on one end. I mounted this sample under our binocular microscope and took a photo, to help her study it further and compare to known reference samples.

E12505_woodID

The wood fragment with exposed cross section, 60X magnification

From this sample, Dr. Miller was able to determine that this is a hardwood, based on the presence of clearly visible rays and thick-walled pores, many of which are radially paired (pointed out below).

Slide4Based on these features and the known types of hardwoods used in ancient Egypt, this helped narrow down the likely possibilities to Common ash (Fraxinus excelsior L.), Carob (Ceratonia siliqua L.) and Acacia (Acacia sp.). Dr. Miller considered other types but ultimately excluded willow (Salix), oak (Quercus), elm (Ulmus) and sycamore fig (Ficus sycomorus) due to either the presence or absence of certain features.

In an attempt to further narrow down the possibilities, I cut thin sections from the sample that Dr. Miller examined, from the cross-section and tangential surfaces, and wet-mounted them on glass slides. Looking at these thin sections with our polarizing light microscope (PLM), I was able to see some of these features a bit more clearly.

Cross-section, 50X magnification

Cross-section, 50X magnification

In the cross-section above, the pores are visible as solitary or paired, and mostly uniseriate (1-cell wide) rays are visible. The tangential section also shows mostly uniseriate rays, but some bi-seriate rays are visible as well.

Tangential section, 50X magnification

Tangential section, 50X magnification

Cutting these sections from the wood sample, which was quite degraded, was difficult and unfortunately I’m not really able to pick out many other features from the sections that I examined. I will have to get Dr. Miller to weigh in on this again, but in the meantime, I’m going to go out on a limb and say that I’m leaning toward this wood being acacia. One thing I forgot to mention is that the wood of the coffin board fragments is a deep red-brown color. Acacia is known for being a red, hard, and durable wood, and while it produces small timbers, we know that it was used for coffin-making, among other things.

Treating fragments of a Middle Kingdom painted wooden coffin

If you’ve visited the lab in the last few weeks you may have seen me, head bent at the binocular microscope, working away on fragments of a painted wooden coffin from Abydos. These fragments (7 in total) were excavated in 1901 and have been here at the museum ever since. As I described in a previous post, these boards were severely damaged by termites prior to excavation, and the painted surface, while very well-preserved in some areas, was cracked, flaking, and barely attached in places, not to mention covered with grime.

One of the coffin fragments, which features a portion of a frieze of objects that includes two vessels with spouts and a bolt of clothing.

A before treatment photograph of one of the coffin fragments, which features a portion of a frieze of objects that includes two vessels with spouts and a bolt of clothing.

On the board in the image above, the paint was actually in decent condition. After cleaning the surface with bits of a kneaded rubber eraser, I stabilized the edges around the paint losses with a 2% solution of methyl cellulose in water. With the help of an intern, we sorted through a box of much smaller fragments that presumably had become detached from the 7 larger boards at some point, and we found two small fragments of wood with painted decoration which belonged to this board. These fragments were adhered in place with a 1:1 mixture of 5% methyl cellulose and Jade 403, an ethylene vinyl acetate emulsion.

E12505emends

In this image the red arrows point out the two fragments which were adhered in place after cleaning and consolidation.

Here is a view of that area from the back after mending those fragments:

e12505e_backbeforemendingThe termite damage is evident from the back, and as you can see, the wood is very thin in this area in particular, only about 1mm thick along the join edges between the small fragments and the larger board. The small loss to the right of the upper fragment is an area where the wood and painted surface have been lost completely.

Because the wood is so thin and fragile, I decided to provide some support to this area, by first adhering a piece of Japanese tissue paper over the loss from the back with a 5% solution of methyl cellulose.

e12505e_backmend

A detail of the Japanese tissue paper support adhered over the loss

I then filled the loss and the small gaps along the join edges of that upper fragment from the front, using a fill mixture made from 5% methyl cellulose, glass microballoons, and powdered pigment.

e12505edetail

A detail shot showing the fill from the front

Here is an overall view of the board, after treatment:

E12505Edt02_blogThe fill mixture I used worked nicely, and I’m now using it to stabilize the edges of some of the lifting paint on the other coffin board fragments where the painted surface is in worse condition. I will post photos soon showing what the coffin boards look like before and after treatment.


Fragmentary painted coffin from Abydos

If you are a member of the museum, you may have already seen some information about these painted coffin board fragments in the most recent issue of Expedition magazine:

E12505_2These fragments, which date to the Middle Kingdom (ca. 2000-1700 BCE), were excavated from the North Cemetery of Abydos in 1901 by John Garstang. The museum supported Garstang’s work through the Egypt Exploration Fund.

Despite the severe insect damage, the preservation of the painted details on these fragments is remarkable.

This fragment features 3 usekh collars, which were often reserved for nobility. Beside each collar is a mankhet, or counterpoise. The hieroglyphs above are the names of each of the collars, which are slightly different.

This fragment features 3 usekh collars, which were often reserved for nobility. Beside each collar is a mankhet, or counterpoise. The hieroglyphs above are the names of each of the collars, which are slightly different.

A detail of the usekh en nebti, the collar of the two mistresses that incorporates the uraeus and the vulture

A detail of the usekh en nebti, the collar of the two mistresses that incorporates the uraeus
and the vulture (7.5x magnification)

These coffin board fragments have never been exhibited, and our renewed interest in them is due to the fact that we are currently excavating tombs from the same time period in South Abydos, including the funerary complex of Senwosret III. You can read a lot more about this project in the recent Expedition issue and on the museum blog by following this link.

In order to exhibit the coffin fragments, they need some extensive conservation treatment. Their surfaces are dirty, the paint is cracked, cupped and lifting from the wood support, and is very fragile, and some of the boards are structurally unstable due to the extensive insect damage.

We are currently working on these boards in the lab, and we have made some good progress. We are cleaning the painted surfaces with a kneaded rubber eraser. The eraser can be shaped to a fine point, and working under the binocular microscope, it is possible to remove the dirt from most of the painted surface without disturbing the fragile paint.

We are using kneaded erasers (left) to clean the delicate painted surface of these coffin boards (right)

We are using kneaded erasers (left) to clean the delicate painted surface of these coffin boards (right)

Some areas of paint need to be stabilized before they can be cleaned. After testing a variety of adhesive solutions, I settled on my old friend methyl cellulose, a 2% solution of methyl cellulose in water to be exact, to consolidate fragile areas.

Paint consolidation is being carried out under the microscope with a fine brush

Paint consolidation is being carried out under the microscope with a fine brush

I am now working on testing some fill materials, both to stabilize the edges of lifting paint and also to stabilize the fragile wood. I will post an update as soon as I make some decisions and proceed with this part of the treatment!


Wrapping up the cat mummy

Speaking of Abydos, let’s get back to our cat mummy, which was excavated from a cemetery there back in 1901-02. Our summer intern Anna O’Neill will describe how she carried out the conservation treatment on this very fragile object:

Hello again.  You may remember that last time I wrote about this cat mummy, I got a little distracted.  But this time I’d like to focus on the treatment process.  Many of our mummies are in remarkably good condition, with wrappings that are stable and that can withstand handling (albeit with care).  Not so with this cat.

cat mummy 1When plant-based fibers age, the cellulose that gives them structure decays and the fibers become brittle.  Badly aged linen can fall apart at the lightest touch, leaving loose fragments and powder on the surface of the object.  The linen on top of this cat mummy was torn and obscured by dust, but the real problem was underneath.  Prior to treatment, Molly and I carefully turned the mummy a little so we could see below—and quickly (but gently) put it back!  As you can see in the image below, the layers of linen were falling apart and the threads that had criss-crossed the layers were broken and hanging off.

cat mummy 2We decided to wrap the mummy in nylon netting, which would hold everything in place while keeping the surface visible.  This would be a non-invasive, completely reversible process that would allow the mummy to be safely handled and studied.

Before wrapping, I gave the mummy a light surface cleaning with a variable-speed HEPA-filtered vacuum.  Using a nozzle attachment fitted with a screen, I carefully removed the powder on the top of the mummy.  The linen—though torn—was still soft and flexible, like modern fabric.

cat mummy 3Then, I toned the netting to match the color of the mummy using acrylic paint.  Once the paint was dry, I positioned the netting across the top of the mummy and pinned it in place.  The flip was simple but nerve-wracking—we knew from our quick peek earlier that the underside was in bad shape, but we didn’t know to what extent.  With Molly’s help, I turned the mummy over so that all of the powder, torn linen and broken threads were now on top.

cat mummy 4Since the thick layer of compressed linen powder completely obscured the wrappings below, I again vacuumed the mummy, using a screen to filter out the powder while keeping everything else in place.  A vacuum may seem like an odd conservation tool (I got some weird looks as I hoovered the cat), but with the filter over the nozzle and variable suction control, there’s no danger of sucking up the entire object.

cat mummy 5

The underside of the mummy after cleaning. It may not look like much, but it’s better!

With the underside of the cat finally visible, I sewed the netting up the middle using a flat-felled seam.  As the name implies, this created a neat seam with a flat profile.

cat mummy 6

Overall view of the underside of the cat mummy (after treatment)

Overall view of the top of the cat mummy (after treatment)

Overall view of the top of the cat mummy (after treatment)

Now that the linen wrappings are encapsulated, the little cat mummy can be handled and studied, and it can (hopefully) be x-radiographed this fall.  It still may not have its head, but at least it won’t be losing any more of itself any time soon.


A final report from Abydos

Back in June, we provided an update from the Penn excavations at the mortuary complex of Pharaoh Senwosret III in Abydos. The team has since returned from the field, and graduate student Kevin Cahail generously passed along some photos showing what the project looked like as they were wrapping up in the field. Just as a reminder, the project has concentrated on three principal areas: (1) the subterranean tomb of pharaoh Senwosret III; (2) the mortuary temple and associated structures dedicated to the cult of Senwosret III; and (3) the urban remains of the Middle Kingdom town at South Abydos. You can read a bit more about the project in our first post.

After excavations are complete, the team documents the site by setting up a huge wooden ladder in the middle of the desert, climbing up it, standing at the top, and taking photos. Kevin mentioned that its a great view, but that he did have to put quite a bit of trust into his Egyptian compatriots to hold the ladder steady.

01 Site Photo MethodAnd this is what the view looks like – here is a shot of part of the Cemetery S excavations of 2013:

02 Cemetery SThe mound in the background is mastaba S10 of the Late Middle Kingdom. Three tombs are visible from left to right, CS.8, CS.4, and CS.5. These three tombs date to the New Kingdom.

Following their excavations in the town site of Wah-sut, grad students Paul Verhelst and Shelby Justl are seen here drawing brick plans of the exposed architecture:

03 Paul and Shelby  drawingIn the background the workers begin the process of backfilling the excavated areas.

This shot shows the excavations in the Temple Cemetery, Tomb TC.19:

04 TC19 excavationThis one-room vaulted tomb with a rectangular entrance shaft had been looted in the months before the team arrived in 2013. Despite this, they did recover a fragment from a yellow-type coffin showing the lower portion of some standing gods:

05 TC19 Coffin fragand a wooden coffin hand applique with painted rings:

06 TC19 Coffin handThe last tomb they excavated was TC.20, a tomb which the team discovered belonged to a Scribe by the name of Horemheb.

07 TC20 OverviewTo the left is an overview of the tomb showing a heavy-walled entrance shaft, an antechamber, and in the foreground, the burial chamber.

A third vaulted chamber to the right below the sand remains unexcavated.  The team plans to tackle this next season.


To give you a sense of the size of this tomb, here is a photo of Joe Wegner taking a photo of Kevin from inside TC.20.  Kevin is standing in the entrance shaft, and Joe is in the burial chamber:

08 Joe in TC20And here is a final group photo of the excavation team standing on the recently completed cover building over the tomb of Senwosret III:

09 Final Group PhotoIt was a busy field season and the team intends to return this winter, conditions permitting. We will continue to provide updates on this blog as their project progresses!


Update from Abydos

Update – this post contains outdated language. We no longer use the term “mummy” and instead use “mummified human individuals” to refer to Ancient Egyptian people whose bodies were preserved for the afterlife. To read more about this decision, follow this link.

A few weeks ago I wrote about Penn Museum Curator Joe Wegner and his team who are currently excavating in Abydos at the mortuary complex of Pharaoh Senwosret III. Recently the team has been battling exceedingly high temperatures and consistent loss of power (so no internet and water) but despite all of this, graduate student Kevin Cahail has been kind enough to continue sending me photos and information about their latest discoveries.

Many visitors to the Artifact Lab ask if mummies are still being discovered in Egypt. The answer is yes, and now I can point to the recent discovery of a mummy just outside of one of the tombs that was recently excavated.

View of the burial chamber from tomb CS.5

View of the burial chamber from tomb CS.5

The shot above was taken after excavation of a tomb (named CS.5) – this is actually the same tomb that contained the curious bricks with the dots in them that I included images of in my last post. Excavation of this tomb revealed that the burial had been long-since removed, but soon after excavation, a skull, and then the rest of a body, was found in the sand nearby. It appears that she(?) was at some point thrown out of her tomb by robbers.

Removing and transporting unexpected or unwieldy archaeological finds often requires a bit of resourcefulness. In order to move this mummy into a box for transport back to the dig house, Kevin recovered an old laundry detergent sack, which they then slid under the mummy, and used as a sling to lift the mummy into a box.

Reconstruction of the skull of this mummy is now underway.

In addition to the field work, the team also spends time in the lab, which sometimes includes minor conservation work. This shabti figure was found in two pieces:

shabtiKevin used Acryloid B-72, an acrylic adhesive commonly used in conservation for repairing ceramics (among many other things) to re-adhere the fragments:

Kevin holding the recently repaired shabti figure

Kevin holding the recently repaired shabti figure

As you can see, Joe, Kevin, and the rest of the team have been busy, and they only have about another week left in the field. As I hear more from them during their last days in Abydos, I will follow up with further information.