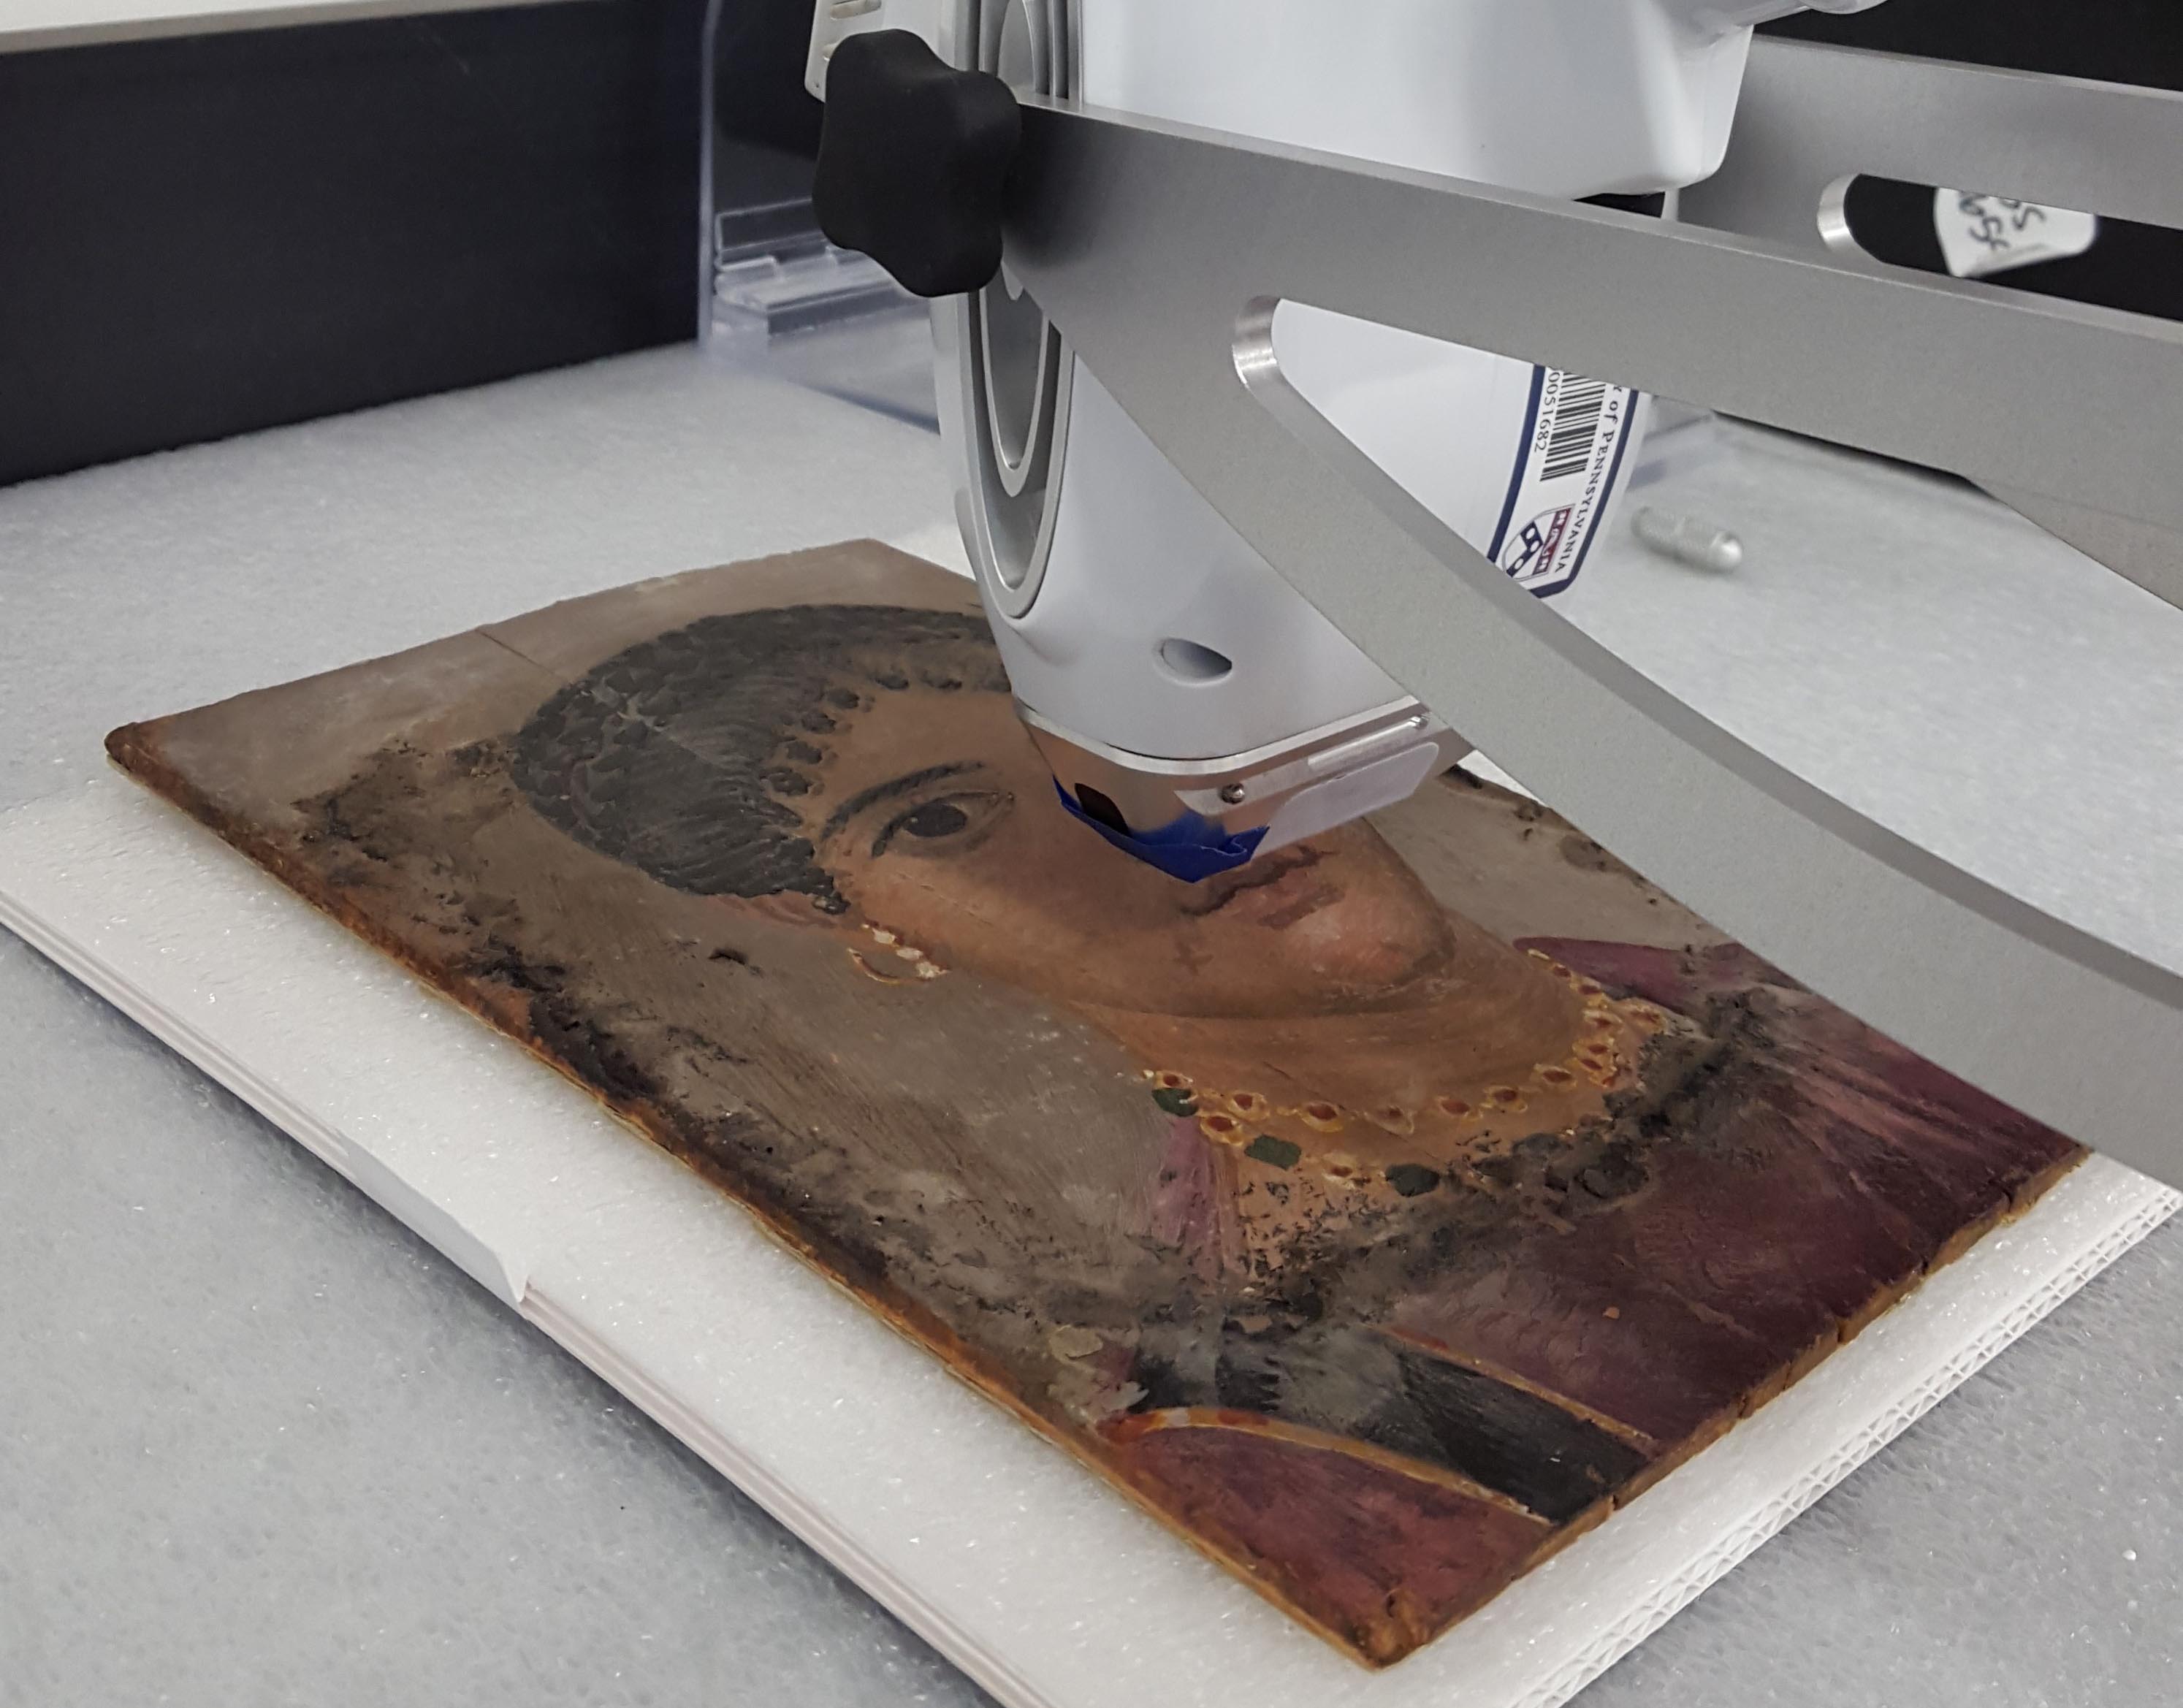
Equipment choices for Visible Induced Infrared Luminescence

by Tessa de Alarcon

Since we have posted often about visible induced infrared luminescence (VIL) and the equipment we use at the Penn Museum, we on occasion get emails from other conservators and museum professionals asking about what equipment to buy and the costs associated with this photographic technique. This technique is often used for imaging Egyptian blue, but it can also be used for Han blue and Han purple. Much of the same equipment is also used for infrared reflectance.

E1827A-E multimodal data set including a visible image (left) and infrared reflectance image (center) and a visible induced infrared luminescence image (right).

Making specific equipment recommendations though are tough because there are a lot of options and a lot depends on your budget. Basically though, what you need are the right lights, a camera (and lens), and a long pass filter for the camera to capture in the infrared. I thought I’d do some testing to show how some these different elements impact the results in the hopes that it might help others figure out budgets, and to show that it’s also possible to build this equipment up piece meal, starting with equipment you might already have or is very low cost. Some elements though are pricey and things can add up.

All of the VIL images in this blog post also have a Spectralon standard in them (99% infrared reflectance standard). This is not low cost, and not required for the technique. It is often required for publication, and is useful for trouble shooting or developing new techniques. I’m mentioning this because it is useful to evaluate the data presented here, but it isn’t something that is strictly required. We did not have one for a long time, but were able to do this type of imaging. We waited as it was a big investment for us (approx. $500). These standards also range in price depending on the size and calibration.

An infrared (IR) filter is a requirement for this technique. I only tested one IR filter (though we have two). They range in cost depending on where you get it and the quality of the filer and the size of the filter. Ours is a B+W and is an 830nm IR long pass filter and is 62mm ($130). There are cheaper ones available as well as more expensive ones too. We got ours to fit our macro lens, and have adaptor rings (all our rings are generic brand low cost ones that were each under $10) to fit it onto other lenses that we have.

The right lights are a critical factor for this technique, but not necessarily one that has be high cost. You need a bright light with no infrared radiation, red lights are commonly used and LED bulbs are preferred as they produce no infrared radiation. I tested out three different lights for visible induced infrared luminesce. These include at the high end of the budget a Mega 64 Profile Plus RGB + UV Par light at maximum intensity with the red LEDs on only. This is a roughly $200 light. The other lights I tested are both low cost options. I tested one FEIT electric one red LED light bulb I put in one of our extra reflectors and photo light stands. I bought this bulb for $6 from my local hardware store, and a two daylight LED bulbs (UL certified) that I got from our facilities department to replace burnt out bulbs on our copy stand. I used both bulbs in the regular copy stand set up for imaging. I don’t know what the bulbs I got from facilities cost, but there are no brand name stamps on them so I’m guessing they weren’t expensive, that UL logo on it just means that it is a UL certified bulb.

The Mega 64 profile plus (left), a daylight LED bulb (center), and a red LED bulb (right)

I tried both our full spectrum modified camera, and our regular digital SLR (unmodified). Neither of these is an inexpensive camera, but should show generally the difference between using what ever digital camera you already have, and getting a similar cost one as a modified camera. Neither is new, we use our cameras until they can’t be repaired. The unmodified camera is a Nikon DSLR D5100 and the modified camera is a Nikon DSLR D5200. We bought our modified camera new, and sent it to Life Pixel to remove the internal filter, but they now sell used cameras that they will modify for you (there are options). Ours was modified to be a full spectrum camera. At the time of writing this post, the most economical option I saw on life pixel for a used camera with this modification package cost a total of $449. So even used not cheap. But lets get to the testing and start looking at results.

Lets get to the results from the modified camera. I have a visible reference image in the set, and the VIL images using each of the different lights. All the lights worked, but the brighter MEGA par 64 gave the best results, especially at exciting traces of Egyptian blue. Though the daylight no-name brand LED bulbs were not bad. These have a range of camera settings, and the benefit of the modified camera is that I could see the results in live view, focus the image and adjust the settings with minimal bracketing. The spectralon should not be visible, and if it is usually means that the image capture settings are not quiet right.

Modified Camera results: visible reference image (top left), VIL image with the MEGA 64 LED lights (top right), VIL image with the no-name daylight LED bulbs (bottom left), and VIL image with the RED LED bulb (bottom right).

Next up, the unmodified camera. The images are arranged in order of the lights used the same way as for the modified camera for easy comparison. So I did get results with all of the lights. The down side is that the live view shows nothing so the focus can’t be corrected. These images are all slightly out of focus because the focus in IR is different from the focus when capturing in the visible range and I focused the image before putting on the IR filter. All of them had to be taken at the longest possible exposure of 30 seconds. This made data collection easy since I had no choice in settings. And for the low costs bulbs it looked like they were just black with no data until I got them in adobe camera raw and converted them to grey scale by adjusting the saturation to -100. Then I could see something, but I did also adjust the exposure for the images you see here. You can see the spectralon and the background in all of the images and interpretation might be harder with these than the images taken with the modified camera. I will say I think this could be used for detecting Egyptian blue, but it’s important to note that the unmodified camera only got the thick areas of Egyptian blue, and didn’t have the sensitivity to pick up the traces visible in the images taken by the modified camera.

Unmodified Camera results: visible reference image (top left), VIL image with the MEGA 64 LED lights (top right), VIL image with the no-name daylight LED bulbs (bottom left), and VIL image with the RED LED bulb (bottom right).

For fun, I also tried putting the IR filter over my cell phone and using the MEGA par lights took a photo. This is just to show that even a small sensor like what is in a cell phone camera can work. It is out of focus though and like with the unmodified Nikon DSLR you aren’t getting traces of Egyptian blue. But it did show something, and I could see the results in the live view. This is also an avenue that I know others are working on: producing low cost modified cell phone cameras with built in filter wheels. Sean Billups has presented at AIC on this topic.

Cellphone VIL image: unprocessed and shown as shot with an 830nm IR long pass filter over a an unmodified cellphone camera

To wrap things up, I think it is possible to build this equipment up overtime. You can start with the camera you already have for documentation, and then get better lights and a camera as you can afford them. The IR filter can also be used for IR reflectance, this is also possible with any digital camera with a long exposure and using any light that produces infrared radiation. There is much less difference in data quality between a modified full spectrum camera and an unmodified camera for this method, though again there is no live view and sharp focus is hard to do with an unmodified camera. We use incandescent photo floods (real bright and toasty) but any light that gets warm probably produces infrared radiation and could be used. Daylight for example works real well too (and is free).

Infrared reflectance images (left) and infrared reflectance false color images (right). The modified full spectrum camera was used for the images on the top and the unmodified camera was used for the images on the bottom.

The Desalination Station II: The Salty Pot Field Diaries

by Tessa de Alarcon

So I have written before about desalination to stabilize ceramics with soluble salts, but this time I’m going out into the world, and setting up a desalination station for the Naxcivan Archaeological Project in Azerbaijan.

I had been given a heads up from colleagues Brittany Dolph Dinneen (the previous conservator on site) and Jennifer Swerida (project registrar), that soluble salts may be an issue with the ceramics from the project’s excavations. Salts can be tricky to identify with freshly excavated material, as the ceramic vessels won’t have visible issues until a while after their excavation; once the salts from the burial environment have had time to go through a few cycles of crystallization and deliquescence.

Before treatment image of QQ.15.155: the white haze is from soluble salts

Here at on the Naxcivan Archaeological project, the salts are mostly manifesting as a white haze over the surface of ceramics.

Detail of QQ-15-193 showing small salt crystals, rather than just hazing, on the surface.

A few are also showing clear crystallization, but the hazing has been the more frequent symptom of the salt problem, especially as this hazing was not observed when they were first excavated.

Detail of QQ-15-155: the poultice in place.

To confirm that what we were seeing was in fact soluble salts, I poultice the surface.

Detail of QQ-15-155: after the poultice was removed

Once the cotton poultice was dry, I removed it from the surface, re-wet and checked the conductivity, and tested it for nitrates and chlorides with test strips (there are lots of other types of soluble salts, but these are two common ones that are easy to test for). The results were positive, and as you can see the poultice also removed the white haze clearly showing how soluble these salts are.

Here Calypso Owen and I are filtering water from the sink with a deionizing column to get salt free water.

The next step is getting the water, and while we used to use a similar system at the museum to make deionized water, the scenery is pretty different.

Salty ceramics soaking in deionized water: the tags outside the buckets are being used to help track the objects during treatment.

The pot then soaked for a day, while I checked the conductivity until it reached the end point of the desalination process.

Desalinated ceramics after they are removed from the water and are now drying: again the tags are moving with the objects so we can track them.

Once it was removed from the water I rinsed it with fresh clean water, blotted it dry, then left it to air dry.

QQ.15.155 after treatment: white haze free!

Finally, here is the bowl after desalination. As you can see it is now white haze free. Most importantly, it can now be handed over to the Naxcivan Museum with no risk of damage from ongoing salt cycles.

View from the current excavation: Azerbaijan is beautiful

As a final note, it has not been all work, I did get to hike up to the current excavation and I wanted to end on this photo taken from the site, as Azerbaijan is stunning, and I can’t resist the opportunity to share.

When is cleaning coins not like cleaning coins?

Alexis North, Williams Project Conservator


This sounds like a joke that only archaeological conservators would enjoy, but it’s actually an honest question! The answer is (in this case at least), when those coins are reused in other objects.

Before treatment photo of 42-35-370.

This necklace comes from Coban, Guatemala. It is made from black glass roundelle beads, interspersed with 144 coins from Guatemala, Mexico, and Spain. It was collected in the early 20th century, but the coins all date to before 1900.

photos of the obverse and reverse of a Guatemalan 50 cent coin, 1870; a Mexican 2 Reales coin (date illegible); and a Spanish 2 Reales coin, 1835.

There are also a number of other beads and charms, including two crosses, two round silver beads, and a black faceted stone charm in a silver bezel. The necklace is in good condition, and the only treatment it needs is a nice overall cleaning.

This necklace is being prepared for display in our new Mexico and Central America gallery, along with this necklace, also made from coins:

Before treatment photo of 42-35-41.

The pendant on this necklace is made from a large 1 Sol coin, dated 1892, surrounded by 8 small 1/4 Real coins, all from Guatemala. On top of the 1 Sol are two small deer, and suspended below are 2 quetzal birds, and a cross.

Coins are important in Guatemalan culture. These necklaces would have been symbols of wealth, and be passed down from mother to daughter within a family. Even today, when a couple decides to get married, the groom will often give the bride a gift of 13 coins in a small box, called an arras.

Come see these pieces when they go on display in our new gallery!

Hidden in plain sight

I like to think that even though the Artifact Lab is essentially a fish bowl, when we are in here we are often hiding in plain sight. People in our department have been known to come up to the Artifact Lab to work on treatments because they are less likely to be interrupted up here. That sounds strange, I know, but it’s true. And sometimes our visitors don’t even think that WE are real, so we can kind of operate under the radar even when people are looking right at us. This is not the case all of the time, of course, and we do get plenty of visitors who tap on the glass and try to talk to us even when our backs are turned and we have earbuds in.

Aside from the people working in the lab, I think that there are a lot of things that go unnoticed too. Now, there are some things that people ask about all the time, like, “what is that Chock full o’Nuts can for?” and “what is in that jar?”.

These are pretty normal accessories in conservation labs, but of course most people would be puzzled by them at first. (The coffee can has been re-purposed as a sharps container, for disposal of old scalpel blades for example, and the jam jar is being used for disposal of cotton swab tips.)

Then there are things that go unnoticed but are arguably more fascinating, and puzzling. For example, we have never been asked, “why do you have an autopsy table in the lab?”. We probably have never been asked this because I would imagine that most people do not know an autopsy table when they see one. Our department inherited this table many years ago and when we opened the Artifact Lab in 2012 it somehow seemed appropriate to bring it up here (but really, we are NOT autopsying or unwrapping mummies, I swear). We have used the table on a daily basis, both for supporting mummies and large (people-sized) artifacts for treatment, and for prepping materials for re-housing artifacts.

Tawahibre’s coffin on the autopsy table during pXRF analysis. Link to original post here.

Unfortunately, it is not the most useful table, because it has a lip around the edge, the table surface is slightly inclined, and there is a hole on one end for the drain. But we made it work for us for over 4 years!

The autopsy table

The Artifact Lab has been closed to the public since December 31 and in the meantime we have been working away in here, but we are gearing up to reopen on April 8. When we reopen there will be some changes to both the lab space and the exhibition space. The most noticeable changes for visitors will be some new objects on exhibit, new graphics and text panels, and some other nice additions which I’ll write about in an upcoming post. But the change that we are feeling slightly sad about is that we are getting rid of the autopsy table. It has served us well but it just isn’t functional for our purposes anymore. And since many of you may not have noticed the table before, I didn’t want it to go away without mentioning it here.

We are hoping to find a good home for the table. Who might want an old autopsy table, you might ask? Well, this exists, so anything is possible. And actually, we can think of a lot of people who might like it.

Stay tuned to hear more about the other changes to the Artifact Lab, and what we’ve been doing in the meantime.

A Complete View and a Complete Treatment: Conservation of the Roman Period Mummy Mask

Update – this post contains outdated language. We no longer use the term “mummy” and instead use “mummified human individuals” to refer to Ancient Egyptian people whose bodies were preserved for the afterlife. To read more about this decision, follow this link.   

After using humidification and four extra hands, the mask is now unfolded! This complete view of the object provides us a wonderful opportunity to look at the materials used in construction and allowed treatment to finally move forward.

Before jumping into treatment, I had the opportunity to perform Multispectral Imaging (MSI) on the mask, allowing us to analyze some of the pigments non-destructively and with great results.

E2462. From left to right: Visible light, Ultraviolet illumination, Visible induced IR luminescence

E2462.
From left to right: Visible light, Ultraviolet illumination, Visible induced IR luminescence

Under ultraviolet illumination, a bright pink fluorescence was visible (middle), indicating the use of a madder lake pigment in the cheeks and to accentuate the face and hands. I also used visible induced IR luminescence to pinpoint the use of Egyptian Blue pigment in the crown, jewelry, and green leaves (right, Egyptian Blue highlighted in pink). This is a material commonly found in Roman period Egyptian artifacts.

In addition to finding out some of the materials used, I also completed full documentation of the object. Although some of the surface is still intact, the paint layer is in poor condition with areas of flaking and powdering. There is also a large loss to the textile along with some smaller tears and holes.

E2462 During treatment detail of flaking paint

E2462 During treatment detail of flaking paint

As my first order of business, the paint needed to be stabilized. This paint, like many other Egyptian painted surfaces, is sensitive to water and adhesives can cause staining and darkening. This meant a lot of testing was required to find the perfect adhesive for the job.

Using both testing panels and small, discrete areas of the surface, I tested adhesives until I found funori, a seaweed-based polysaccharide. This material preserved the matte and light tones of both the paint and ground layers.

Amaris Sturm, summer intern, consolidating surface of E2462

Amaris Sturm, summer intern, consolidating surface of E2462

As treatments usually go, you sometimes get unexpected bumps along the way. As I was consolidating I discovered that the flesh tones in the face and hands were significantly more sensitive to the water-based adhesive. I quickly had to rethink my approach, ultimately using a methyl cellulose in 50:50 ethanol: water for the hands, face, and larger flakes in the yellow framing the face.

Once consolidation was complete, I moved on to the next hurdle: the molded mud plaster mask. A large gap is present between the fragmented mud plaster crown and the textile below. To support the plaster and its mends, I made a removable fill of carved Volara foam and Japanese tissue, all toned with Golden acrylic paints to make the supports more discrete.

Removable fills to support the heavy mud plaster crown in E2462

Removable fills to support the heavy mud plaster crown in E2462

Fragmented, actively shifting, and detached mud plaster was mended with a 40% AYAT in acetone applied by brush and syringe. Unstable and weightbearing cracks and gaps were filled with a 25% AYAT in acetone that was bulked with microballoons and toned with dry pigments. Fill material was applied with syringed, shaped with a brush and wooden skewer, and  smoothed with a little bit of acetone. A thin toning layer of acrylic paint was applied to fills to make them a warmer tone, but still distinguishable from original material.

Filling compromised gaps on E2462

Filling compromised gaps on E2462

And with that, the treatment is complete! The mask is now stable and will be returned to storage safe and sound.

E2462 Before treatment (left) and After treatment (left)

E2462 Before treatment (left) and after treatment (right)

  • Amaris Sturm is a second-year graduate student in the Winterthur/ University of Delaware Program in Art Conservation. She recently completed her summer internship in the Penn Museum’s conservation labs.

New Mask in the Lab

Update – this post contains outdated language. We no longer use the term “mummy” and instead use “mummified human individuals” to refer to Ancient Egyptian people whose bodies were preserved for the afterlife. To read more about this decision, follow this link.   

Amaris Sturm is a second-year graduate student in the Winterthur/ University of Delaware Program in Art Conservation. She is currently completing a summer internship in the Penn Museum’s conservation labs.

I’m excited to introduce a new addition to the objects in the Artifact Lab! This Roman period Egyptian mummy mask and shroud, likely from 220 – 250 AD and excavated from Deir el-Bahri in the late 19th century, will be one of my primary treatment projects during my summer at the Penn Museum.

E2462- Overall before treatment

E2462- Overall before treatment

Meant to be placed over the upper body of a mummy, this mask is constructed of multiple pieces of coarsely woven linen sewn into a long shroud.  At the top of the shroud is a hollow, molded mud plaster mask in the form of a man’s face with a jeweled crown. The entire front surface has a white ground with colorful painted decoration. Additionally, gilding is present on fragments of the crown.

Sadly, the mask was folded at some point in its history, obscuring most of the linen shroud. Although there are no records of the complete decorated surface and little is known about the history of the mask in our collection, other similar examples from Deir el-Bahri give great insight into what may be hidden beneath the folds.

Comparable mask in the Louvre collection

Comparable mask from the Louvre collection

Comparable examples, including this mask from the Louvre, show the continuation of the man’s white tunic with a goblet in one hand and a plant stem in the other. A lower register is likely present containing Sokar, a falcon-headed god, on a boat and flanked by two jackals. One jackal is visible on an exposed corner of the Penn Museum’s mask.

E2462- Crown before treatment

E2462- Molded mud plaster crown before treatment

Apart from being folded, the mask has other condition issues that will be treated over the course of my summer internship. The textile support of the crown has sagged, causing the mud plaster to break and crumble. Additionally, the exposed painted surface is flaking and the linen fabric has started to tear and unravel.

I hope to start treatment in this coming week and unfold the shroud, allowing us to better understand the construction, decoration, and condition of this mummy mask. Check back to see what it revealed and for more on the mask’s treatment!

Sources:

Panel Portrait of a Man. Louvre Museum. Accessed June 25, 2016. http://www.louvre.fr/en/oeuvre-notices/panel-portrait-man

Riggs, C. 2000. Roman Period Mummy Masks from Deir el-Bahri. From The Journal of Egyptian Archaeology, 86. Egypt Exploration Society. 121-144.

APPEAR Project – Portable X-Ray Fluorescence on the Fayum Mummy Portraits

Hi! This is Eve Mayberger with another update on the Ancient Panel Painting: Examination, Analysis, and Research (APPEAR) project (see earlier posts here and here). I recently investigated the pigments used on the three Fayum mummy portraits with the portable x-ray fluorescence (pXRF). While the pXRF results for all three portraits are interesting, I am going to briefly discuss the findings for the Portrait of a Woman (E16214).

E16214bt1_crop_pXRF_locations_web

APPEAR Project, Portrait of a Woman (E16214); Annotation of pXRF test locations

One of the major advantages of pXRF is that it is a non-destructive technique that uses x-rays to identify specific elements. The technique can help to characterize pigments and metal alloy components. It is important to remember that pXRF is a surface technique and will only detect elements present on the surface. I decided to analyze the seven different colors used on the mummy portrait to determine if there are any elemental differences.

20151216_150556_web

Collecting data with the Brucker pXRF

All the test locations recorded prominent peaks for calcium (Ca), iron (Fe), and lead (Pb). Although there is some variation in peak heights across the test spots, it is important to remember that pXRF is a qualitative not a quantitative technique. See below for a representative spectrum for six out of the seven analyzed locations.

E16214_pxrf_sample2_crop

APPEAR Project, Portrait of a Woman (E16214); Spectrum for sample #2 – forehead; Peaks detected for Ca, Fe, and Pb

The green used to paint the gemstones on the woman’s necklace has an additional peak for copper (Cu). This is not surprising as many greens have a copper component. In ancient Egypt, the greens were generally made with malachite or green earths, or from a mixture of blue and yellow pigments. While malachite is a copper-based compound, more analysis is needed to confidently identify the green pigment used for the gemstones.

E16214_pxrf_sample5_crop_edit

APPEAR Project, Portrait of a Woman (E16214); Spectrum for sample #5 – gemstone on necklace; Peaks detected for Ca, Fe, Pb, and Cu

It should be noted that not all pigments can be identified with pXRF alone. Some organic pigments, such as madder, cannot be detected with pXRF. In addition to using analytical instrumentation, it is also important to know what colorants are expected on specific artifacts to help limit the number of possible pigments.

Be sure to visit the blog in the upcoming weeks to read more about the APPEAR project!

Eve Mayberger, Curriculum Intern

Initial treatment of the wooden boat model

Alexis North is the Project Conservator for the Egyptian Storage Move Project, Penn Museum.

Since my first post, I have been working steadily on stabilizing the painted wooden boat model. For a bit more background, this boat model was excavated from Sedment, a cemetery site about 100km south of Cairo.

sedment - Google Maps

Map of Egypt showing the location of Sedment and other cities. Source: Google Maps

A number of First Intermediate Period (2250 – 2061 BCE) tombs were uncovered, including that of Khentkhety, a middle-aged man who was buried in a shaft tomb with a separate burial chamber that was bricked up after interment. Sir Flinders Petrie, the archaeologist who excavated at Sedment, described Khentkhety’s tomb as “the finest burial that we found,” (Petrie and Brunton 1924, 11) even though it had been robbed in antiquity. His mummy was placed in a rectangular wooden coffin, similar in style to the coffin of Ahanahkt. According to Petrie, the wood of the coffin was so damaged by termites that it could not be moved. A detailed colored drawing was made as a record of the interior decoration, which was elaborate:

Khentkhety-coffinSMALL

Colored drawing of the interior of Khentkhety’s coffin, depicting offerings to the deceased. Source: Petrie and Brunton 1924

Several wooden models were also removed from Khentkhety’s tomb, including two boats, a granary, and several human figures. The boat model I am currently treating, which represents a sailing boat, was found on the ground outside the burial chamber, where it had been either moved or dropped by the tomb robbers.

To return to the present day, the first and most obvious issue which needed to be addressed for this model was the actively lifting and flaking paint. In order to determine the best materials and procedure to follow, I and some of my fellow conservators performed spot tests with water, solvents, and adhesives. This involves applying a very small amount of each material to an inconspicuous area of the object to be treated, and watching for any reaction, like darkening or staining. Luckily, the surface of the boat model did not react negatively to any of the materials tested, and I was able to move on to treatment.

I began by consolidating the paint on the exterior sides of the boat. I wanted to stabilize the sides first because it was very difficult to handle or move the boat at all when so much of the exterior paint was so fragile. For each lifted area, I started by applying a drop of ethanol, which cuts the surface tension and allows the consolidant to flow more easily underneath the lifting paint. Then I used a very small brush to apply 1% Methylcellulose in deionized water. The water in the adhesive helped to relax the lifted paint, and after a few minutes I could gently push the area down until it made contact with the wood underneath. It is a bit difficult to see in photographs, but the consolidation has worked really well so far in relaxing and readhering the paint:

14260_1-beforeafter3

Before (top) and after (bottom) consolidating the areas of lifting paint.

I am also keeping a detailed record of where I am applying the consolidant. Documentation is an important part of conservation treatment, so future examiners know what is original and what has been added to the object over time. These records can also alert a conservator to any additional changes in the object’s condition.

An annotated image showing all the spots I consolidated, what material I used, and where I performed spot tests.

An annotated image showing all the spots I consolidated, what material I used, and where I performed spot tests.

In working closely on the exterior surface, I have seen several areas where it appears a resin or surface coating was applied. I do not know right now whether this is ancient or modern material, but that is something we may be able to find out in the future using different analytical techniques. What I can see now is that these areas show preferential damage, where the applied material has shrunk and become brittle, pulling the paint away from the wood beneath it.

underneathbackSMALL

Image of the bottom of the back of the boat. The green areas indicate where the applied resin has run down the bottom, and there is now preferential loss to the paint in those areas.

If the material is modern, I may decide to try and remove it before it can cause further paint loss. If it is an ancient application, however, we want to preserve it as part of the object’s construction. The areas will be documented carefully, and monitored for future changes.

I have now finished the sides of the boat, and am moving on to the top, where some of the most significant flaking is. I will be back with another post soon to show the progress!


Sources:

Horne, Lee. Introduction to the Collections of the University Museum. Philadelphia: University Museum, University of Pennsylvania, 1985.

Petrie, W.M.F. and Brunton, G. Sedment. British School of Archaeology in Egypt Publications, v.34/35, 1924.

http://www.ucl.ac.uk/museums-static/digitalegypt//sedment/index.html


What is under the paraffin ?

Egyptian wooden statue of Ka-Aper, also named  the Sheikh-el-beled, from the Vth Dynasty, decorated with inlaid eyes.

Egyptian wooden statue of Ka-Aper, also named
the Sheikh-el-beled, from the Vth Dynasty,
decorated with inlaid eyes.

Quite a while ago, we dealt with the treatment chosen for the two Egyptian wooden heads and now it’s time to talk about its results. Let’s focus on the cleaning of the surface: the goal was to remove the paraffin that certainly masked other remains of the painted layer.

First of all, we have to talk about the notion of original surface and original level.

> The original surface is composed of the original materials, before they were buried and underwent an alteration process. Concerning the heads, it corresponds to the paint layer they were decorated with.

> The original level is a layer of altered material that took the place of the original material but remained at the same level as the original surface. A good way to understand this is to think about a fossil: it is no longer the original animal, insect or plant made of flesh, bones, shell that it used to be…but you can still identify its shape since it was precisely petrified by another material. That’s what we can call the original level of an object surface.

Nouvelle image (2)It was necessary to define what the original level was on the heads, so as to know how deep the cleaning could go. It had to keep its meaning regarding the object itself. The paint layer was a good clue since these colored patches were all that remained from the original surface. As far as we could see, the rest of the surface was more or less corresponding to the original level. Indeed, there was no important gap between the painted areas and the present surface.

Sans titre - 1

Original surface and original level near the wig of E17911, x7.5 magnification.

Another issue with paraffin was to think about how much of it we wanted to remove. Indeed, this sticky layer seemed to be what was holding the elements of the current surface together. That was especially true about the painted areas. Concerning the wood, we could only suppose that the paraffin had penetrated inside on a few millimeters only (thanks to a few articles that were published and gave estimations of paraffin migration inside archaeological wood) since we had no way to obtain an accurate estimation of this. Therefore, we didn’t want to remove it completely from the wood because it could threaten its stability and cause the wood to crumble.

That’s why the cleaning began with the known rather than with the unknown: the painted areas were cleaned from the paraffin that covered them. Thus, we could see their real extent. However, the pigments remain stuck in a thin paraffin layer but their legibility was improved, as you can see on these pictures:

Pictures of E17911’s right cheek before and after cleaning, x7.5.

Pictures of E17911’s right cheek before and after cleaning, x7.5 magnification

Nouvelle image (15)

Pictures of E17910’s chin before and after cleaning, x7.5 magnification.

E17910’s right eye, before and after cleaning.

E17910’s right eye, before and after cleaning.

Then began the exploration of the unknown side of the heads, meaning the rest of the surface, where the presence of areas of paint was only a supposition.

This part of the work was really the longest since we couldn’t know what to expect under the paraffin and sediment layer. Some days, only a centimeter square could be cleaned ! Cleaning was carried out using a binocular microscope, in order to see precisely what happened under the scalpel blade and to be able to stop whenever it was necessary.

We found some new paint areas, generally rather small, sometimes buried under a rather important depth of sediment.

Example of two new painted areas on E17911, on the wig (on the left) and next to the right ear (on the right).

Example of two new painted areas on E17911, on the wig (on the left) and next to the right ear (on the right).

The biggest surprise happened with E17910 :

E17910 before and after treatment: a wig is now visible.

E17910 before and after treatment: a wig is now visible.

Close-up on the wig on the right part of E17910.

Close-up on the wig on the right part of E17910.

E17910’s face before and after, with other remains of a wig.

E17910’s face before and after, with other remains of a wig.

The cleaning allowed us to reveal a wig on the right side of E17910 and some other elements belonging to it on the face. We now know more details about the heads and they are almost able to be studied.

See you at our next post to learn more about the remaining steps of this treatment.

The jar is gone !

Example of an Egyptian jar, complete (XVIIIth Dynasty).

Example of an Egyptian jar, complete (XVIIIth Dynasty).

After making some fills on the Egyptian demotic jar, two other steps remained to complete the treatment.

First: painting the fills. The goal is to tone the fills with a color matching the general shade of the ceramic, so as it doesn’t catch your eye when you’re looking at it from a few feet away. It has to be clearly distinguishable if you get a closer look.

Here is the result:

Untitled-2 Let’s have a closer view:

Untitled-3

Untitled-4

View of the 4 areas of the jar that were filled and toned.

Second step: making a storage box. The basic rules about storage-making are quite simple. The materials used to make the storage must be chemically neutral towards the object and their ageing must not threaten its condition. For example, some materials can deteriorate in a short-term time period and cause chemical reactions with the artifact they are supposed to protect, causing alterations.  That’s why conservators use materials that were approved by testing them, like submitting them to specific temperature or humidity settings. More details about storage materials can be found following this link.

To prevent this situation from happening, acid-free paper and cardboard, polyethylene foam and fabric, and other well-known conditioning materials are preferred.

Then, each object being different, the storage needs to be adapted to its needs (size, weight, material sensitivity…) but also to the room available in the storeroom itself ! Concerning the jar, it was about allowing its safe and easy handling and preventing it from rolling.  According to its weight, the cardboard used had to be quite strong.

Left: the box has a front side that opens and a small compartment (on the right) to store fragments that couldn't be glued to the jar.   On the right: The box with the front side closed.

Left: the box has a front side that opens and a small compartment (on the right) to store fragments that couldn’t be glued to the jar.
Right: The box with the front side closed.

The mount, so as the jar can safely be pulled out of the box.

The mount, so as the jar can safely be pulled out of the box.

Left: the jar in its new storage box... Right: ...ready to go back to the Egyptian storeroom.

Left: the jar in its new storage box…
Right: …ready to go back to the Egyptian storeroom.

Here ends the conservation treatment of the jar; it was brought back to the storerooms last week. But we still have new projects in the Lab !