Caring For Culture: Introducing Teens to Museum Conservation

By Lu Denegre

All photos by Emily Hirshorn

On June 4th, 2022, with the help of funding from the Museum Council of Greater Philadelphia, the Conservation and Learning Programs departments hosted “Caring for Culture”, a hands-on introduction to conservation for teens. We had a great time and got some good feedback, and look forward to welcoming another group of teens this year on June 3rd 2023!

(If you’re a teen in the Philly area, you can register here for this year’s workshop)

Last year, 24 students arrived at the museum for a day of activities. The workshop began with introductions and a presentation by Senior Project Conservator Molly Gleeson about the basics of museum conservation. What kind of work does it involve? Why do we do it and what can damage cultural heritage collections?  

Molly Gleeson addresses Caring For Culture Participants in Widener Auditorium, and a diagram of the Agents of Deterioration (from A Guide to Risk Management of Cultural Heritage (p. 27), ICCROM, 2016).

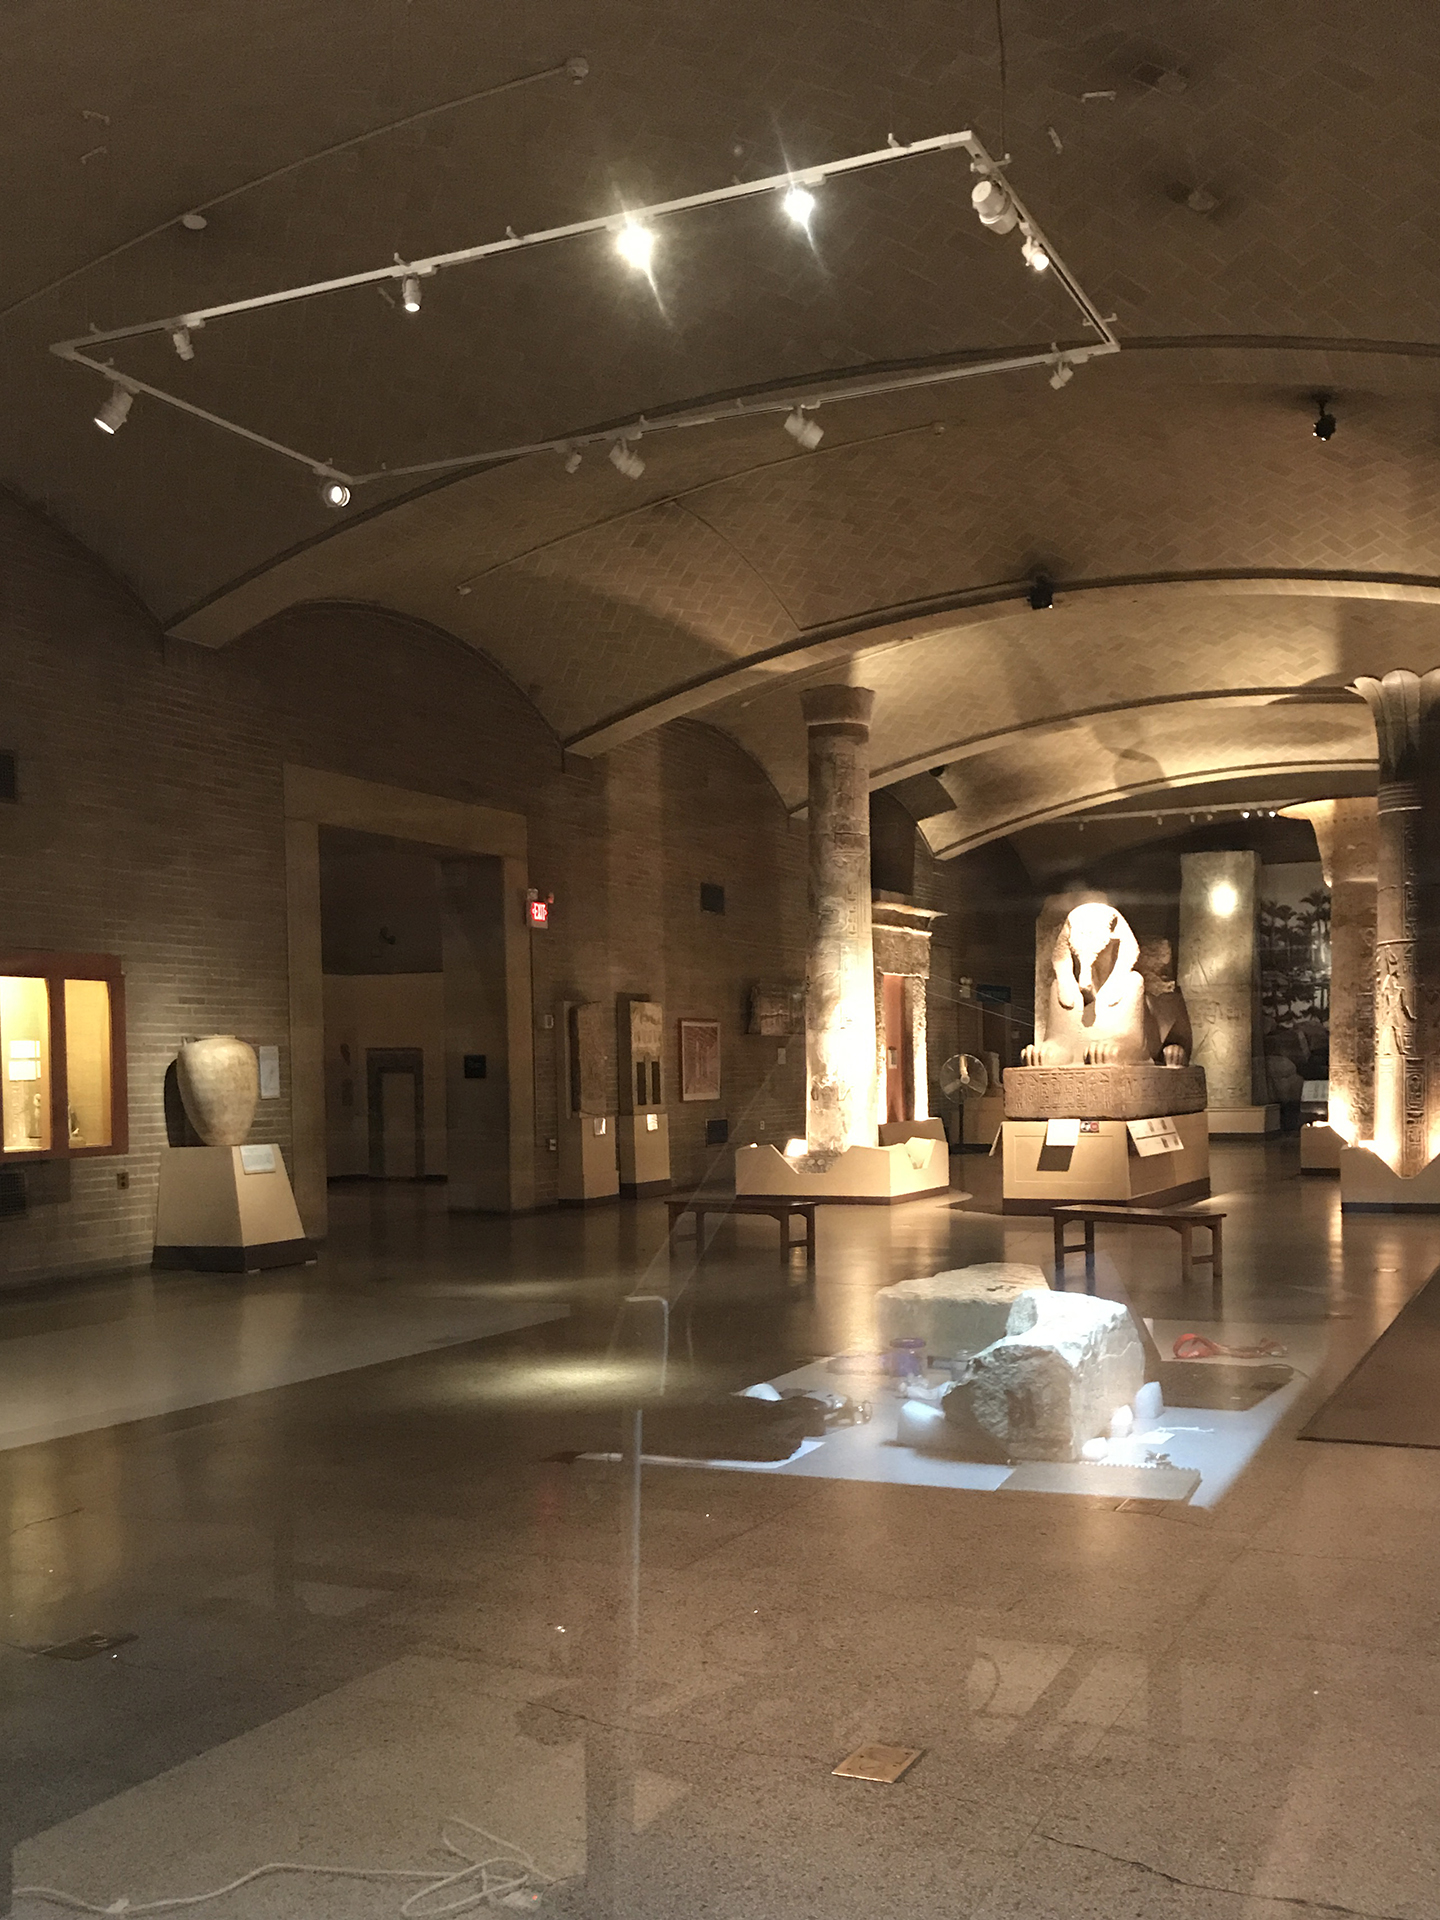
Next, participants were led in smaller groups on a tour of the Museum’s conservation lab spaces by Head Conservator Lynn Grant. They got to see the X-Ray room, the photo studio, prep room, and main lab. Lynn and Graduate Intern Nylah Byrd spoke about the different treatments a large wall painting, a cartonnage mask, and a stone sculpture have undergone. These objects will be included in the upcoming reinstallation of the Ancient Egypt and Nubia Galleries and have collectively required different types of imaging, storage mounts, cleaning, and structural and aesthetic fills. 

Lynn Grant leads a tour of the conservation lab
Nylah Byrd talks about the treatment of a cartonnage mask

For rest of the morning, the groups were led into the galleries by a member of the conservation department to do some documentation of their own. Each participant chose an object in the galleries to condition report and diagram. Condition reporting is one of the first things you learn as a conservator and is the first important step in assessing an object’s needs before starting treatment. This activity offered opportunities to look for real life examples of condition issues, agents of deterioration, preventative conservation steps, and mountmaking.

Participants observing a strategy for a large fill on an object in the Middle East Gallery
Completing condition report worksheets for an object chosen in the galleries

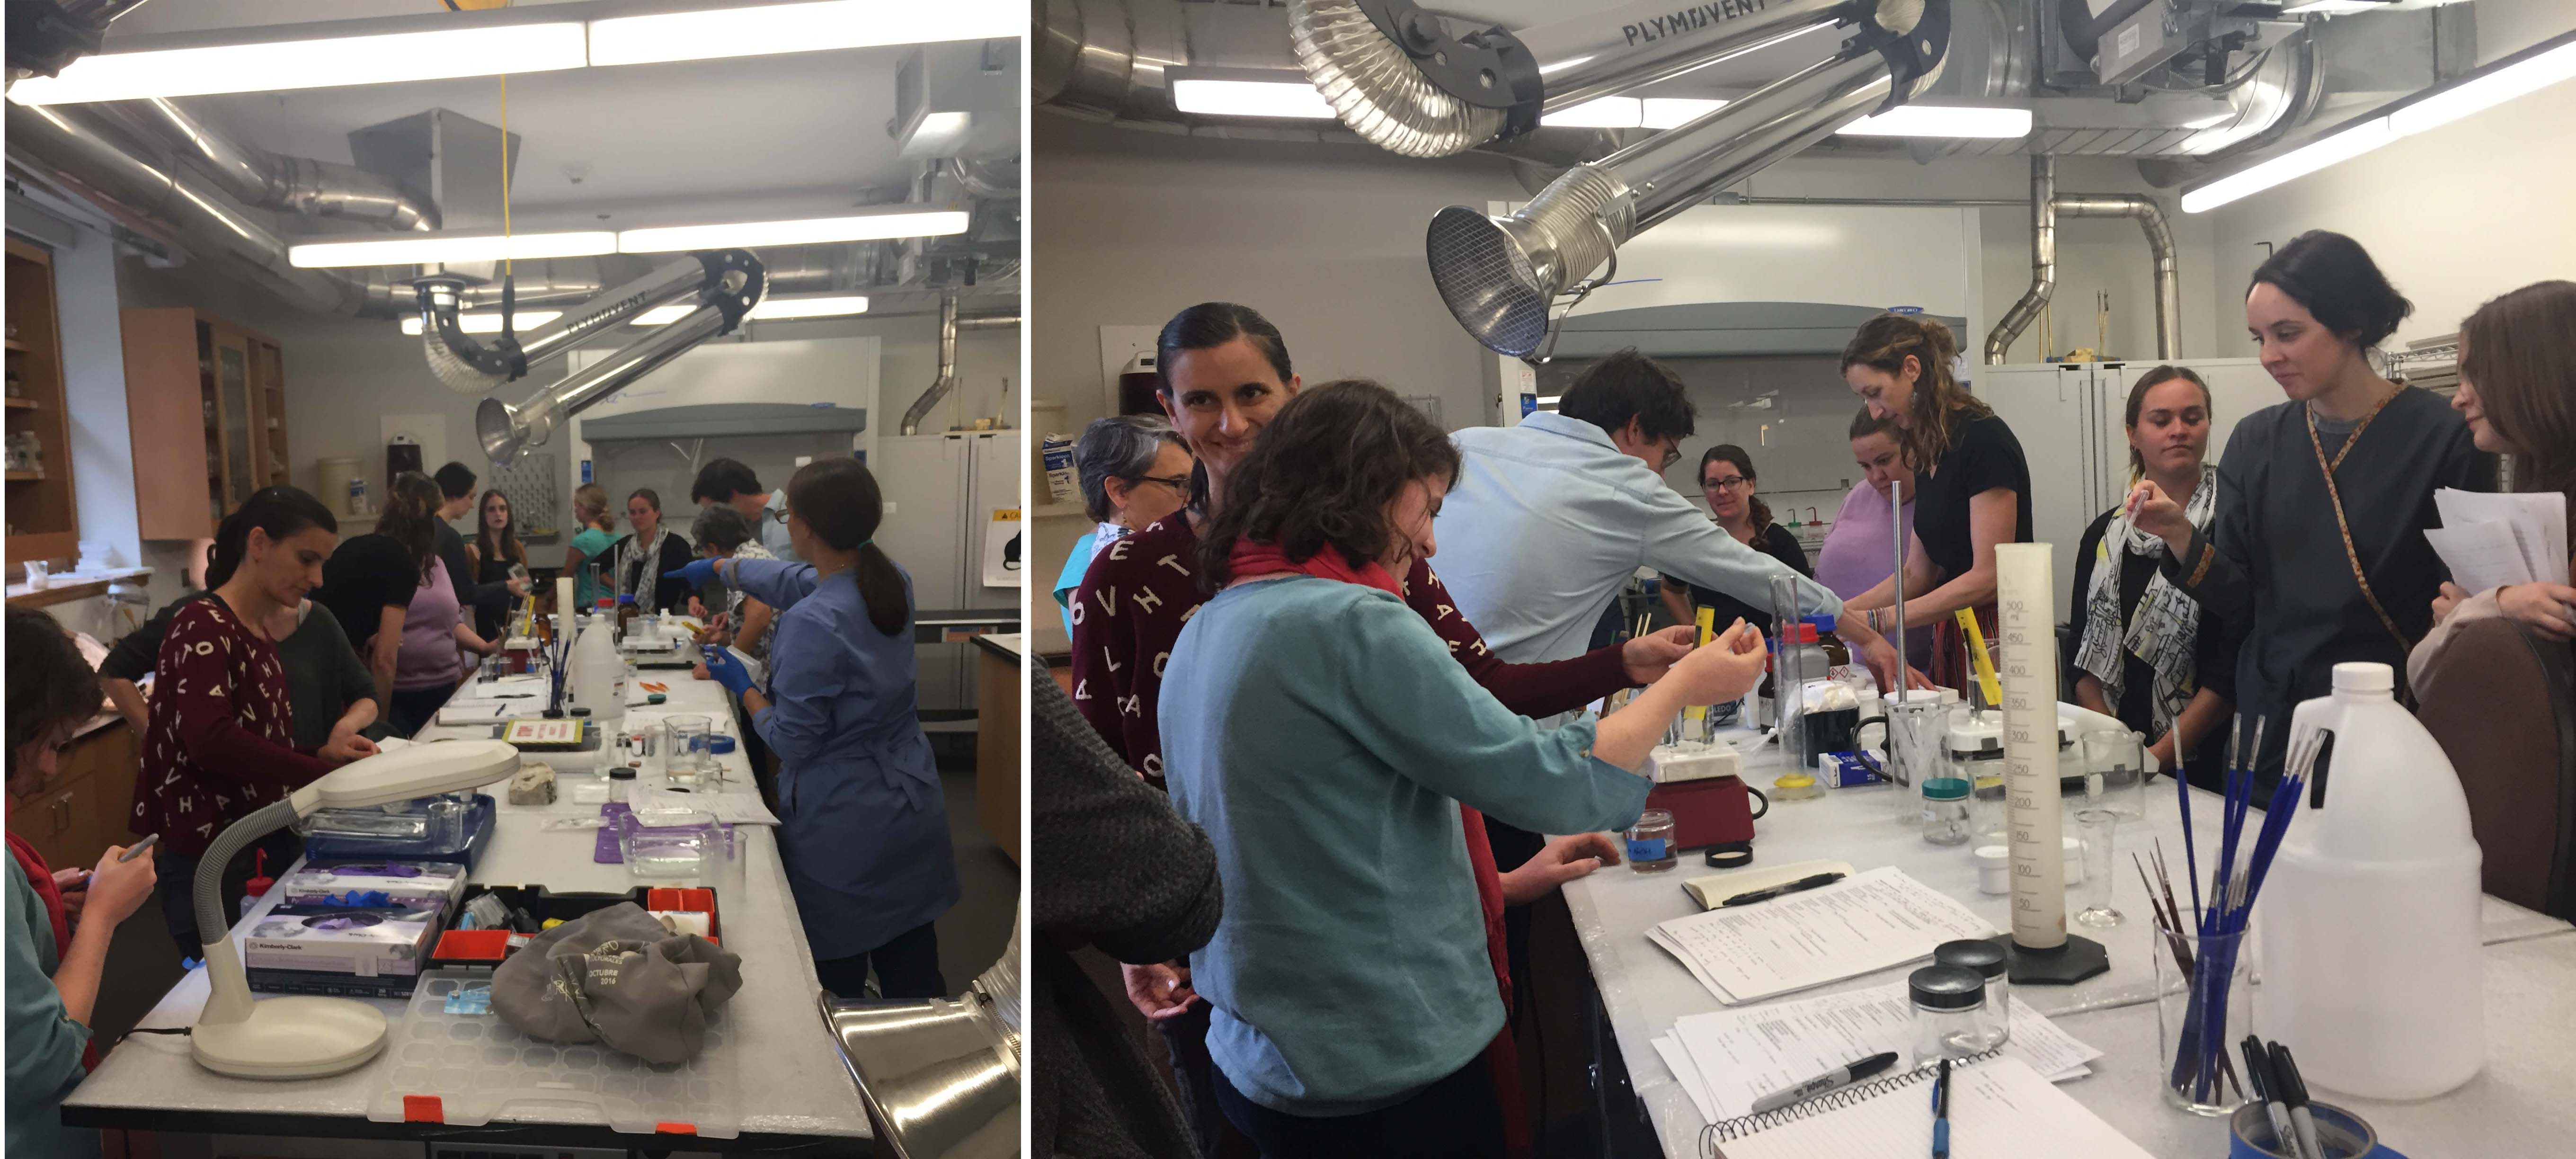
After a sunny lunch in the Warden Garden, participants came back in for some hands-on activities. Groups rotated between three stations: cleaning, close looking, and ceramic reassembly. These stations introduced some of the beginning skills needed by a conservator in training. 

At the cleaning station, teens learned to roll their own cotton swabs to gently remove grime from the surface of a dirty tile. They also applied warm agar gel to learn how we loosen up and remove grime without using too much water on more sensitive objects or more stubborn dirt. 

A participant swab cleans a dirty tile

At the close looking station, teens used a Dino-lite digital microscope to get up close and personal with some study objects. A UV light setup showed that the way materials fluoresce differently under Ultra-Violet light can help identify unknown substances. 

Conservator Julia Commander guides participants through using a Dino-lite microscope

At the ceramic reassembly station, teams worked to puzzle out the correct location of sherds and reconstruct a ceramic object. Small sandboxes, blue tape, and clamps to hold everything in place are essential tools for gluing a ceramic back together. 

If students tried their hand at each table and still had time to spare, there were also individual activities on color matching and inpainting prepared for some down time. 

We were happy to see such enthusiastic attendance of this program last year and hope we get to meet some more future conservators at the workshop next month! If you or someone you know would like to participate, you can find more info and register here for this year’s workshop!

Eyes are the Window to the Soul, Or So They Say

By Tessa de Alarcon

Typically, at the Penn Museum when we are working on objects, even for display, we prioritize stability over aesthetics. This means that we are often do less cosmetic work than would be done at an art museum when it comes to putting in fills and toning out areas of loss. However, I recently undertook a project where I went further than I usually do to recreate lost material. This blog post is going to walk through why that decision was made in this case as well as some of the mysteries that I found along the way

E1019 Before treatment. At this point the object was being tracked as E17632

The object in this case is an Egyptian cartonnage mask E1019. When it entered the lab it had a lot of condition issues, including the top of the head was partially crushed, it had been heavily treated before, and it was missing the inlays for its eyes and eyebrows. The missing eye inlays had been giving many visitors to the lab the creeps as the mask appeared to have dark empty eye sockets. Because of this, from the start I had been polling to my colleagues about what level of repair I should do to reduce the distraction of the missing inlays. I was not at this point considering replacing them, but was instead thinking about maybe toning out some of the other losses on the cheek to draw less attention to the eyes.

E1019 before treatment, a detail of the face and eyes.

When it first entered the lab the mask was being tracked as E17632 but over the course of the treatment, I found a different accession number on the interior, E1019. With the help of our curators, we were able to piece together that E1019 was the original accession number, and E17632 had been assigned to it later. When I looked up the record for E1019 in the museum collection database, I found the record included two eye inlays! I was so hopeful that this would mean that I could reintegrate two inlays, one into each eye. However, when I reached out to the curators to get more information, I found out that they are two parts of the same eye, the white part of the eye and a pupil/iris.

Eye inlays E1019.1, and E1019.2 before treatment

Well, this left a new set of problems. Especially since you can see here, the white part of the eye was not very white anymore since it was covered with a dark brown substance. I was left with a lot of options, leave the eye inlays out, reintegrate them as they are, or clean them and reintegrate them, and if I reintegrated them should I then also create a replica set for the other eye?

Before making any decisions, I checked to see if they inlays fit the eye sockets in the mask, which they did. The inlays turned out to be for the masks right eye. After that, I spent some time characterizing the dark coating on the white part of the eye inlay. This included UV examination and comparing how the coating fluoresced with the brown modern materials I found on the interior of the mask from previous treatments. The results were not as clear cut as I was hoping. It seems that there is more than one brown substance on the inlay based on the UV examination. With this data in hand, I reached out again to the curators with the options of leaving the eyes out, reintegrating them as is, or cleaning and reintegrating. The curators indicated that they wanted the inlay reintegrated, and that they would like a replica for the missing inlay as well so that she looked even as one eye seemed worse than no eyes. Together we decided to clean the eye inlay, but to keep samples of the substances on the inlay for future analysis.

E1019.1 white part of the eye inlay in visible light (top) and under 368nm UV radiation (bottom). The rectangular material is a piece of acidic board with brown residues on it that had been used on the interior of the mask as part of a modern restoration. The fluorescence on the front of the eye inlay under UV is similar though not as bright as the modern brown residues but the back of the eye the brown residues do not fluoresce.

Once clean, I set about making a copy for the masks left eye to be a close but not identical match. Based on previous experience I decided to make the new inlay set out of a two-part light weight epoxy called Wood Epox as it is easy to shape and can be sanded and carved. To start, I made a paper template of the shape of each inlay. I made sure to mark what I wanted to be the front of each so that the shape would be a mirror image of the original inlay. The white inlay is slightly curved, so I also created a form that would have the same curvature using foam.

The inlay, E1019.1 after cleaning (left), the paper template of the inlays (center) and the foam support mimicking the curvature of the inlay with the inlay in place during a test fit (right).

Next, I rolled out some sheets of wood epox, and using the paper template trimmed out the shape I needed for both parts of the eye. The pupil/iris part I let set flat, what let the one fore the white of the eye set in the form I had made so that it would have the same curvature as the original. Once cured I sanded them to finish, with the final stages being wet sanding so that the replica inlays would also have a natural gloss.

The inlays replicas curing with the white part in the curved support (left) and the original inlays (E1019.1, and E1019.2) laid out above the shaped and sanded replicas (right)

The final step before assembly and placement in the mask was the paint them to resemble but not exactly match the originals. I used gloss medium for the pupil/iris as this inlay was especially glossy and I could not get that level of gloss with polishing and painting alone.

The original inlays (E1019.1 and E1019.2) laid out above the replicas after the replicas have been toned to be similar thought not identical to the originals

Finally, here you can see the end results after treatment. You will see though, that I have not attempted to recreate the inlays for the eyebrows. Because we had the one set of eye inlays, I had something to reference for making the replica set of inlays, however, there are still pieces missing which I had no frame of reference for. There were also likely inlays that went around the outside of the eye as well. These and the brows might have been made out of a variety of materials and without the originals for reference, there is no way to be certain about what their color and appearance would have been.

E1019 after treatment. The original inlays are in the masks right eye and the replicas are in the masks left eye.

Laser training for our monumental projects team

Our department has owned a Compact Phoenix Nd:YAG laser for several years now and we have successfully used it to clean objects like this trio of birds for our Middle East Galleries. While there are a lot of possible applications, we have found the laser to be especially effective for cleaning stone objects with coatings, stains, and surface grime that are not easily removed using other tried and true cleaning methods including solvents, steam, and gels.

Did somebody say “stone objects with coatings, stains, and surface grime”? Because we have tons of those (literally) in our Conservation Lab Annex (CLA) where we are working on monumental projects for the Ancient Egypt and Nubia Galleries. But the last time we held a laser training session was before we hired our CLA team. Lasers are not found in all conservation labs, so it is not unusual for experienced conservators to have little to no experience with lasers.

A small Egyptian limestone stela mid-treatment. Many cleaning tests were carried out on this piece with very little success in removing some of the grime and stains. It is a good candidate for some laser cleaning tests.

In order to ensure a safe set-up and to get everyone trained on the equipment, we brought in Philadelphia-based conservator Adam Jenkins to provide the team with a full day of training. Adam specializes in laser cleaning and also conducted our last training session at the Museum in 2017.

Adam demonstrating use of the laser

After a classroom session covering the fundamentals and science of lasers, and the necessary safety protocols and PPE, we moved to the lab to try the laser on a few objects. We had success with several, which is very promising! The team is now set up to continue laser testing and cleaning on their own. We are grateful to Adam for his expertise and support and for this professional development opportunity. We are excited to incorporate this tool into the work out at CLA!

CLA conservation technician Kyle Norris testing the laser on an Egyptian stela

Monumental but gentle

by Anna O’Neill, Julia Commander, and Jessica Betz Abel

Hello from the Penn Museum Conservation Lab Annex (CLA)! Since Lynn’s introduction, we’ve had a little bit of time to settle into our new, off-site facility and get started on some seriously big projects. Our primary task here is working on architectural elements that were part of the palace of the Pharaoh Merenptah, who ruled Egypt from Memphis from 1213–1203 BCE. We have doorways, windows, and other objects from the palace which will be displayed in the new Ancient Egypt & Nubia Galleries to give visitors the experience of being in an ancient Egyptian building. But first, we have to put them together!

The warehouse section of CLA, with pallets of fragments from the Merenptah palace complex.

We have four doorways that will go into the galleries, all of which are very large and in many pieces. They are made of limestone and intricately carved, with traces of inlay and paint. Our first project is Doorway 1, which will be about 12 feet tall once it’s all together. It’s never been displayed before, but it was partially treated in the past. Some fragments are joined together with adhesive and metal pins, and we can tell that some of the decorated surfaces were coated with a consolidant. The fragments are also very dark and dirty from almost 100 years in storage.

Doorway 1 is in thirteen major pieces, which were all on different pallets when they were moved to CLA. With a little bit of effort and a lot of maneuvering with pallet jacks, we grouped the fragments together. It was very satisfying to figure out how all the pieces fit together and form a door!

Doorway 1 coming together on pallets in the lab section of CLA.

Since we’re using Doorway 1 as our pilot project to figure out how we’ll treat the rest of the palace objects, we’ve spent a lot of time testing different conservation approaches. Since the doorway is discolored with dirt and one or more old coatings, we’ve been experimenting with gel cleaning and found two methods that work well for what we need – hot agar and Nanorestore gels® Peggy. We’ve talked about using other kinds of gel before.

Agar is a product of red seaweed and contains a polysaccharide called agarose. When it’s dissolved in water and heated, agarose forms long molecular chains – that means that when it sets, agar becomes a rigid gel that can be peeled up as a sheet without leaving problematic residues behind. The long agarose chains create pockets that hold solvents on the surface of the object, allowing them to work on grime or coatings without soaking in too deeply. You can add different cleaning solutions to agar, but plain deionized water gave us the results we wanted. We dissolved agar in deionized water and heated it in the microwave to form the solution, then poured it directly onto the surface of the stone and allowed it to cool. Applying it as a liquid means that the gel conforms well to the irregularities in the object and lets us get into all the nooks and crannies.

Action shots showing the application of agar to the surface of Doorway 1.

The Peggy 6 gel is made of poly (vinyl acetate) and comes as a thin polymer sheet. It feels a little like the gummy hands you can stick on windows – stretchy and flexible but strong. Like agar, the Peggy gel can be used with different cleaning solutions but we stuck with deionized water. The gel is laid on the surface of the stone to let the water do its work on the grime. Because the Peggy is a stretchy sheet, it can skim right over delicate carvings that might contain pigment. Another advantage of the Peggy gel is that it’s reusable – we just rinse it out in deionized water and use it again.

The Peggy 6 gel in action.

To clean Doorway 1 we used a combination of the agar and Peggy gels. Both gels soften the dirt and coating, and often looks pretty grimy when they’re peeled up. Once the gel is removed, the stone is wiped with cotton and more deionized water to remove even more dirt. We were pretty pleased with the difference between the cleaned and dirty surfaces, and using the gels meant that the process was much more efficient and gentler on the stone than using swabs.

Other parts of the treatment include reversing old repairs (or deciding when to leave them be), assembling fragments, and figuring out how to display the doorway in the gallery. We’ll check back in later with more monumental updates!

When is cleaning coins not like cleaning coins?

Alexis North, Williams Project Conservator


This sounds like a joke that only archaeological conservators would enjoy, but it’s actually an honest question! The answer is (in this case at least), when those coins are reused in other objects.

Before treatment photo of 42-35-370.

This necklace comes from Coban, Guatemala. It is made from black glass roundelle beads, interspersed with 144 coins from Guatemala, Mexico, and Spain. It was collected in the early 20th century, but the coins all date to before 1900.

photos of the obverse and reverse of a Guatemalan 50 cent coin, 1870; a Mexican 2 Reales coin (date illegible); and a Spanish 2 Reales coin, 1835.

There are also a number of other beads and charms, including two crosses, two round silver beads, and a black faceted stone charm in a silver bezel. The necklace is in good condition, and the only treatment it needs is a nice overall cleaning.

This necklace is being prepared for display in our new Mexico and Central America gallery, along with this necklace, also made from coins:

Before treatment photo of 42-35-41.

The pendant on this necklace is made from a large 1 Sol coin, dated 1892, surrounded by 8 small 1/4 Real coins, all from Guatemala. On top of the 1 Sol are two small deer, and suspended below are 2 quetzal birds, and a cross.

Coins are important in Guatemalan culture. These necklaces would have been symbols of wealth, and be passed down from mother to daughter within a family. Even today, when a couple decides to get married, the groom will often give the bride a gift of 13 coins in a small box, called an arras.

Come see these pieces when they go on display in our new gallery!

Kaipure Catch Up

by Anna O’Neill

Hello again from the “Other Artifact Lab”! It’s been a while since we’ve checked in here from Kaipure’s tomb chapel and a lot has changed in Lower Egypt since the summer. Since June, we have been working to clean and stabilize the painted limestone walls of the Old Kingdom (2415-2298 BCE) mud-brick mastaba tomb chapel for a high-ranking Egyptian official named Kaipure. In the winter of 2015-2016, conservators Emily Brown and Madeleine Neiman worked to disassemble the tomb chapel wall from its wooden 1920s support and performed triage treatments (read more about that here) to keep the blocks safe from vibrations caused by construction next door. This past spring marked the start of the current phase of the project: cleaning and stabilizing the blocks so they can be moved to off-site storage in 2018.

If you’ve been through the Lower Egypt (Sphinx) gallery recently, you may notice some new and familiar faces in the lab. While Céline Wachsmuth and I (Anna O’Neill) have been working on the wall since June, in September we were joined by a third project assistant, Jonathan Stevens. 

The view from our lab space, with two of the blocks reflected in the foreground. We may be biased, but we think we’ve got the coolest lab-mate around.

Between all of us it’s been a very busy fall! We’ve continued to clean and stabilize each individual block from the wall, becoming familiar with some different techniques for cleaning, consolidation, infilling, and documentation, as well as repair methods used by the ancient Egyptians (more on these later). Dr. David Silverman, Curator-in-Charge of the Egyptian Section, stopped by to tell us a little more about the history and imagery of the chapel. We’re also improving our proficiency in fork lift handling as we move the pallets supporting the very heavy stones. Just a few weeks ago, we reached a very important milestone – we officially passed the halfway point, with more than half of the 59 blocks stabilized for their move off-site next year.

A view inside the lab. The largest blocks (up to 700 pounds!) are housed on the red shelves along the back wall; the ones covered in tissue are cleaned, consolidated, and ready to move off-site.

If you find yourself in Lower Egypt any time soon, you are welcome to come watch us work in the lab and read more about the history of Kaipure’s tomb chapel (on our new, informative signage!). While we don’t have open window sessions downstairs, we do occasionally find ourselves in the main Artifact Lab and we’ll be happy to talk about our work then. We’ve got more Kaipure blog posts planned, so keep your eyes open for updates and insights.

The Kaipure Conservation Project is funded through a generous grant from the American Research Center in Egypt (ARCE) Antiquities Endowment Fund (AEF) which was established though a grant from the United States Agency for International Development (USAID).

Cleaning – it’s complicated

by Lynn Grant

Not that long ago, a museum colleague was heard to say “I suppose cleaning counts as conservation” in a doubtful voice. We conservators found this both appalling and amusing as cleaning is a huge part of what we do. And knowing when and how to clean is a big part of our education. Using the wrong methods can permanently damage an artifact. Those of us who finished our conservation training more than ten years ago mostly relied on the rule of thumb ‘try gentlest methods first’. But there have been rumblings in the field about better ways to do things, with terms like Modular Cleaning Systems and Gel Cleaning drifting by. Clearly this was something we needed to know more about.

Richard Wolbers (in blue polo shirt) demonstrates basics of cleaning gel production to Museum conservators and interns

Fortunately for us, one of the ‘rock stars’ of gel cleaning research, teaches nearby at the Winterthur/University of Delaware Program in Art Conservation. Richard Wolbers, who describes himself as a ‘Cultural Materials Engineer’ to reflect his interest in applying new ways of thinking about conservation issues, is Associate Professor at WUDPAC and has graciously lent us his expertise on specific projects previously (one example here). But now that we have so many conservators and interns working on different projects and with a major campaign to reinstall our Egyptian Galleries after 90 years about to start, we asked Richard to give us a two-day workshop on the basics of gel cleaning. This was an abbreviated version of week-long workshops he gives around the world but we certainly squeezed a lot of learning into two jam-packed days.

The conservators and interns get into gel (and emulsion) production!

Richard has basically turned much traditional conservation ‘wisdom’ on its head: looking deeply into the complex interactions among surfaces, dirt, and cleaning materials and using his observations to develop new approaches to cleaning. Even gels aren’t the new frontier anymore; custom made emulsions may allow conservators to use water and solvents in combination when the surface is easily damaged by them when used in liquid applications. Many of the techniques and materials that Richard uses come from the cosmetics and food industries. In fact, as we listened to his explanations, I kept thinking of the Molecular Gastronomy movement. Some of our new cleaning tools have as much relation to our old way of doing things as this does to your grandma’s chicken soup:

Chicken soup spheres (http://jordancaterers.blogspot.com/2013/07/chicken-soup-spheres.html)

It’s a brave new world for conservation cleaning….

A final look at Ptah-Sokar-Osiris

Julia Commander is a third-year graduate student in the Winterthur/University of Delaware Program in Art Conservation. She is currently completing a curriculum internship at the Penn Museum.

When we last checked in with the Ptah-Sokar-Osiris figure, I was working on finding a satisfactory cleaning approach. The figure has a darkened layer over the front surface, which obscures the beautiful patterns, colors, and hieroglyphs. My goal for cleaning was to clarify designs and improve legibility, although the sensitivity of the paint layers has made this an interesting challenge.

After cross-section analysis, I looked into instrumental techniques to better understand the condition issues. One promising technique was gas-chromatography mass-spectrometry (GC-MS) since the darkened layer was potentially a coating material. I took a sample by swabbing the dark layer from the wood substrate. Since only a small amount of material can be gathered this way, I collected several swabs in a glass vial for analysis. I sent this down to Winterthur Museum’s Scientific Research and Analysis Laboratory (SRAL), which has previously collaborated on samples from the Artifact Lab. Dr. Christian Petersen, a GC-MS specialist, sent back my spectra with some interesting results. He described the mixture as “waxy dirt,” which helps to clarify what likely happened to the surface. Wax may have been applied to consolidate the badly flaking paint, and this layer could have trapped dirt over time as the figure rested face-up in storage.

Focusing on the wax component did not immediately produce better cleaning results, and I continued testing gels with variations on solutions, application method, and timing. I eventually tried an application of Pemulen TR-2 gel, a polymeric emulsifier, with a proportion of solvent added. This gel was more effective for lifting the waxy grime and did not require excessive action on the surface. Used along with a silicone solvent barrier layer, I was able to lightly clean without lifting pigments from the surface. While I had some initial ideas about cleaning, this method was something that I only found through the process of trial and error.

L-55-29 detail, cleaning test

Even though I cleaned slowly in very small sections, the actual treatment step took much less time than the research, testing, and planning phases. Take a look at the results below.

L-55-29, before cleaning (left) and after cleaning (right)

Aside from cleaning, a few other steps were taken to stabilize the statue. The headdress, which is constructed from multiple pieces of wood, had a large gap that allowed the pieces to move individually. To add support and decrease movement, removable fills were made from Volara foam and Japanese tissue. These materials were turned into small “pillows” that were then pressure-fit into place.

L-55-29 headdress, shaping and fitting Volara foam fills

The figure, headdress, and base do not fit together in a stable arrangement. Instead of intervening further with the object itself, an exterior mount will be constructed to hold the components in place. This method has worked well with a similar Ptah-Sokar-Osiris figure, which you can see displayed in the Upper Egypt Gallery!

Another Ptah-Sokar-Osiris figure on display in Upper Egypt, showing the back of the figure and the mount holding the three pieces together.

Overall, this project provided quite a few challenges and an opportunity to explore cleaning techniques. Thanks for following along on this experience with Egyptian painted surfaces!

The treatment of (half of) a yellow coffin

This week, we finally finished the treatment of the lower half of our 21st/early 22nd Dynasty yellow coffin.

A view of the interior of the coffin before (left) and after (right) conservation treatment.

A view of the interior of the coffin before (left) and after (right) conservation treatment.

The treatment mostly involved cleaning the interior surfaces to remove dust using a soft brush and HEPA-filtered vacuum, and cosmetic sponges. Here’s another view to give you a better sense of just how much grime had accumulated in the interior of the coffin:

A detail of the head of the interior of the coffin before (left) and after (right) conservation treatment.

A detail of the head of the interior of the coffin before (left) and after (right) conservation treatment.

There was also a fair amount of flaking and lifting paint, which needed to be stabilized. We used 1-2% methylcellulose in 50:50 water/ethanol to consolidate flaking paint, and Japanese tissue paper and 5% methylcellulose to fill gaps.

In the course of the treatment, I have also continued to research the significance of the holes drilled into the bottom of the coffin, which can clearly be seen in the overall images at the top of this post, but here is another look:

An overall shot of the coffin bottom, with a detail of 4 of the holes below.

An overall shot of the coffin bottom, with a detail of 4 of the holes.

I’m anxious to start working on the lid of this coffin, which will inevitably provide more information about this object and it’s history. We should be able to bring the lid from storage up to the lab sometime this summer, and I’ll post images of it as soon as it arrives. In the meantime, I have enjoyed researching these types of coffins and finding images of similar ones in other collections (like this one at the Petrie Museum, this one at the Houston Museum of Natural Science, and this “remuddled” coffin at Stanford University) which is helping me gain a better understanding of these coffins and the contexts in which they were made.

Spring cleaning?

It may be a little early for spring cleaning, but no matter what time of the year, there is not much that I find more satisfying than a good, deep clean (on a grimy artifact). Last week, Tom Stanley (the museum’s Public Relations/Social Media Coordinator) posted this image on the museum’s Facebook page, which shows some cleaning in progress on an Egyptian painted wooden coffin here in the Artifact Lab:

coffin board cleaningHe also posted this on our Instagram page.

Here is a before treatment image of the coffin board (which is in 3 separate fragments):

E12617A-C, boards from a painted wooden coffin

E12617A-C, boards from a painted wooden coffin

While Tom was in the lab taking photos, I promised him that I’d put some additional information about this project on the blog. I thought this would be a great opportunity to take another video with our binocular microscope, kind of like the video I captured of the paint consolidation on the shabti figures I worked on awhile ago.

To see the process of how we go from

————————–this————————–to————————–this———————-

corner before after

click on the link below.

Cleaning an Egyptian painted wooden coffin from Molly Gleeson on Vimeo.

In the video, you’ll see (at 7.5X magnification) that I first used a soft-bristled brush to remove loose sediment and dust from the surface, by brushing directly into the nozzle of a variable suction HEPA-filtered vacuum. Then I used a cosmetic sponge to further, gently, lift away grime from the surface. Finally, I used a kneaded rubber eraser to remove the grime that is more embedded in the painted surface.

Okay, so I’ll admit that this may not be as cool as the video of Conservator Tessa de Alarcon laser cleaning a stone table from Ur (this one is hard to top), but it’s pretty gratifying nonetheless.

I’m currently trying to learn more about this object too, by checking into our museum records. I’ll keep you posted.